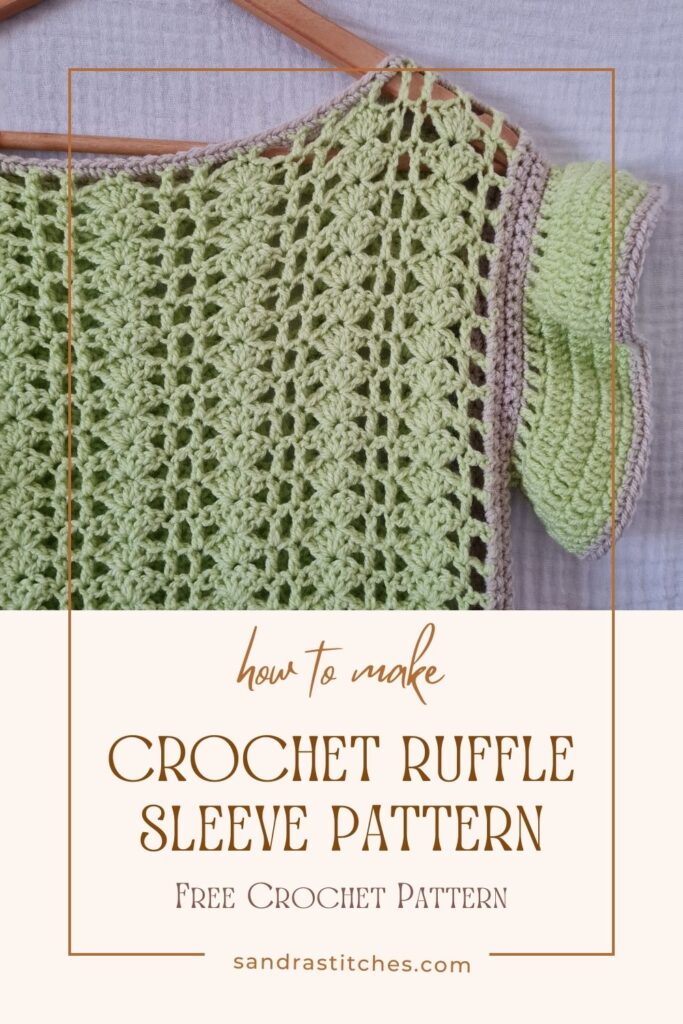
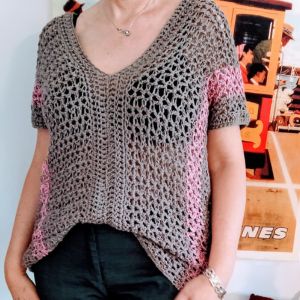
This ruffle sleeve crochet top pattern is your next crochet project for the summer or winter as you choose.
It is a gorgeous addition to your wardrobe and I love those ruffled sleeves so much I am obsessed!
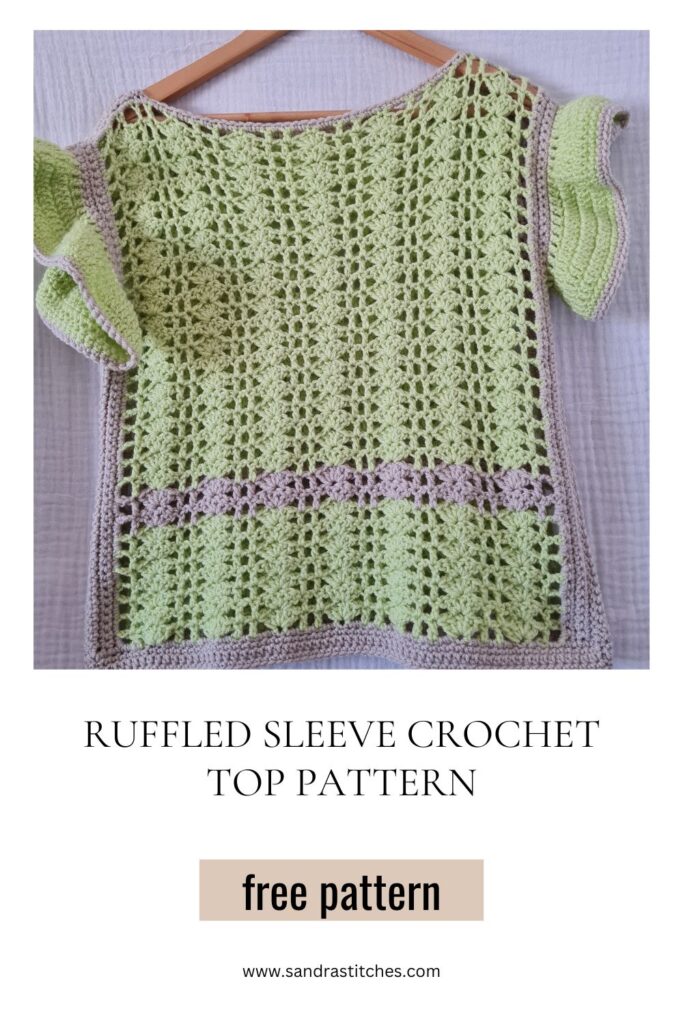
The ruffled crochet top is presented here in only one size Women M/L, but because it is a two rectangle top pattern you can easily customize it to your own size.
And did I mention the crochet ruffle pattern on the sleeves?
Let’s do it!
Are you with me?
There are 2  ways to get this pattern:

Option 1: You can purchase the individual pattern as an easy-to-read, print-friendly PDF  from Ravelry and support my business 🙏

Option 2: Scroll down to get the written instructions for this pattern for free
How to crochet ruffles?
Have you ever admired those adorable blankets or clothes with beautiful, frilly edges? Those lovely details are called crochet ruffles, and they’re a fantastic way to add a touch of freedom and flair to any project you make!
The best part? Creating ruffles is surprisingly simple and opens up a world of creative possibilities. Think ruffled tops, ruffled pillow covers, ruffled home wear…
Learning the Ruffle Magic
Crochet ruffle patterns rely on a key concept: working more stitches into specific spots on your project.
This creates extra loops that puff outwards, forming a lovely ruffle. The number of stitches you crochet in each spot determines the size and fullness of your ruffle. Want a delicate picot edge with tiny ruffles? Use just a few extra stitches! Dreaming of a dramatic, cascading ruffle? Simply crochet more stitches per spot.
** Some of the links in this post may include affiliate links. Purchasing through one of these links pays me a small referral fee at no added cost to you. These small fees add up and help me keep the blog running. View our Disclosure and Privacy Policy for more information.
Two Rectangles Crochet Top
Have you heard about the magic of the two-rectangle crochet top? I absolutely love this clever technique, it gives you and me the freedom to size, accessorize, and construct it in so many different ways.
Here’s the beauty of it: you simply crochet two rectangles – one for the front and one for the back – and then sew them together. It’s a perfect project for beginners or anyone who wants a relaxing crochet experience.
The two-rectangle top is a blank canvas for your creativity. Here are some ways to personalize your creation:
- Size it Up or Down: The beauty of rectangles is their adjustability! Simply change the number of chains you start with to create a top that perfectly fits your body.
- Spice Up the Stitch: Don’t be limited to basic stitches! Experiment with different textures like single crochet, double crochet, or even a fun stitch pattern to add visual interest.
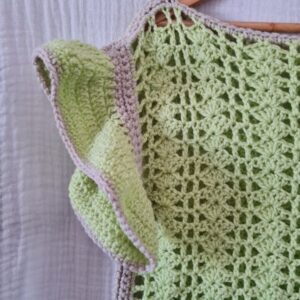
- Sleeve it Your Way: Feeling fancy? Add sleeves! You can crochet separate rectangles for sleeves or incorporate them directly into your front and back panels, in our case I made ruffle sleeves to give the boxed rectangles some movement!
Before you get started, check out my Favorite Crochet Tools (affiliate)
Yarn Winder – a perfect crochet accessories
Neck Stretcher – to keep you without neck and back pain
Gauge Ruler – so you always get the right size
Pattern Designed By: Sandra Stitches This pattern is copyright protected; it is unlawful to distribute this pattern in any form (free, sale or trade).
▶️ Add this pattern to your Ravelry favorites here.
Let’s get to the pattern, shall we? Making Crochet Ruffle Pattern
Difficulty

Materials

Bravo Burco Ipliksan 100%Acrylic, 100 gr, 3 skeins
YarnArt Finland 100% Acrylic, 100 gr ,0.5 skein
Choose any weight #4 yarn for this project it can be for winter using blended wool or summer using cotton yarn
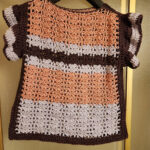
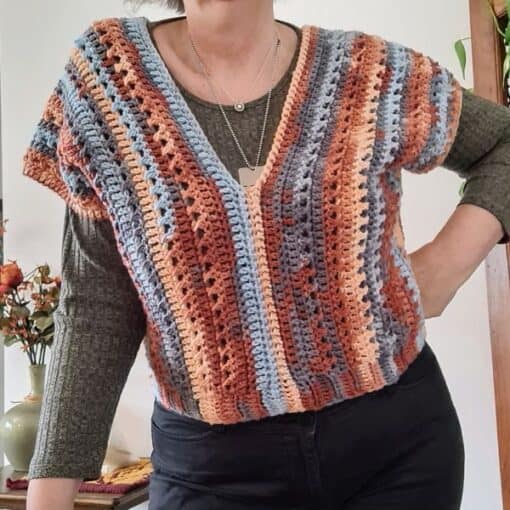
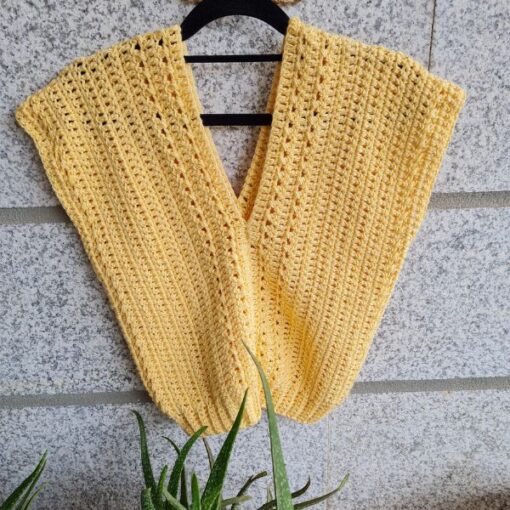
See how this crochet top transforms with different color and yarn choices!

Hook: US Size H-8(5 mm)
- Yarn Needle, Scissors, Measuring Tape
Gauge
- 14 st X 6 rows of pattern repeat for 4” X4”
Sizes
- Can be modified as you wish this sample is
- Size M/L
- length 21” 54cm, width 18” 46cm
Stitch Key
- Ch = Chain
- Sc = Single Crochet
- St = Stitch
- DC = Double Crochet
- Yo = yarn over
- Slst = Slip stitch
Specialty Stitches
Shell st [Skip 2 ch, dc 5 in next st, skip 2 ch, dc1, ch1, skip 1 ch, dc 1 in next st]
Notes
- This Pattern is beginner-friendly, it uses only basic stitches, of course, you have to be familiar with single crochet, double crochet, and slip stitch if you are not please visit any YouTube channel tutorial before starting this Project.
- I used 2 different yarns and colors you can decide which yarns and colors to use,
- I recommend at least 2 colors for more interest in the pattern
- This Top is made of two identical rectangles joined in shoulders and sides, and sleeves are added and worked in rounds
- The Measurements are for these instructions- you can add or reduce chains to obtain your size
- If changing colors make sure to have a changing technique
Instructions
Front and Back Panels( make two identical)
Rectangle ( 7 Shell patterns)
Chain 62 ch (or multiple of 8+6)
R1: Dc1 in 6th ch from hook, Shell st *[skip 2 Ch ,Dc 5 in next st, skip 2 ch, dc1, ch1 ,skip 1 ch ,dc 1 in next st]* repeat from *to* all the way across the last st is a Dc
R2: Ch 4 turn your work (this counts as 1Dc+Ch1) skip 1 ch, Dc1 on top of Dc from prev row, *[skip2, Dc5 in next st from prev row(shell st), skip2 , Dc1 in next st, Ch1, skip1 , Dc1 in next st]* repeat from *to* across to end of the row
R3-28: Repeat R3 ( you can change colors or keep only one color, you can add rows to make it longer
R29: FINAL ROW PAY ATTENTION TO CHANGE HERE: Ch 4 turn your work (this counts as 1Dc+Ch1) skip 1 Ch, Dc1 on top of Dc from prev row, Ch1,skip2, Sc in 3rd Dc, skip2, Ch1,Dc1 in next st, skip1, Dc1 in next st, repeat all the way across
Continue to
Now we will make the detail on the sides of the Top.
Work the same on both sides
Turn your work on the right side up and from the bottom up on one side.
R1: SC across up to the shoulder part making 2 Sc in each Dc side for a total of 60 sc
R2-4: Ch1 turn your work, Sc in 1st st and in every st across to end of work
You Finished Rectangle #1- now make an identical second one
Construction
Measure 12 cm for the shoulder on each side leaving 28cm for the head and sew with a tapestry needle on both shoulders.
Measure 30 cm from the bottom up on both sides and sew with a tapestry needle to make the armhole.
Now to the sleeves
Turn your work right side up.
R1: Insert yarn in the join of the side part(under the arm) Ch3 and Dc1 in every st around, you do not have to count exactly the st but make sure you do not reduce because we want to make a curly sleeve 🙂 Slst to ch3 from the beginning.
Do not turn work! Now we will increase to make the curly part- the ruffles
R2: Ch 3, Dc in same st, Dc2 in every st from prev row, Slst to ch3 from beginning
R3-4: Ch 3, Dc1 in every st all across Slst to ch3
R5: change color Ch1, Sc1 in every st from prev row to give the sleeve a neat ending.
Secure yarn, weave in ends, and cut yarn.
Finishing
SC 4 rows around the bottom of the Top and SC 1 row around the neck. Secure yarn, weave in ends, and cut yarn.
Block your top before wearing it.
Enjoy!
Want to save this post for later? Pin it!
Did you try this Pattern? Share a picture
Tag me on Instagram
@sandrastitchesil
P.S. Do you have any favorite crochet stitch? Share in the comments below and let’s build a supportive community of crocheters who love to learn and grow together!
Want more crochet Top patterns?
DISCLOSURE
AMAZON ASSOCIATES: Sandra Stitches is a participant in the Amazon Services LLC Associates Program, an affiliate advertising program designed to provide a means for sites to earn advertising fees by advertising and linking to Amazon.com.
This post contains links to products that I use and recommend, If you purchase any using my links I get a very small fee at no ad to you! Thank you for supporting my small biz!
