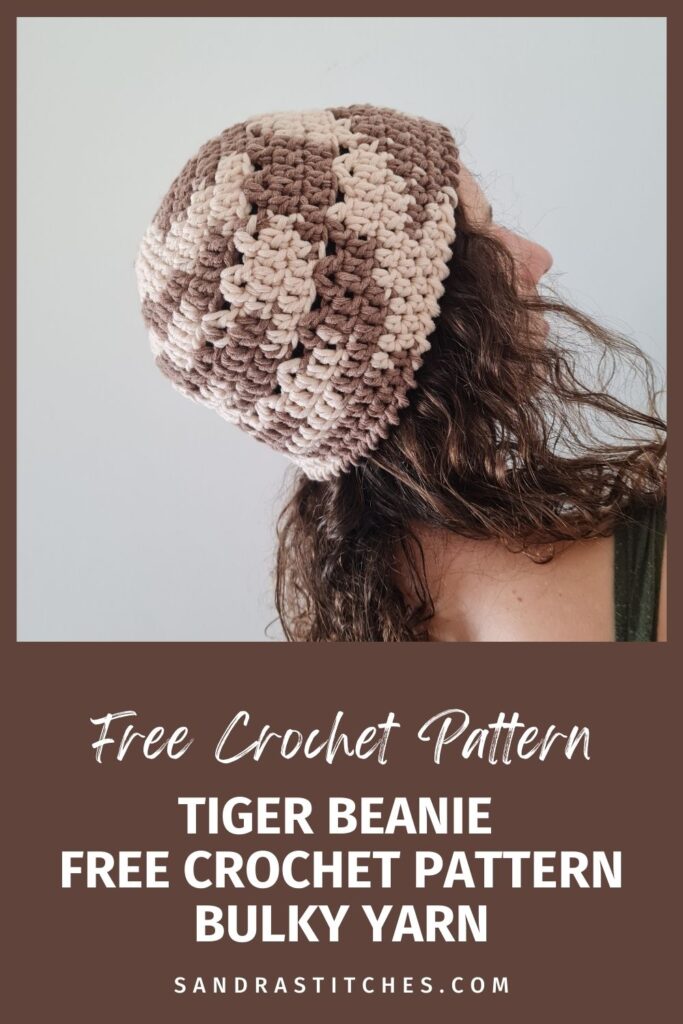
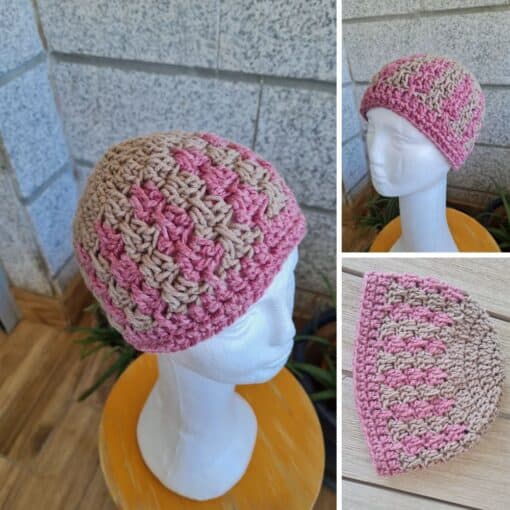
How about a textured crochet beanie hat pattern named Tiger?
Have you ever looked at a skein of yarn and felt instant inspiration? That’s exactly what happened when I stumbled upon this beautiful beige bulky cotton yarn.
Its warm, earthy tone immediately brought to mind the soft fur of a tiger cub, and just like that, the Tiger beanie was born!
Don’t let the name fool you – this hat isn’t orange or striped.
Instead, it’s a cozy, neutral-toned piece that’ll complement just about any outfit in your wardrobe. The name “Tiger” is more about the strength and versatility of this design (and maybe a little bit about how addictive it is to make – you might just find yourself stalking more yarn to make another!).
So, are you ready to create a hat that’s as warm and inviting ? Grab your yarn, and let’s get started on your new favorite beanie!
Are you with me?
This pattern is part of the Bundled Up Blog Hop & Bundle – Scroll down to find all the details ⬇️
There are 2  ways to get this pattern:

Option 1: You can purchase the individual pattern as an easy-to-read, print-friendly PDF  from Ravelry

Option 2: Scroll down to get the written instructions for this pattern for free
What skill level is this pattern suitable for?
Now, I’ve labeled this pattern as intermediate, but don’t let that scare you off if you’re still new to the crochet scene.
I’ve broken down the steps to be beginner-friendly, so even if you’re just starting out, you can work this project with confidence. And for my more seasoned crocheters, you’ll find the Tiger beanie to be a satisfying and quick make.
What crochet stitches are used in this pattern?
Ready for some stitch fun? The Tiger pattern uses the X stitch , The V stitch ( my favorite 🙂 ) and a new stitch I just learned – The Reversed single crochet stitch which is amazing for any finishing touches and edging!
Don’t let the fancy names intimidate you it is all broken down below in the instructions
Can I adjust the size of the beanie easily?
Absolutely! One of the best things about Tiger is how customizable it is.
Want it bigger or smaller it all depends on the number of rounds in the cap , find the standard hat dimensions chart below.
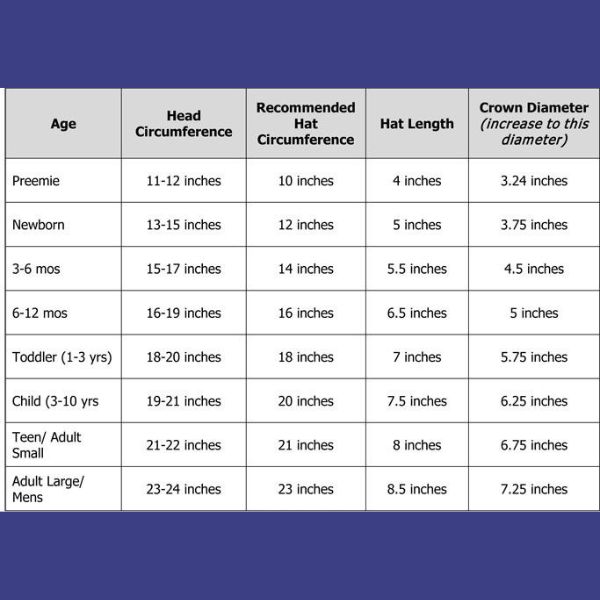
You will find instructions in the free pattern below ⬇️
** Some of the links in this post may include affiliate links. Purchasing one of these links pays me a small referral fee at no added cost to you. These small fees add up and help me keep the blog running. View our Disclosure and Privacy Policy for more information.
Before you get started, check out my Favorite Crochet Tools (affiliate)
Yarn Winder – a perfect crochet accessories
Neck Stretcher – to keep you without neck and back pain
Gauge Ruler – so you always get the right size
Pattern Designed By: Sandra Stitches This pattern is copyright protected; it is unlawful to distribute this pattern in any form (free, sale or trade).
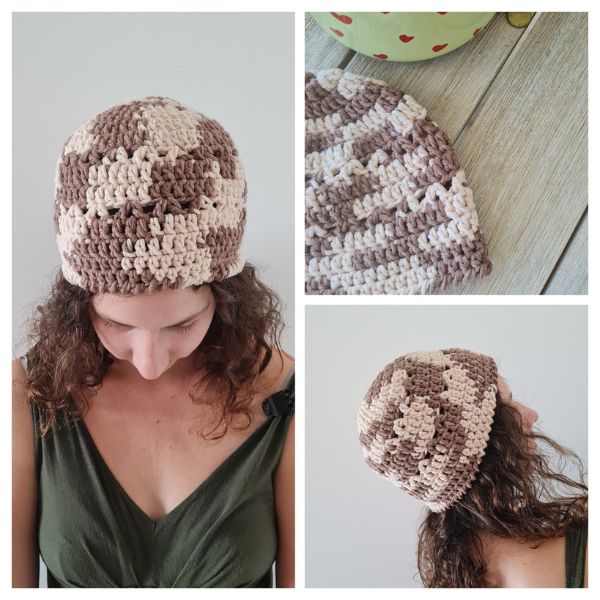
▶️ Add this pattern to your Ravelry favorites here
Let’s get to the pattern, shall we? Making the Tiger Beanie Hat

Materials
Bulky Cotton Yarn, 100g/3.52oz
Or any weight #5 yarn – 1 skein, approx 57 yards
You can work this pattern with any yarn weight and hook size, it will change the measurements.
Or any weight #5 yarn

Hook: US Size (5 mm)
Yarn Needle, Scissors, Measuring Tape
Gauge
- 8 rounds X 12 st ( 4” X 4”)
Sizes
- This sample is women M size ( 7” in height X 20” in circumference)
Stitch Key
- Ch = Chain
- Sc = Single Crochet
- St = Stitch
- Hdc = Half Double Crochet
- Dc = Double Crochet
- Yo = Yarn over
- Slst = Slip stitch
- INC = Increase round
Specialty Stitches
X st = Cross Double Crochet
(Skip next st, dc 1 in next st, dc 1 in skipped st)
VSt = V stitch
(Dc+ch+dc) in the next st, skip 2 st
Rsc = Reversed Single Crochet
Insert the hook, from front to back, in the next stitch to the right, Yarn over (yo) draw a loop, and finish the single crochet
Notes
- This pattern is written in US terminology
- This pattern is worked in rounds
- Ch 3 does count as st at the beginning of each round
- Ch1 at the beginning of the row does not count as a stitch
- I used two-tone color yarn You can choose a solid color or more.
Instructions
The Cap
Chain 4, Slst to 1st ch to form a circle or use the magic circle method
Round 1: Ch 3, Dc 9 more st into the circle, Slst to Ch 3 to close the round (10)
Round 2: INC Ch 3, dc1 in same st, dc 2 in next st and around to end of round, Slst to Ch 3 to close the round (20)
Round 3: INC Ch 3, *dc 2 in next st, dc 1 in next st, repeat from * to end of the round, Slst to Ch 3 to close the round (30)
Round 4: INC Ch 3, dc 1 in next st, *dc 2 in next st, dc 1 in next 2 st, repeat from * to end of the round, Slst to Ch 3 to close the round (40)
Round 5: INC Ch 3, dc 1 in next 2 st, *dc 2 in next st, dc 1 in next 3 st, repeat from * to end of the round, Slst to Ch 3 to close the round (50)
Round 6: INC Ch 3, dc 1 in next 3 st, *dc 2 in next st, dc 1 in next 4 st, repeat from * to end of the round, Slst to Ch 3 to close the round (60)
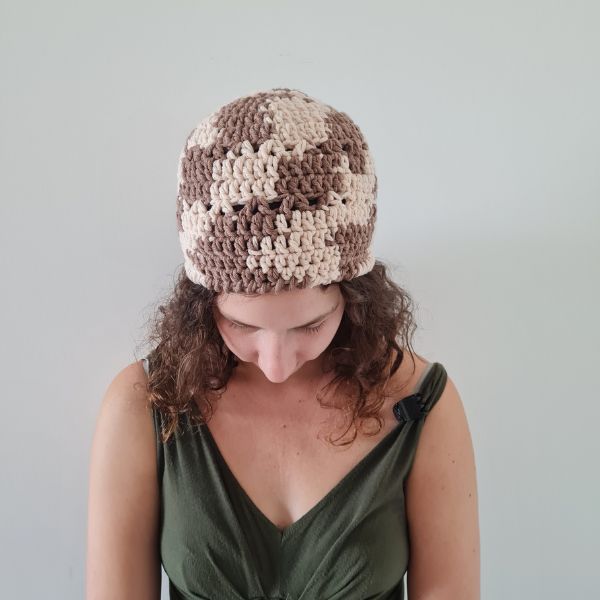
Do you want to save this post for later? Pin it!
The Body
Round 7: (Ch 3+ch1+dc1) in 1st st from hook, *skip 2 st, V st in next, repeat from * to end of the round, Slst to Ch 3 to close the round (20 V st)
Round 8+9: Ch 3, *dc 1 in ch 1 space, dc 1 in next 2 st, repeat from *to end of the round, Slst to Ch 3 to close the round (60 st)
Round 10: (Ch 3+ch1+dc1) in 1st st from hook, *skip 2 st, V st in next, repeat from * to end of the round, Slst to Ch 3 to close the round (20 V st)
Round 11+ 12: Ch 3, *dc 1 in ch 1 space, dc 1 in next 2 st, repeat from *to end of the round, Slst to Ch 3 to close the round (60 st)
Brim/Edge
Round 13: Ch 1, Rsc 1 stitch around to end of the round, Slst to Ch1 to close the round ( 60 st)
The Bundled Up Blog Hop & Bundle 2024
Finishing
Secure the yarn, weave in the ends, and cut the yarn.
Optional: Add a pompom
**This is an original Sandra Regev pattern: Owner / Designer of Sandra Stitches. This pattern may not be redistributed for free, sale or trade, but finished products are permitted to be sold with credit to this shop – enjoy!
Did you try this Pattern? Share a picture
Tag me on Instagram
@sandrastitchesil
Want more Hat patterns?
DISCLOSURE
AMAZON ASSOCIATES: Sandra Stitches is a participant in the Amazon Services LLC Associates Program, an affiliate advertising program designed to provide a means for sites to earn advertising fees by advertising and linking to Amazon.com.
This post contains links to products that I use and recommend, If you purchase any using my links I get a very small fee at no ad to you! Thank you for supporting my small biz!
**This is an original Sandra Regev pattern: Owner /Designer of Sandra Stitches. This pattern may not be redistributed for free, sale, or trade, but finished products can be sold with credit to this shop – enjoy!

