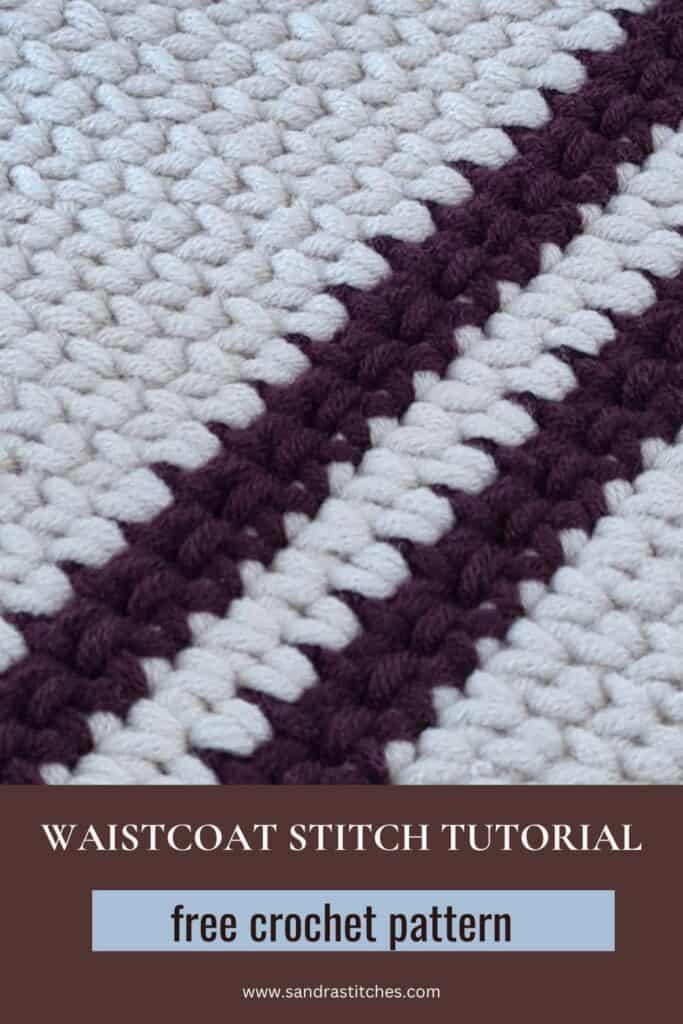
Today we are going to Master the Waistcoat Crochet Stitch
Have you ever wanted to create a crochet project with a super dense, almost woven-like fabric? Then you must check out the waistcoat stitch!
This beauty is surprisingly simple, and Sandra Stitches is here to show you how it’s done.
The waistcoat stitch creates a fabric that’s not only dense but also reversible and incredibly versatile.
Think washcloths, cozy blankets, stylish sweaters, warm scarves – the possibilities are endless!
Get ready to add a new favorite to your crochet arsenal.
Watch the video below for a step-by-step tutorial
It’s a great stitch because:
- It is a one-row repeat using a basic crochet stitch
- You can design blankets, sweaters, and items for the home!
- So much texture in one single stitch!
- It has a knitting feeling and combining colors makes it so beautiful
- It looks the same on both sides!
Be creative!
The form you have selected does not exist.
Do you want to save this post for later?Pin it 👇
** Some of the links in this post may include affiliate links. Making a purchase through one of these links pays me a small referral fee at no added cost to you. These small fees add up and help me keep the blog running. View our Disclosure and Privacy Policy for more information.
Before you get started…
Check out my Favorite items and tools
Rechargeable LED night reading light on Amazon
Bamboo Hooks on Amazon
Colorful Bobby pins as crochet markers on Amazon
What You’ll Need: Gathering Your Supplies
Before we dive into the waistcoat crochet stitch tutorial, let’s gather our supplies. Sandra uses these in her video:
- Worsted weight yarn (also known as “weight 4” yarn)
- 5 mm crochet hook
Keep in mind that you can adjust the yarn weight and hook size depending on the project you’re planning. Want a looser fabric? Try a bigger hook. Aiming for something extra dense? Go for a smaller one.
Understanding the Basics: Foundation Chain
Every great crochet project starts with a solid foundation, right? In this case, it’s a chain and a row of single crochet stitches. The number of chains you’ll need depends on what you’re making. A scarf will need a different number than a blanket.
The first row sets you up for success. Let’s break it down:
- Chain the number of stitches you need for your project.
- Add one extra chain.
- Single crochet in the second chain from the hook.
- Continue single crocheting in each chain across the row.
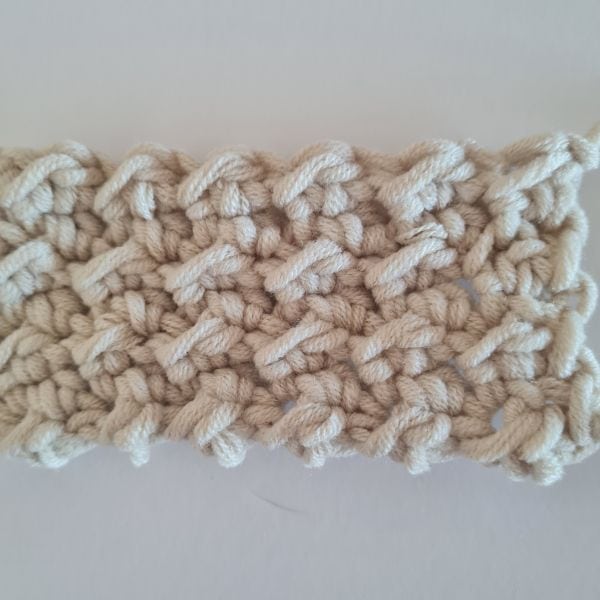
Foundation Row: Single Crochet
This row is super important because it gives you the base you need to work the waistcoat stitch. Think of it as prepping your canvas before painting.
Waistcoat Stitch Crochet Tutorial
Mastering the Waistcoat Stitch: A Detailed Tutorial
Okay, here’s where the magic happens! The waistcoat stitch is actually a variation of the single crochet. The secret is where you place your hook.
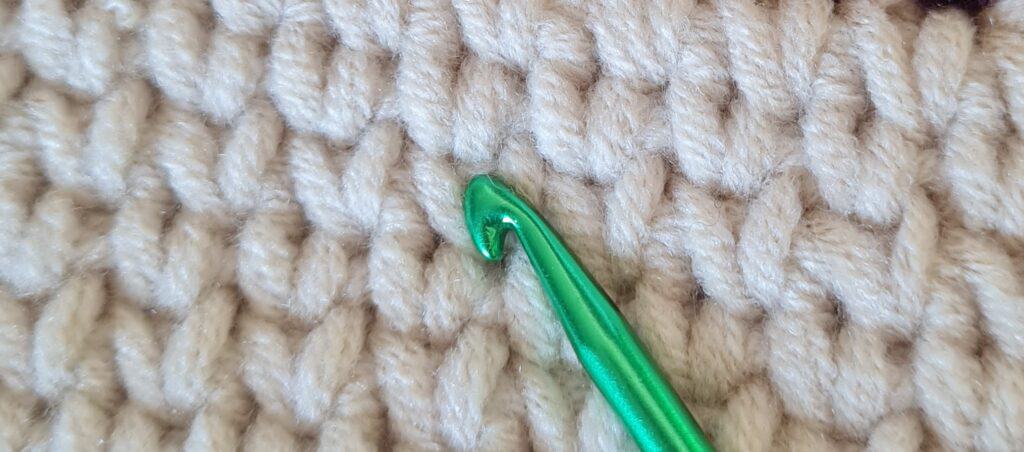
The Key to the Stitch: Hook Placement
This is where the waistcoat stitch gets its unique look. Instead of inserting your hook into the top “V” of the stitch like you normally would, you’re going to do something a little different.
For the waistcoat stitch, insert your hook in the middle of the V, between the “legs” of the stitch.
It might sound tricky, but once you get the hang of it, it’s a breeze!
Step-by-Step Instructions with Visual Cues
Ready to give it a try? Here’s a detailed walkthrough:
- Chain one and turn your work.
- (Optional) Work a regular single crochet in the first stitch (Sandra likes to do this for a clean edge).
- Insert your hook into the middle of the V (between the legs) of the next stitch from the previous row.
- Yarn over and pull up a loop.
- Yarn over and pull through both loops on the hook (completing the single crochet).
- Repeat steps 3-5 across the row.
- (Optional) Work a regular single crochet in the last stitch (again, Sandra’s tip for a tidy edge).
One-Row Repeat
Guess what? That’s all there is to it! You just repeat that one row over and over.
Pay attention to your tension! You might need to adjust your tension or hook size to get the fabric you want.
Do you want to save this post for later? Pin it!
Tips and Tricks for Perfecting the Waistcoat Stitch
Want to make your waistcoat stitch even better? Here are a few tips and tricks:
- Remember Sandra’s tip of using a regular single crochet in the first and last stitch of each row. It gives your edges a nice, clean finish.
- Don’t worry if it feels a little awkward at first. “Sometimes it’s a little bit hard, but as you go on with it, you’ll get your hand on it.”
- Make sure you don’t miss any stitches! It’s easy to do, especially when you’re just starting out.
- The waistcoat stitch creates a dense fabric, which means it doesn’t have a lot of drape. If you want a looser fabric, try using a slightly larger hook.
Practice Makes Perfect! The more you practice, the easier it will become to find the “V” of the stitch and insert your hook in the right place.
Want more stitch tutorials:
Click Here to share your finished project in our community!
A new stitch steps
- When learning a new stitch, try several yarn weights and hook sizes to understand how the stitch works and looks.
- Use light yarn colors to get the right formation of the stitch.
- Make several swatches before starting a new project
Stay Calm and Crochet!😎
Sandra
Interested in a professional Paperback Crochet Planner?
Want to know more about me? This is my story
DISCLOSURE
AMAZON ASSOCIATES: Sandra Stitches is a participant in the Amazon Services LLC Associates Program, an affiliate advertising program designed to provide a means for sites to earn advertising fees by advertising and linking to Amazon.com.
This post contains links to products that I use and recommend, If you purchase any using my links I get a very small fee at no ad to you! Thank you for supporting my small biz!


