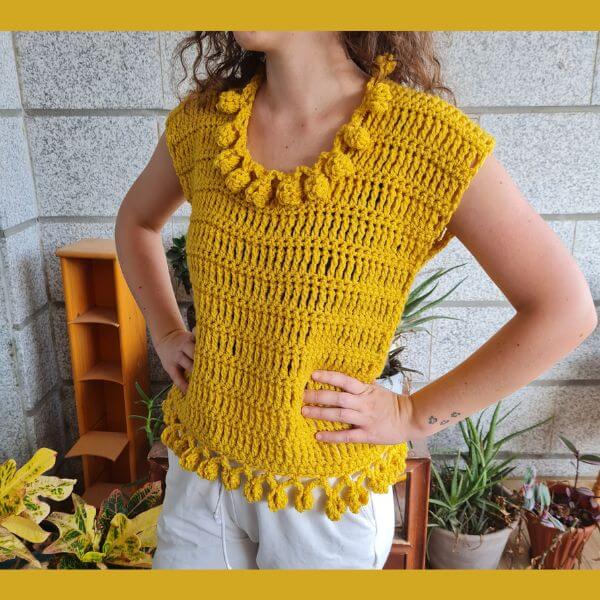
Quick answer: This is a v-stitch crochet cropped cardigan made in four panels, a back, two fronts, and sleeves, using one repeating stitch throughout. It’s beginner friendly and easy to resize to any bust measurement using simple chain multiples of 3.
The V Stitch Crochet Cardigan is a quick and easy pattern to follow, uses one stitch all across, and makes the perfect weekend project.
Worked in panels, this crochet cardigan uses only basic stitches, chain, double, single, and slip stitch.
Step by step, I’ll walk you through every row of this pattern with easy to follow instructions, simple stitch and row repeats, and the exact stitches you should create every row.
Learn to crochet the V stitch, my absolute favorite, and you can use it for future projects too.
Cardigans can use one solid color or combine different ones. They can be worked in blended wool, acrylic yarn, or cotton, depending on the season.
Find the free pattern below or purchase the ad-free PDF version of this pattern HERE. The PDF is designed for printing, and this way, you can support me! Thank you
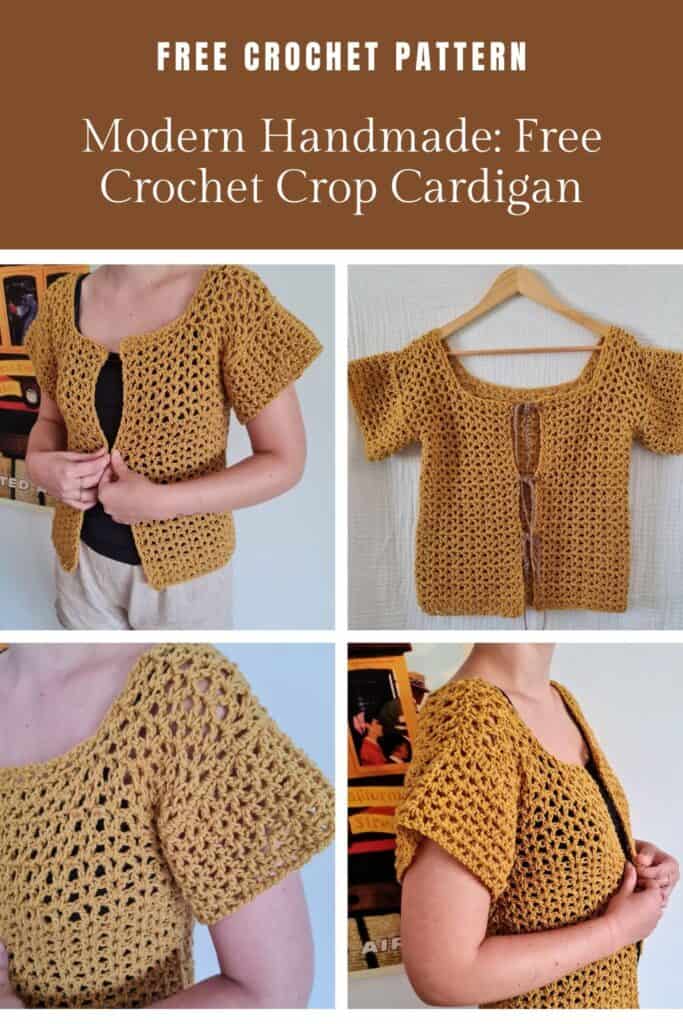
Do you want to save this post for later? Go ahead and PIN IT!
V Stitch Cardigan Resources
How to join the crochet cardigan panels
Once you’ve finished crocheting the back panel and the two front panels, it’s time to join them, and there are a few ways to do that, depending on the kind of look and structure you want. Here are three common join methods to choose from:
- Slip Stitch Join — This method uses your hook to slip stitch through the edges of your panels. It creates a flat seam that’s pretty subtle and works well if you want the join to blend in. It’s fast and easy, but it doesn’t stretch much, so keep that in mind if you want some give in your seams.
- Single Crochet Join (my favorite!) — This one adds a bit more structure and makes a visible ridge along the seam, which can actually look really nice as a design feature. I love using the single crochet join because it’s sturdy, easy to line up, and gives the cardigan a clean, polished look with just a little extra texture.
- Tapestry Needle (Whip Stitch or Mattress Stitch) — If you prefer a smoother, nearly invisible seam, this is the way to go. You use a tapestry needle and yarn to sew the panels together, whip stitch is quick and slightly more noticeable, while mattress stitch takes a little longer but gives a seamless finish that looks great from the outside.
There’s no wrong choice here, just pick the method that matches the look and feel you want for your finished cardigan.
** Some of the links in this post may include affiliate links. Purchasing from one of these links pays me a small referral fee at no added cost to you. These small fees add up and help me keep the blog running. View our Disclosure and Privacy Policy for more information.
Before you get started, check out my newest favorite finds!
Yarn Winder – a perfect crochet accessory
Neck Stretcher – to keep you without neck and back pain
Gauge Ruler – so you always get the right size
How to Size the V Stitch Crochet Cardigan
This pattern is written for a women’s size Small, with a finished bust of about 34″, and I designed it to be cropped with short sleeves, perfect for layering or wearing on warmer days.
But don’t worry if that’s not your ideal fit, you can totally adjust it. Just add or subtract multiples of 3 to the starting chain to make it wider. If you’d like it longer, just work more rows on the body, and for longer sleeves, keep adding extra rounds until they hit the length you like. It’s a super flexible pattern, so feel free to make it your own.
Sandra’s tip: If your seam feels tight or puckers once joined, check that your panel edges have the same stitch count before sewing. A mismatch of even a few stitches is usually what causes pulling, not the join method itself.
Sizing Math
To get the starting chain for other sizes, we calculate how many stitches are needed to match the standard bust measurement, then round to the nearest multiple of 3, since this stitch pattern uses multiples of 3.
- Small (34″ bust): Back panel 63 chains, each front panel approximately 30 chains
- Medium (38″ bust): Back panel 72 chains, each front panel 36 chains
- Large (42″ bust): Back panel 78 chains, each front panel 39 chains
- Extra Large (46″ bust): Back panel 84 chains, each front panel 42 chains
To customize further, increase each panel’s starting chain by multiples of 3, keeping the front panels around half the width of the back panel.
You can also make the cardigan longer by adding more rows, and lengthen the sleeves by adding rounds.
You might want to adjust slightly if you prefer a looser or tighter fit, these are close to standard bust ease for a cropped cardigan.
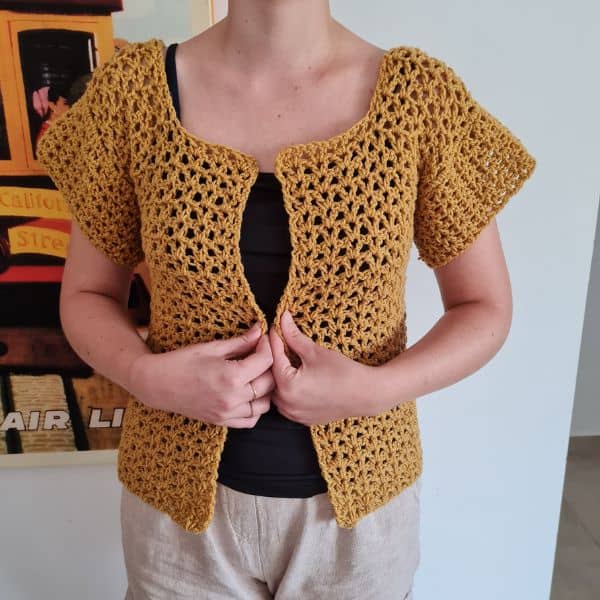
Finished V Stitch Crochet Cardigan Projects
Need some inspiration before you get started? Check out other finished V Stitch Cardigan projects on Ravelry.
More Crochet Top Patterns
If you love the look of this easy V Stitch Crochet Cardigan pattern, here are a few more crochet top patterns you can view on our website:
More Crochet Patterns using the V Stitch
Let’s get to the pattern, shall we? Making the V Stitch Crochet Cardigan
Difficulty
Easy
Materials
This is the yarn I had at hand. Do not forget I made a sample for you to learn, so be creative and choose the yarn you love.
Feel it before starting your project.
I know there are a million different yarn choices out there, but that also depends on where you live, so just be creative!
- 100% Acrylic or Cotton yarn, weight #4 in 1 color, a total of 250 gr, 480 yards for Small size
- Hook: US Size H-8 (5 mm)
- Yarn Needle, Scissors, Measuring Tape
Gauge
- 13 st X 7 rows ( 4” X 4”)
Sizes
This sample is: 20” long X 17” wide, (34” circumference) Women’s Small Size
Stitch Key
You can see these stitches in action as you watch these video tutorials (just click on the underlined text):
- Ch = Chain
- St = Stitch
- Sc = Single Crochet
- Dc = Double Crochet
- Slst = Slip stitch
Specialty Stitches
V stitch = (Dc1+ch1+dc1) in indicated space
Watch my review of the Hooks & Needles Subscription Box- Use coupon code: sandra20 for 20% off your 1st purchase
Notes
- The pattern is written in US terminology
- The pattern is worked in rows and rounds
- Ch2 does count as st at the beginning of each row
- Ch 1 does not count as a st at the beginning of the round
- You can work this pattern with one color or multiple, as you wish- I used 1 color
- The stitch pattern calls for multiples of 3
- This pattern is worked in 4 parts: the back panel, two front panels, and the sleeves
- ( joining instructions below)
- If changing colors, make sure to have a changing technique and weave your ends in.
V Stitch Cardigan Instructions
Instructions
Ch 63 ( for Small size)
Back Panel
Row 1: Dc 1 in 4th ch from hook, ch 1+dc 1 in the same ch, skip 2 ch, *V-st(dc1+ch1+dc1) in next ch, skip 2 ch, repeat from * to last 2 ch, skip 1 ch and dc 1 in last, turn work
Row 2: Ch 2, *V-st in next ch1 space, repeat to last ch 1 space, dc 1 in last st
Rows 3-25: repeat row 2
If you want a longer cardigan, continue repeating row 2.
Now we will work on the neckline and shoulders
Rows 26-30: Ch 2, *V-st in next ch1 space, repeat from * to complete 5 V-stitches, d 1 in next dc. secure yarn and cut.
Work the same rows 26-30 on the opposite side for the second shoulder
Let’s Continue
Front panel – make 2
Ch 33
Row 1: Dc 1 in 4th ch from hook, ch 1+dc 1 in the same ch, skip 2 ch, *V-st(dc1+ch1+dc1) in next ch, skip 2 ch, repeat from * to last 2 ch, skip 1 ch and dc 1 in last, turn work
Row 2: Ch 2, *V-st in next ch1 space, repeat to last ch 1 space, dc 1 in last st
Rows 3-25: repeat row 2
Now we will work on the neckline and shoulders
Rows 26-30: Ch 2, *V-st in next ch1 space, repeat from * to complete 5 V-stitches, secure yarn and cut.
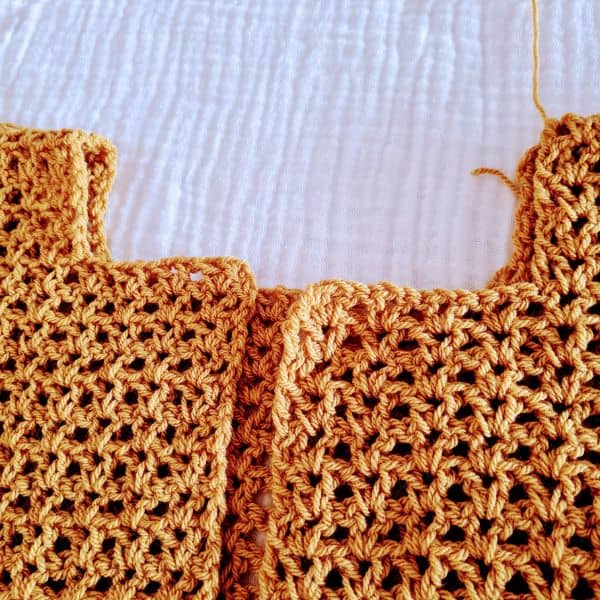
Construction
Align the back panel with the two front panels, right side inside. Sew the two shoulders using the tapestry needle.
Measure 20 cm 8 “ from the top to the side to make the sleeve hole. Mark with stitch markers on both sides. Sew both sides
Sleeves ( work on both sides)
Turn your work right side up, Now we will work on rounds.
Round 1: Introduce yarn in the join of the side part (under the arm), ch1 and sc1 in every st around, you do not have to count exactly the st, but make sure you do not reduce because we want to make a nice sleeve, make sure you have an odd # of stitches 🙂 slst to 1st st
Do not turn your work!
Round 2: Ch3 (counts as dc+ch1), dc 1 in same st, *skip 2 st, V-st in next, repeat around, to end, Slst to 2nd ch from beginning.
Round 3-10: Slst to ch1 space, V-st in 1st ch 1 space and around, Slst to 2nd ch from beginning. If you want to make long sleeves, continue to the desired length
Round 11: Ch 1, sc1 in next st, sc 1 in next and around, Slst to 1st st.
Work the second sleeve exactly the same- Make sure you count how many st you made on the first sleeve so you make an identical sleeve.

Finishing
Cut your yarn and weave in the ends.
Options:
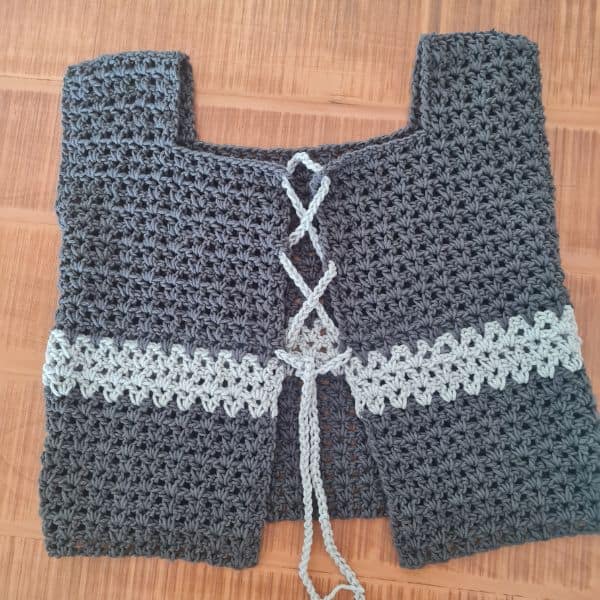
👉Work a round of single crochet st on the neckline, front panels, and bottom.
👉Chain a long chain in a different color, weave it between the two front panels to close.
👉Use buttons or leave it open
Enjoy!
**This is an original Sandra Regev pattern: Owner /Designer of Sandra Stitches. This pattern may not be redistributed for free, sale, or trade, but finished products can be sold with credit to this shop – enjoy!
Do you want to save this post for later? Go ahead and PIN IT!
FAQ
Any of the three work well, slip stitch is fastest but doesn’t stretch much, single crochet gives a visible textured ridge (my favorite), and a tapestry needle whip or mattress stitch gives the most invisible finish. Pick based on how much seam texture you want to see
This is almost always a stitch count mismatch between the two panel edges, not the join method itself. Double check both edges have the same number of stitches before you start sewing.
Yes, add or subtract multiples of 3 to your starting chain to adjust the width, following the sizing chart above for Small through Extra Large
Yes, just keep repeating Round 3 through 10 until the sleeve reaches the length you want
A quiet place to keep crocheting
If projects like this one are your kind of calm, you might love the V-Stitch Club.
It is my little corner of the internet for women who crochet for the joy and the quiet of it, with new patterns, gentle company, and the steady rhythm of always having something beautiful on the hook.
Be Part of The Tribe!
Come share your finished Ridgeline Beanie in my free Facebook group. Join Crochet & Stories with Sandra Stitches.
Questions?
Ask and share in our
FREE Facebook Group
DISCLOSURE
AMAZON ASSOCIATES: Sandra Stitches is a participant in the Amazon Services LLC Associates Program, an affiliate advertising program designed to provide a means for sites to earn advertising fees by advertising and linking to Amazon.com.
This post contains links to products that I use and recommend, If you purchase any using my links I get a very small fee at no ad to you! Thank you for supporting my small biz!

Hi my crochet friend!
Crochet has followed me from Argentina to Israel and through every crossroads since. Now I design calm, achievable crochet, made to feel possible.
Come find free patterns, tutorials, and the V-Stitch Club right here on the blog.