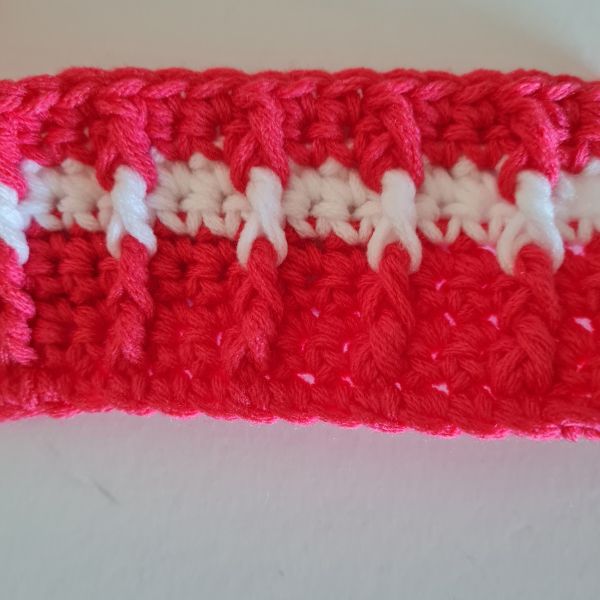
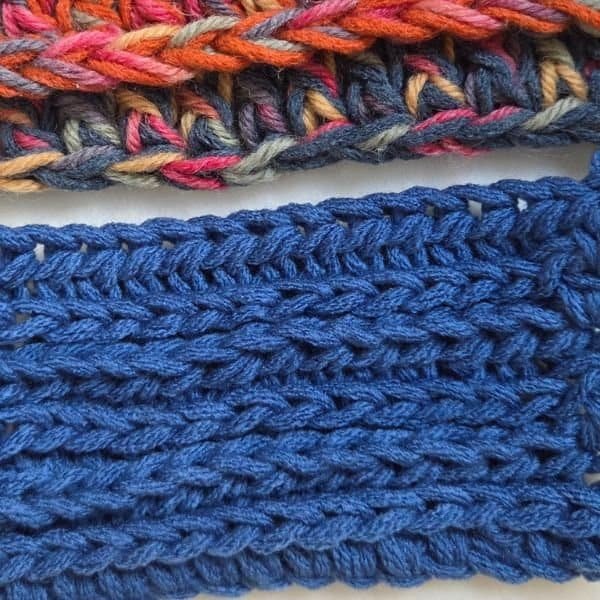
I live in a country where we do have camels in the desert, and I will be honest with you: this stitch does not look like a camel to me. Still, I respect whoever gave it the name, because it is one of the most useful stitches I know for finishing a project.
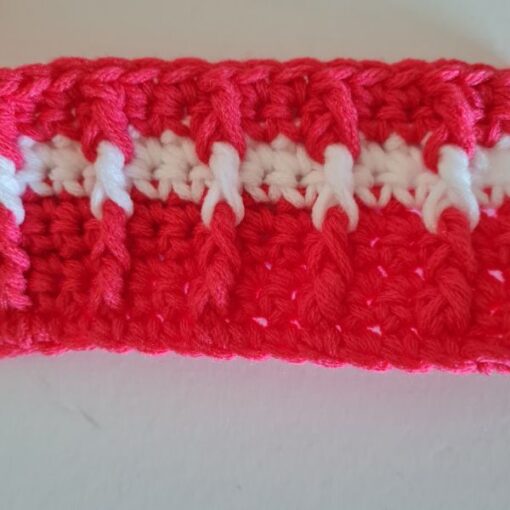
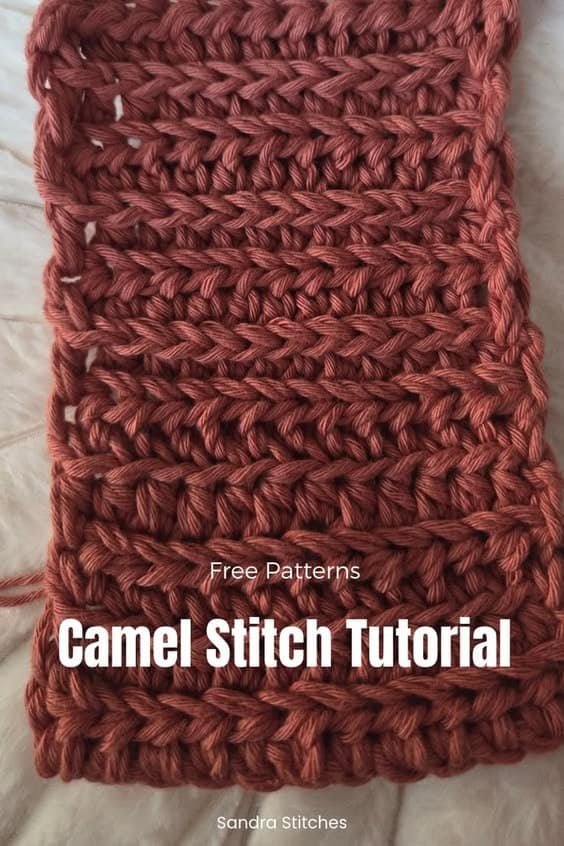
The camel stitch is a half double crochet with one twist. You work it into the third loop, and that pushes the V on top of every stitch to the front of your work. As a result, it looks knitted, but it is all crochet. It makes a clean, structured border, and it works just as well on blankets and home decor.
Below you will find the video and the written steps. I used a 5 mm hook and scrap yarn, but you can use any yarn you like.
Quick Answer: The camel stitch is a half double crochet worked into the third loop of each stitch instead of the top loops. You repeat two rows, so the V on top of every stitch is pushed to the front. On one row, you work the third loop on the side facing you. Then, on the next row, you work the third loop on the far side. Because it needs no stitch multiples, it fits any width
Jump to: Camel Stitch Tutorial
Watch the Camel Stitch Tutorial
Prefer to watch first? The video shows every row, including the trick for grabbing the loop. Also, the written steps are right below.
Do you want to save this post for later? Pin it 👇
Where the Camel Stitch Shines
It is best for borders, blankets and home decor. In fact, it suits anywhere you want a clean edge and a clean ending to your project.
People often say it gives the feeling of knit, and they are right. For example, look at the swatch and you will see columns that look knitted, but it is crochet, worked with a regular hook.
In the video, I show a home decor project of mine with just one row of camel stitch around it. It works like a frame for the piece.
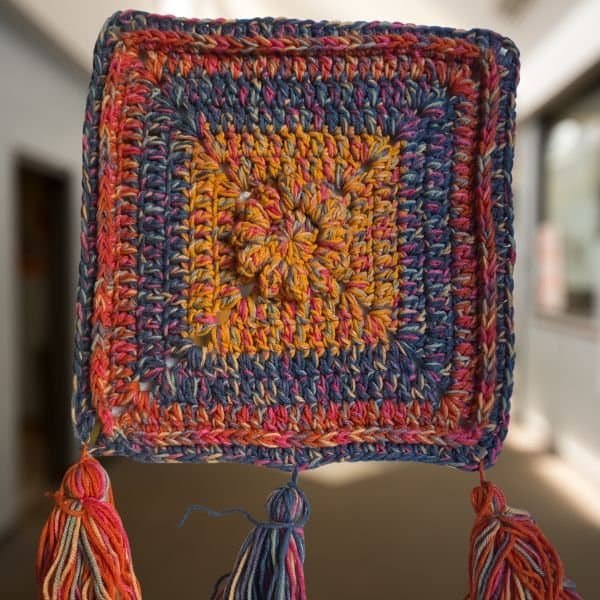
Also, there are no multiples to worry about. So chain as many stitches as your project needs and you are ready to go.
If you love a knit look in crochet, you may also like my Waistcoat Stitch tutorial.
What You Need
- Hook: 5 mm
- Yarn: Any yarn you like. I used scrap yarn, but the stitch suits any yarn, so choose what your project needs.
- Scissors
Abbreviations (US terms): ch = chain, hdc = half double crochet.
** Some of the links in this post may include affiliate links. Making a purchase through one of these links pays me a small referral fee at no added cost to you. These small fees add up and help me keep the blog running. View our Disclosure and Privacy Policy for more information.
Tools for this stitch:
Camel Stitch Tutorial
Before you start, keep these notes in mind:
- Work every row in half double crochet.
- The ch 1 at the start of each row does not count as a stitch.
- The first and last stitch of every row is a regular half double crochet, worked in both top loops.
- If you work around and around on a project, simply continue the pattern and skip the regular first and last stitch.
Refresher: Half Double Crochet
First, yarn over, insert your hook and pull up a loop. Now you have three loops on your hook. Then yarn over and pull through all three loops.
Find the Third Loop
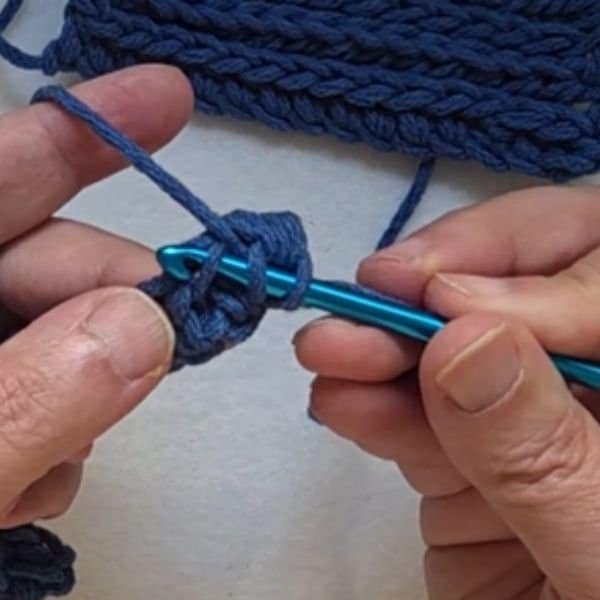
Look at the top of any half double crochet and you will see a V. The camel stitch asks you to bring that V to the front of your work. To do that, you use the third loop, which is the leg of the V on the side of the stitch facing you.
So yarn over, insert your hook in that leg, pull up a loop and finish your half double crochet as usual. As a result, the V on top of the stitch is pushed to the front of your work.
Foundation Row
First, start with a straight edge. If your project has rounds, triangles or shells along the edge, work a row of half double crochet or single crochet first, so your border starts straight.
Then ch any number of stitches, because there are no multiples.
Row 1: Hdc in the 2nd ch from the hook and in each ch across. Ch 1, turn.
Rows 2 and 3: The Two Row Repeat
Row 2: Hdc in the first stitch (a regular hdc, in both top loops). Next, hdc in the third loop of each stitch across, the third loop on the side facing you, until the last stitch. Finally, hdc in the last stitch (a regular hdc). Ch 1, turn.
Now you will see the V from the top of each stitch pushed to the front of your work.
Row 3: First, hdc in the first stitch (a regular hdc). Now the front of your work faces you, so you need to work in a different place. If you used the same third loop again, you would push the V to the other side, and we do not want that. Instead, turn the top of your work a little toward you, find the V on top of the stitch, and work in the third loop on the other side, opposite to you. Next, hdc in each stitch across this way. Finally, hdc in the last stitch (a regular hdc). Ch 1, turn.
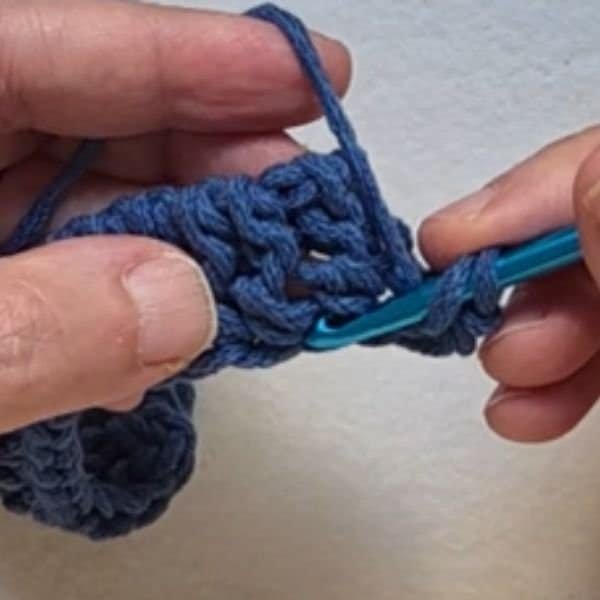
This is the part that feels a little tricky. However, the tip of your hook makes it easier: grab the leg, then yarn over and finish your half double crochet. So go stitch by stitch, and do not skip any.
Repeat for Your Border
Next, repeat Rows 2 and 3 for as many rows as you need. Row 4 is worked like Row 2, in the third loop on the side facing you, which is much easier to grab. Then Row 5 is worked like Row 3, in the third loop on the opposite side.
Because the camel stitch is usually a border, you often do not need many rows. It depends on how wide you want your border to be.
Also, each row works into a different place, so give it two or three rows before judging the pattern. After that, the pattern comes along.
Sandra’s Tip: Keep pushing the V to the same direction on every row, and do not skip any stitch. The only tricky part is finding the loop on the front rows. However, if you grab it with the tip of your hook, it becomes much easier, and you will get used to it.
Using the Camel Stitch as a Border
For a blanket or any other project, work your border around the edge. First, start with a straight row of half double crochet or single crochet. Then go around and around, continuing the pattern. It suits any kind of project.
Looking for more ways to finish an edge? See my Picot Border tutorial and my Braided Border tutorial.
Your Turn
I hope you enjoyed this tutorial and learned a new stitch. If you use it, please take a photo and share it in the comments under the video, so we can all see your creations. Also, new videos come out every Wednesday and Friday on my YouTube channel.
Want more stitch tutorials:
A new stitch step
- When learning a new stitch, try several yarn weights and hook sizes to understand how the stitch works and looks.
- Use light yarn colors to get the stitch to form the right shape.
- Make several swatches before starting a new project
Stay Calm and Crochet!😎
Sandra
A quiet place to keep crocheting
If projects like this one are your kind of calm, you might love the V-Stitch Club.
It is my little corner of the internet for women who crochet for the joy and the quiet of it, with new patterns, gentle company, and the steady rhythm of always having something beautiful on the hook.
DISCLOSURE
AMAZON ASSOCIATES: Sandra Stitches is a participant in the Amazon Services LLC Associates Program, an affiliate advertising program designed to provide a means for sites to earn advertising fees by advertising and linking to Amazon.com.
This post contains links to products that I use and recommend, If you purchase any using my links I get a very small fee at no ad to you! Thank you for supporting my small biz!

Hi my crochet friend!
Crochet has followed me from Argentina to Israel and through every crossroads since. Now I design calm, achievable crochet, made to feel possible.
Come find free patterns, tutorials, and the V-Stitch Club right here on the blog.