Hello, my crochet friend!
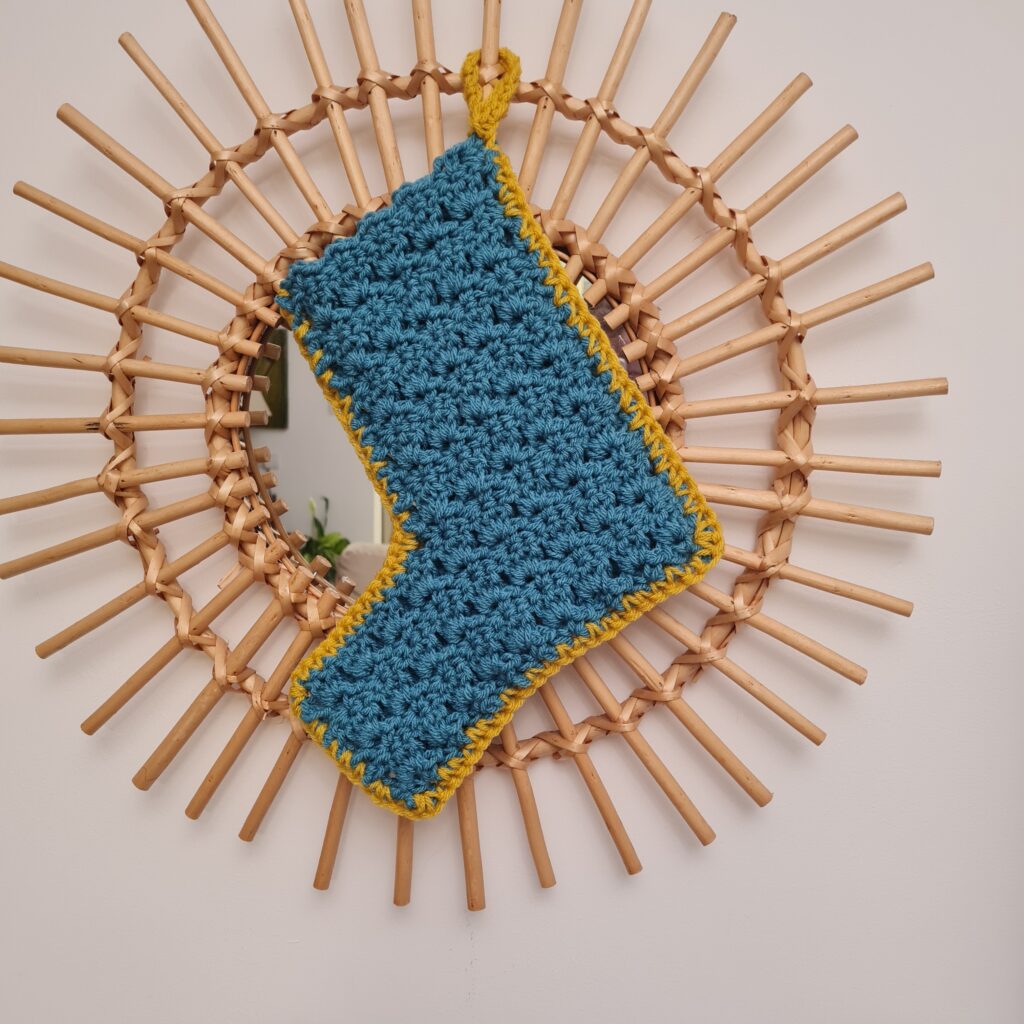
Let’s start our Christmas crocheting early with this simple crochet stocking pattern!
It is never too early right?
Well this simple crochet stocking pattern is worked in less then 3 hours at the most!
So, you can make 1 or 2 or 3 or maybe 4 the same day!
Find the free pattern below or purchase the ad-free PDF version of this pattern on Ravelry. The PDF is designed for printing and this way you can support me!
It’s a great pattern because:
Uses only 100 yards of yarn
Takes less then 3 hours to make
The stitch used is so textured
Great for those one skeins you never know how to use
Pin it for later 👇

** Some of the links in this post may include affiliate links. Making a purchase through one of these links pays me a small referral fee at no added cost to you. These small fees add up and help me keep the blog running. View our Disclosure and Privacy Policy for more information.
Before you get started…
Check out my Favorite Crochet books
Let’s get to the pattern, shall we?
SKILL LEVEL
Beginner
SIZES/FINISHED MEASUREMENTS
10” X 10”
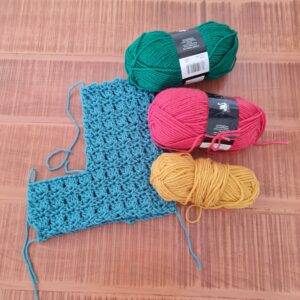
YARN
Deluxe Cygnet Chunky, 100g, 100% Superior Acrylic, 156m I used 63 grams
HOOK & OTHER MATERIALS
- US Size J 10 (6 mm) crochet hook
- Scissors
- Yarn Needle
- Measuring Tape
STITCH KEY
Ch = Chain,
Dc = Double Crochet
SlSt = Slip stitch
Sc = Single Crochet
Hdc = Half Double Crochet
Shell = 3 Double Crochet in same st
NOTES
- The pattern is worked in rows
- The pattern has two identical parts joined
- Beginning Ch3 does count as 1st st
- Beginning Ch2 does count as 1st st
Pattern Designed By: Sandra Stitches This pattern is copyright protected; it is unlawful to distribute this pattern in any form (free, sale or trade).
And the instructions for this simple crochet stocking pattern are:
Part 1
Ch 27+2 (multiples of 3+2)
Row 1:(Sc1+ Ch2 + Sc1) in 3rd st from hook,*[ skip 2 Ch, (Sc1+ Ch2 + Sc1)in next st ]* repeat from *to* across, end with Hdc1 in last st
Row 2:Ch 3, * [3 dc in next ch 2 space (shell)]*, repeat from * across, ending with 1 Dc at the top of turning ch, turn.(9 shells)
Row 3: Ch 2, * [(Sc1+ Ch2 + Sc1) in 2nd Dc of next shell, repeat from * across, ending with 1 Hdc at top of turning chain, turn.
Row 4+5+6: repeat rows 2+3+2
Now we make the body
Row 7: Ch 2, * [(Sc1+ Ch2 + Sc1) in 2nd Dc of next shell, repeat from * across, 5 times ending with 1 Hdc at top of next Dc
Row 8: Ch 3, * [3 Dc in next Ch 2 space (shell)]*, repeat from * 5 times ending with 1 Dc at the top of last Hdc, turn.(5 shells)
Row 9: Ch 2, * [(Sc1+ Ch2 + Sc1) in 2nd Dc of next shell, repeat from * across, ending with 1 Hdc at top of turning chain, turn. (5 )
Rows 10-18: Repeat rows 8+9
Part 2
Ch 27+2 (multiples of 3+2)
Row 1:(Sc1+ Ch2 + Sc1) in 3rd st from hook,*[ skip 2 Ch, (Sc1+ Ch2 + Sc1)in next st ]* repeat from *to* across, end with Hdc1 in last st
Row 2:Ch 3, * [3 dc in next ch 2 space (shell)]*, repeat from * across, ending with 1 Dc at the top of turning ch, turn.(9 shells)
Row 3: Ch 2, * [(Sc1+ Ch2 + Sc1) in 2nd Dc of next shell, repeat from * across, ending with 1 Hdc at top of turning chain, turn.
Row 4+5+6: repeat rows 2+3+2 , secure yarn, and cut.
Now we need to start the body on the opposite side so it matches on the right side.
Row 7: Introduce yarn on the opposite end, and Ch 2, * [(Sc1+ Ch2 + Sc1) in 2nd Dc of next shell, repeat from * across, 5 times ending with 1 Hdc at top of next Dc
Row 8: Ch 3, * [3 Dc in next Ch 2 space (shell)]*, repeat from * 5 times ending with 1 Dc at the top of last Hdc, turn.(5 shells)
Row 9: Ch 2, * [(Sc1+ Ch2 + Sc1) in 2nd Dc of next shell, repeat from * across, ending with 1 Hdc at top of turning chain, turn. (5 )
Rows 10-18: Repeat rows 8+9
Construction
Place both parts of the stocking wrong side facing in, so you have the right side facing out on both sides.
With the accent yarn of your choice, join 3 parts with Sc1 around, leaving the 4th part open, make sure to work 2 Sc’s on each corner.
On the upper-end Ch12 , Sc1 on each Ch back and Slst to the same st to form the strap
Finishing
Secure your ends and cut yarn.
Interested in a professional Paperback Crochet Planner?
Check out my Planner on Amazon
Free ways to share and support me
- Favorite this pattern on Ravelry
- PIN on Pinterest
- Share in your story on Instagram
- Share on FacebookThank you so much! 🙂
.
Look at all the colors you can use for the joining border of the Simple Christmas Crochet Stocking Pattern 🔽
Get your Ad-Free version on Ravelry
Click Here to share your finished project in our community!
Do not forget to add some goodies inside your stocking ☺️
Did you try this pattern?
Share a picture
Tag me on Instagram
@sandrastitchesil
Questions?
Ask and share in our
FREE Facebook Group
Want to know more about me? This is my story
DISCLOSURE
AMAZON ASSOCIATES: Sandra Stitches is a participant in the Amazon Services LLC Associates Program, an affiliate advertising program designed to provide a means for sites to earn advertising fees by advertising and linking to Amazon.com.
This post contains links to products that I use and recommend, If you purchase any using my links I get a very small fee at no ad to you! Thank you for supporting my small biz!
You may also like:

Granny Rectangle Table Runner Pattern


One thought on “Basic Crochet Christmas Stocking Pattern”