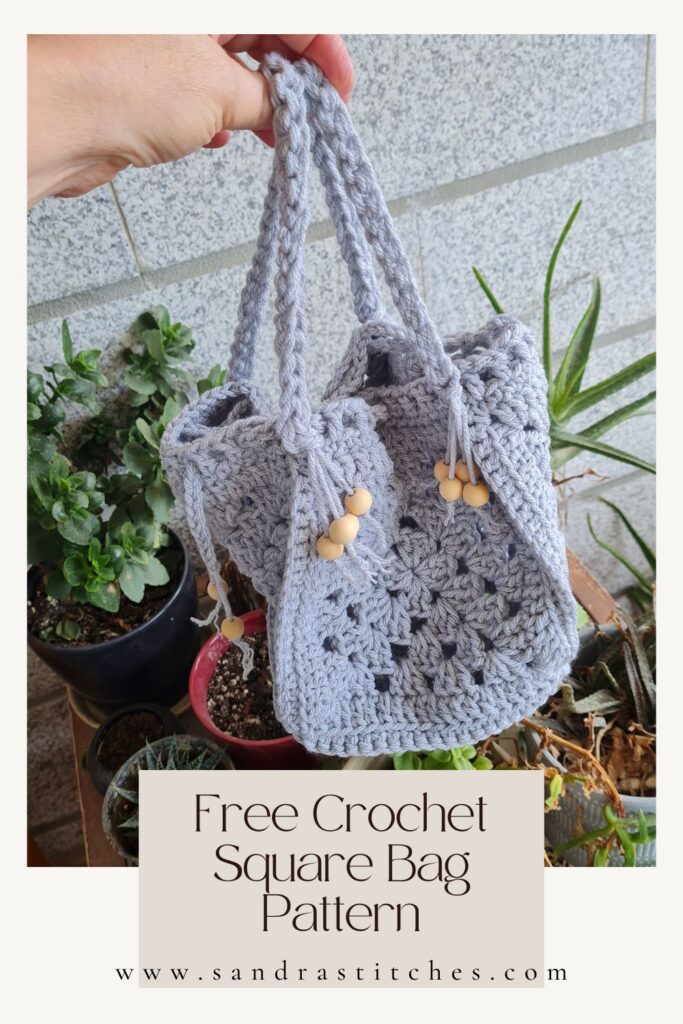
Sun, sand, and… a boring beach bag? Nah! The Square Granny Beach Bag pattern is live!
This square granny bag will be your coolest crochet project for summer: a granny square beach bag! It’s perfect for using up leftover yarn, and you can customize it with your favorite colors. Get ready to ditch the dull bag and crochet yourself a beach tote that’s as fun and very useful!
You will find instructions for the granny square below in the pattern section, and a video tutorial teaching you a second method to work a granny square!
Are you with me?
Part of The Summer Vibes Blog Hop & Bundle Hosted by Susanna Biaye from Fosbas Crochet
Scroll down for details ⬇️
There are 2  ways to get this pattern:

Option 1: You can purchase the individual pattern as an easy-to-read, print-friendly PDF  from Ravelry

Option 2: Scroll down to get the written instructions for this pattern for free
Why a granny square beach bag?
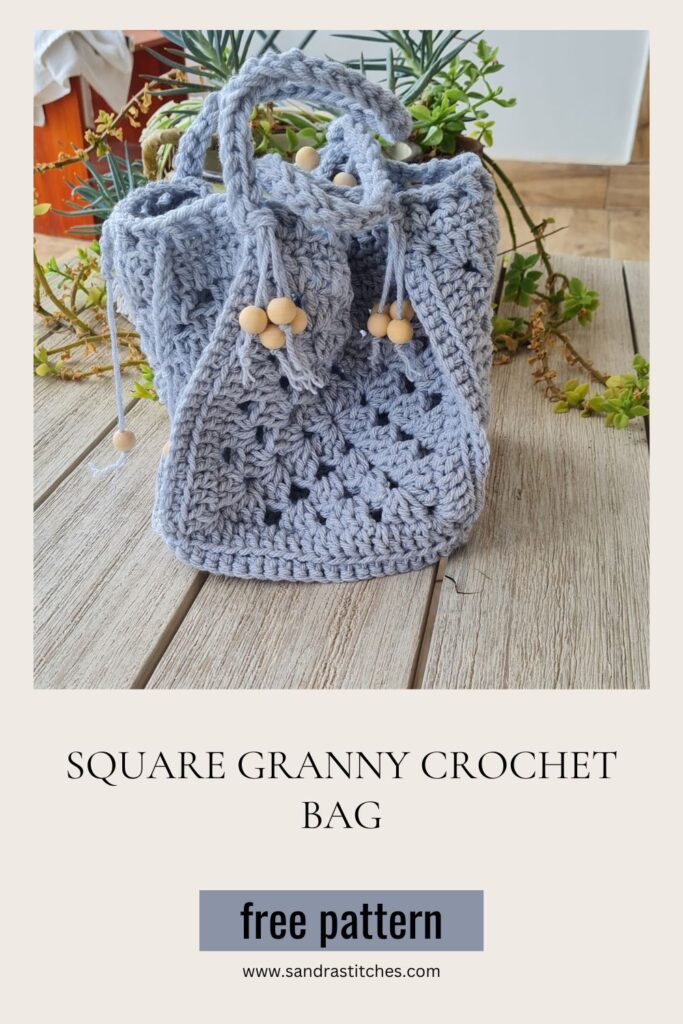
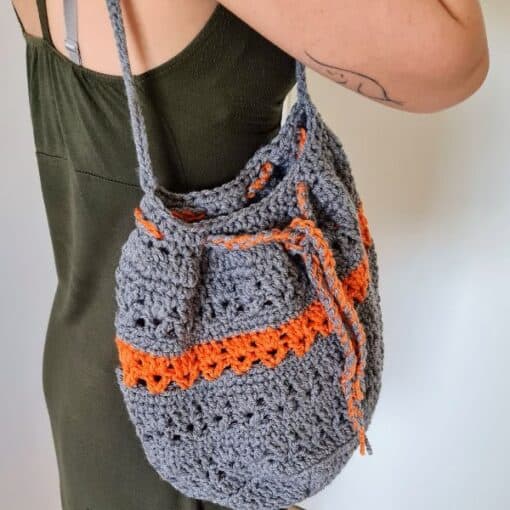
Structured Yet Spacious: Granny squares, when joined together, create a surprisingly sturdy fabric. This makes your square granny bag perfect for carrying all your beach essentials – towels, sunscreen, snacks – without worrying about it becoming floppy.
Endless Customization: The beauty of granny squares is their versatility. You can mix and match colors, create patterns, or even add embellishments to make your square granny bag truly unique. I used some wooden beads!
** Some of the links in this post may include affiliate links. Making a purchase through one of these links pays me a small referral fee at no added cost to you. These small fees add up and help me keep the blog running. View our Disclosure and Privacy Policy for more information.
Before you get started, check out my Favorite Crochet Tools (affiliate)
Yarn Winder – a perfect crochet accessories
Neck Stretcher – to keep you without neck and back pain
Gauge Ruler – so you always get the right size
How many squares for a square granny beach bag?
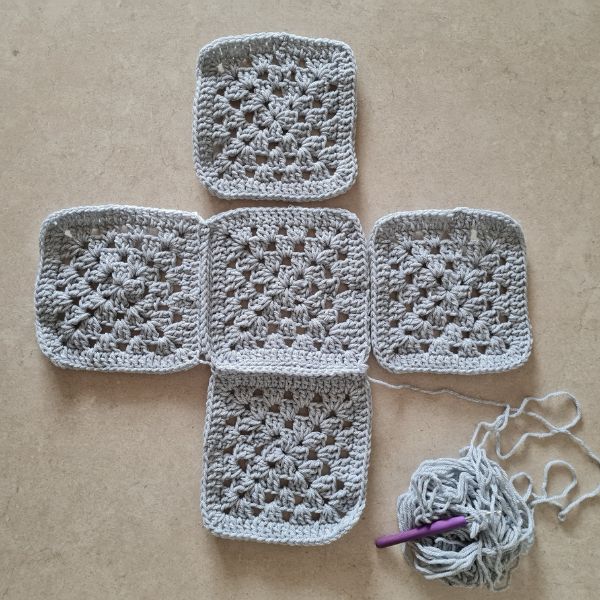
We want to form a square (cube) out of the grannies, so I used 5 identical squares for this design.
One for the bottom and the rest for each side of the cube.
Pattern Designed By: Sandra Stitches This pattern is copyright protected; it is unlawful to distribute this pattern in any form (free, sale or trade).
▶️ Add this pattern to your Ravelry favorites here.
How do you line your crochet granny bag?
Lining your crochet beach bag adds a polished look and extra functionality. It hides any loose ends from the crochet work, provides a smoother interior, and makes the bag easier to clean.
To line your bag, you’ll need fabric slightly larger than the crocheted piece with seam allowance added. Cut and sew the fabric into a shape that mirrors your bag, leaving the top open, in this case, I would make a larger insert to give space to the square shape.
Pin the lining to the top rim of your bag, right sides facing. Sew them together with a strong stitch, then flip the lining inwards and hand-sew the opening closed for a clean finish.
Let’s get to the pattern, shall we? Making square granny bag/tote
Difficulty

Materials
Hayfield Bonus Chunky Extra Value, 100gr, 100% Acrylic, 150 yds, 137 m, color Starling (1.5 skeins)
Subs HERE

Hook: US Size H-8 ( 5 mm)
I used a smaller hook size to give the bag more sturdiness
Yarn Needle, Scissors, Measuring Tape
Sizes
- This sample is 8.5” X 8.5”
Stitch Key
- Ch = Chain
- Sc = Single Crochet
- St = Stitch
- Dc = Double Crochet
- Yo = Yarn over
- Slst = Slip stitch
- Ch-Sp = Chain space
Specialty Stitch
Granny cluster (3 dc cluster): A granny cluster is a set of 3 double crochet stitches, all worked into one stitch or space. In this pattern, the granny clusters are separated from one another with chain stitches.
Notes
- The pattern is worked in rounds and rows
- Starting Ch3 counts as first stitch in round and row.
- You can work this pattern with one color or multiple as you wish- I used one color
- This pattern consists of 5 identical granny squares joined and handles
- If changing colors make sure to have a changing technique and weave your ends in.
- You can decide on the size of the square by adding rounds.
Instructions
The Bag
Make 5 identical squares- alternating colors as you wish
Ch 4, join with a SIst to form a ring.
Round 1: Ch 3. Into the center ring, make 2 dc, ch 2, (3 dc, ch 2) three times. Join with a sl st to the top of first ch-3.
Round 2: Chain 4. (This counts as the first dc and ch-1 space.)Work in the next ch-2 space (aka the first corner space): (3 dc, ch 2, 3 dc), ch 1. Repeat Step 2 twice more for a total of three times. In the last ch-2 space, work: 3 dc, 2 ch, 2 dc. Join with a sl st to the 3rd chain of the beginning chain stitches.
Round 3: Chain 3. (This counts as 1 dc.) into the ch-1 space just below in the previous round, work 2 dc, ch 1. (This makes the first granny cluster of this round.), Into the next ch-2 corner space, work: 3 dc, ch 2, 3 dc, ch 1 Into the next ch-1 space, work: 3 dc, ch 1. Repeat steps 3 and 4 around to the beginning chain. join with a sl st to the top of the starting ch-3.
Round 4: Chain 4. (This counts as 1 dc and the ch-1 space.)Into the next ch-1 space, work: 3 dc, ch-1.Into the next ch-3 corner space, work 3 dc, ch 2, 3 dc, ch 1. Repeat steps 2 and 3 in each of the remaining ch-1 and ch-2 spaces .In the last ch-1 space, work 2 dc. Join with a sl st to the top of the starting ch-3.
Round 5: Ch3, dc1 in next st, dc1 in next st, and around- when in corners ( dc2+ch1+dc 2) on each corner, secure yarn and cut.
To make bigger squares, repeat rounds 3 and 4 until you reach the desired size
Let’s continue
Handle – make 2 identical
I used double strands for more thickness
Single Crochet Cord:
Measure the length of the handle you want X 5 times and slip knot, so you have two long strands ( I have 4), Yarn over your hook one strand and finish a single crochet, Yarn over again and finish a single crochet, continue the length desired.
You can leave a strand for a tassel or secure the yarn and weave in the ends.
Want to save this post for later? Pin it!
Construction
Lay all squares as in the photo, and join to form a square by using Sc 1 on each st using the middle loops only as in the photo, on corners Sc1 joins all corners to secure.
When a square is formed:
Round 1: Ch 1,sc1 around the top part of the bag, Sl st to 1st ch, turn
Round 2: Ch3, dc1 in next st, skip 1 st, ch1, dc1 in next, skip 1 st , ch 1, dc1 in next around, When in corner, dc 3 in 3 stitches and continue (skip 1, ch1, dc1) to next corner. Finish by Slst to 1st ch,
Secure yarn, cut, and weave in ends.
Finishing
Attach the handles to both sides by sewing them to the bag. Use the tapestry needle and secure the handles.
You can sew fabric to the bottom square to avoid the holes.
You can line the bag with fabric.
You can add fringe, tassels, or beads to make it prettier 🙂 I used these wooden beads
Did you try this Pattern? Share a picture
Tag me on Instagram
@sandrastitchesil
The Summer Vibes Blog Hop & Bundle will take place July 1st – 31st – Each day 2 new free or 50% off designs for you to choose from

Grab your free PDF Download of the Square Granny Beach Bag – valid only July 9th

An eBook bundle is available through the blog hop and a week after

Want more crochet Bag patterns?
DISCLOSURE
AMAZON ASSOCIATES: Sandra Stitches is a participant in the Amazon Services LLC Associates Program, an affiliate advertising program designed to provide a means for sites to earn advertising fees by advertising and linking to Amazon.com.
This post contains links to products that I use and recommend, If you purchase any using my links I get a very small fee at no ad to you! Thank you for supporting my small biz!
