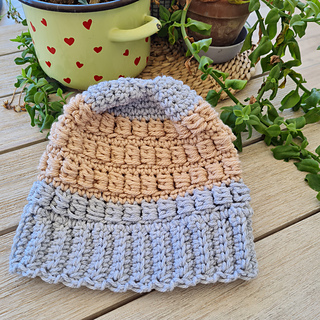
Let’s add some warmth and joy to these chilly winter days with a cheerful Beanie Hat Crochet Pattern!
This pattern is a perfect way to showcase your love for traditional Nordic colors, and the mix of intermediate-level stitches makes it a fun and exciting project for all skill levels.
Whether you’re just starting out with crochet or you’re looking for a new challenge, you’re going to love how this hat turns out.
So put a smile on your face, grab your hook and yarn, and let’s create something beautiful together!
Want to save this post for later? Go ahead and PIN it!
Get ready to add some pizazz to your crochet collection with this Crochet Beanie Hat Tutorial.
Don’t be afraid to get creative with color combinations, the possibilities are endless! And with weight 4 yarn, you can create a warm and cozy hat in no time.
Beanie Hat Crochet Pattern
SKILL LEVEL
Intermediate
SIZES/FINISHED MEASUREMENTS
One size
21” circumference (women)
YARN
Hayfield Bonus Chunky Extra Value, 100gr, 100% Acrylic in two colors, Gray and Beige
Substitutions can be: Paintbox Yarns Simply Chunky or Stylecraft Special Chunky
HOOK & OTHER MATERIALS
- US Size J 10 (6 mm) crochet hook
- Scissors
- Yarn Needle
- Measuring Tape
STITCH KEY
Ch = Chain,
Sc = Single Crochet
SlSt = Slip stitch
Dec = decrease
Sc2Tog = Single crochet 2 together
Blsc = Back loop single crochet
SPECIALTY STITCHES
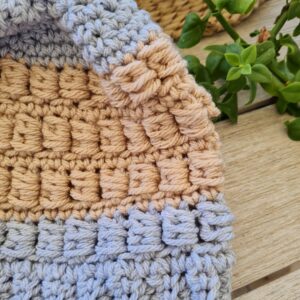
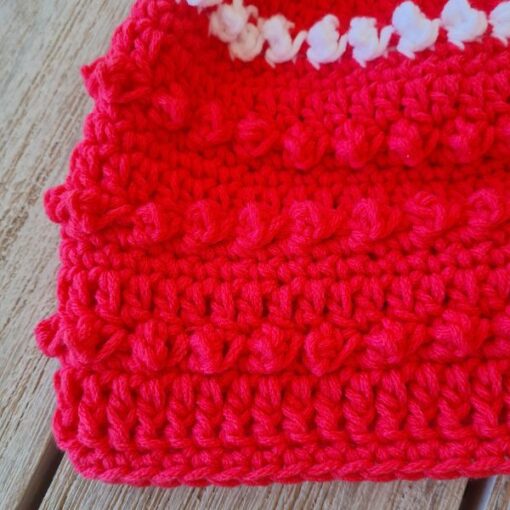
Puff post st = dc in next st, yarn over and pull through behind dc, yarn over and pull through again behind dc, repeat one more time, yarn over and insert hook in the same place of the dc, pull through 2 loops, pull through 3 loops and pull through the rest of loops
SC2TOG = Insert hook into first stitch, Yarn over and pull up a loop, and you’ll have 2 loops on your hook, Insert hook into the next st, Yarn over, and pull up a loop, and you’ll have 3 loops on your hook, and Yarn over and pull through all 3 loops on your hook, This completes the sc2tog
BLSC = Chain 1, next you will single crochet in the bl of the first single crochet stitch from the previous row. The stitch looks like a V from the top and the bl is part of the V that is the furthest away from you
NOTES
- The pattern is worked in Rows for the brim and Rounds for the body
- Beginning ch1 does not count as 1st st
- Ch3 at the beginning of the round counts as 1st st
Check out these essentials for your crochet experience! (Affiliate)
Rechargeable LED Neck Reading Light
Yarn Holder for Crochet by Laborwood | Handmade Wood Yarn Dispenser
Fabric Storage bins for all your Wip’s
Get your Downlabe Ad-free PDF on Ravelry
Beanie Hat Crochet Pattern INSTRUCTIONS
Brim:
Starting chain: 8 chains for the brim
Row1:sc 1 in 2nd ch from the loop, sc 1 in each ch to end of row, ch1 and turn(7 st)
Row 2: blsc in 1st st from prev row, blsc in each st across to end of row
Row 3- 48 : repeat row 2
Measure your brim to make sure the size is right, it all depends on your yarn and tension.
Slip stitch the band together to make a circle so we can start the crown part of the beanie hat
The Crown
Round 1: ch1 , sc in 1st st from hook, sc 1 in every st around. You should have 48 st.
Round 2: ch3 (counts as 1st st), skip 1, Puff post in next st, skip 1 st, Puff post in next, continue around, finish by slst to the top of beginning ch3. (24 puff post st)
Round 3: ch1, sc 1 in 1st st from prev round, sc 1 on next 3 and across to end of round. Always count that you have 48 st.
Round 4-8: Repeat round 1 and 2, three more times to a total of 4 repeats.
Again measure your work to make sure the height of the hat fits you. We are not finished yet….
Now is the part where we close the crown of the Beanie using Sc2Tog.
Round 9: ch1’ sc in 1st st from hook, sc 1 in next 3 st, sc2tog in next st, sc 1 in next 4 st, sc2tog in next and repeat to end of round. 40 st
Round 10: ch1, sc 1 in 1st st from hook, repeat round 9
Round 11-13: work sc2tog every other st to close the crown of the Beanie.
Please do not worry about the counting here. Just make sure you close it evenly.
Secure your ends and cut!
DONE!!
Copyright protected. You may not redistribute the pattern after purchase or publish any part as your own including photos. If sharing online you must link back to this original post. You may sell finished products and if possible, reference back to this pattern and/or give credit to Sandra Stitches by Sandra as the original designer.
Did you try this out? Share your project!
– Let me know how it went and leave a comment below
– Tag me @sandrastitches
– Join and share in our FB Community
DISCLOSURE
AMAZON ASSOCIATES: Sandra Stitches is a participant in the Amazon Services LLC Associates Program, an affiliate advertising program designed to provide a means for sites to earn advertising fees by advertising and linking to Amazon.com.
This post contains links to products that I use and recommend, If you purchase any using my links I get a very small fee at no ad to you! Thank you for supporting my small biz!

5 thoughts on “Free Crochet Beanie Pattern: Nordic Beanie Hat”