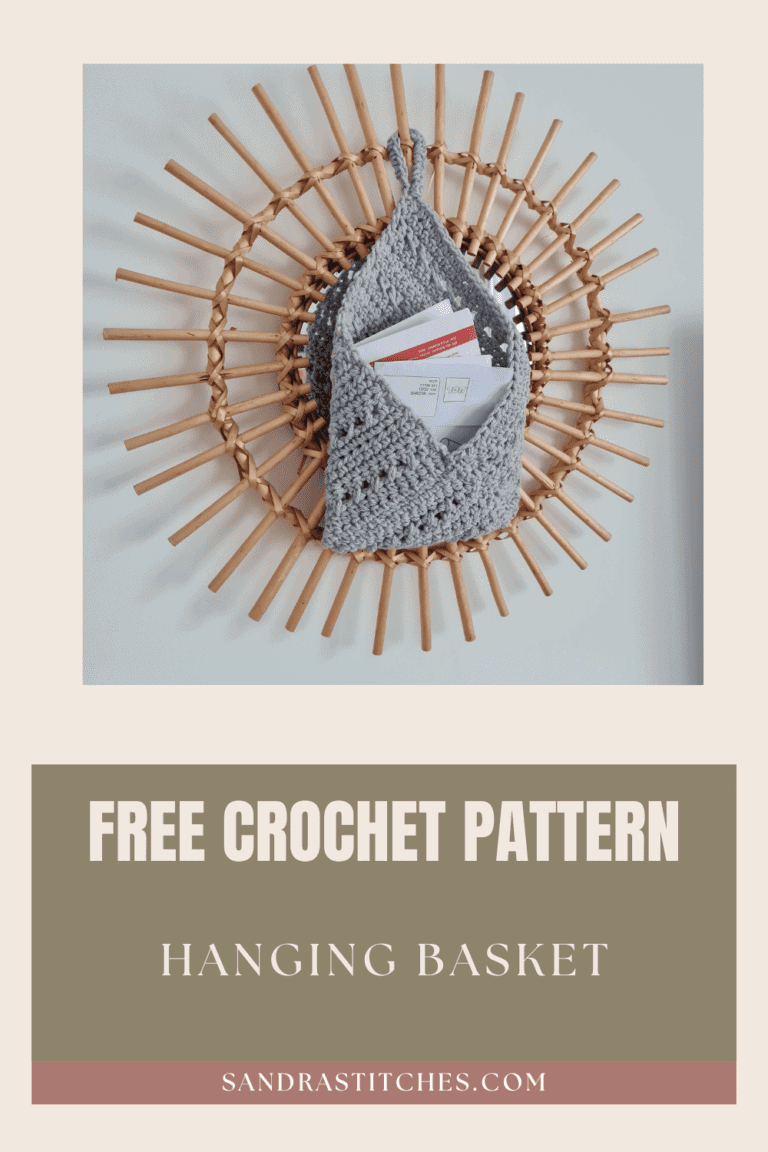
Quick answer: This is a crochet hanging basket made from one square worked flat, then folded into an envelope shape and sewn along three edges. It’s beginner friendly, uses half a skein of chunky yarn, and works up in an afternoon.
I know how satisfying it can be to make something both beautiful and useful with just a hook and some yarn, and this one delivers on both. Grab your favorite yarn and let’s get hooking.
Find the free pattern below or purchase the ad-free PDF version of this pattern on Ravelry. The PDF is designed for printing and this way you can support me!
Use it as a bathroom organizer, a toy room tidy-up, or a cozy catch-all in your kitchen or bedroom.
Cotton or acrylic both work, in any color that fits your style.
If you want another easy storage piece to make alongside it, the Market Tote Bag uses the same kind of simple, useful construction.
Want to save this post for later? Pin it!
** Some of the links in this post may include affiliate links. Making a purchase through one of these links pays me a small referral fee at no added cost to you. These small fees add up and help me keep the blog running. View our Disclosure and Privacy Policy for more information.
SKILL LEVEL
Beginner
FINISHED MEASUREMENTS
12” X 12 “ square
YARN
½ skein of Hayfield Bonus Chunky Extra Value, 100gr, 100% acrylic, 150yrd, 137 meters
Substitutions can be:
HOOK & OTHER MATERIALS
- US Size I-9 (5.5 mm) crochet hook
- Scissors
- Yarn Needle
- Measuring Tape
STITCH KEY
Ch = Chain
Sl St = Slip Stitch
Sc = Single Crochet
Hdc = Half Double Crochet
SPECIALTY STITCHES
X -st : [skip 1 st, dc in next st, dc in skipped st.
Sandra’s tip: If you plan to hang anything with real weight in this basket, a smaller hook and a tighter tension will help it hold its shape better than a looser fabric will. Acrylic works fine for lighter use, but cotton or a doubled strand of yarn gives you a sturdier basket if you’re storing something heavier.
NOTES
- The pattern is worked in Rows
- Beginning ch1 does not count as 1st st
- This pattern has an even number st in the row
- This pattern has to be a perfect square to become an envelope basket
INSTRUCTIONS:
Foundation chain: chain 31
Row 1: Hdc 1 in 2nd ch from hook, Hdc 1 in next ch, and in every ch across to end of row
Row 2: ch1 and turn your work, sc1 in 1st st from hook, sc 1 in next st and in every st across to end of row
Now Row 3: ch1 and turn your work, dc1 in 1st st from hook, dc 1 in next st, X st * [skip 1 st, dc in next st, dc 1 in skipped st]* repeat from * to * until 2 last stitches, dc1 in each st of 2 last stitches
Row 4: ch1 and turn your work, sc2 in 1st st from hook, sc1 in next st and in every st across to end of row.
Repeat rows 1-4 five times to make a square
Handle
When you reach the last st in your last row, chain 10 and sl st to the same st you started with, turn and sc 12 back and sl st again, fasten your yarn, and cut.
Free ways to share and support me
- Favorite this pattern on Ravelry
- PIN on Pinterest
- Share in your story on Instagram
- Share on Facebook
Thank you so much! 🙂
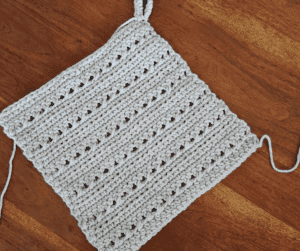

Forming the Envelope Shape
Follow the pictures here to fold your work and form the shape. Lay your work flat with the right side facing you. Sew the three triangles with a tapestry needle. Done!
FAQ
A tighter tension and a slightly smaller hook than usual make the biggest difference, they create a denser fabric that holds its structure. Cotton yarn or two strands held together also help if you plan to store anything with real weight
Cotton or a cotton blend holds its shape best. Pure acrylic can stretch and sag over time under weight, so if you love your acrylic stash yarn, holding two strands together adds extra stability.
About half a skein of a chunky weight yarn, this sample used Hayfield Bonus Chunky Extra Valu
Yes, work more or fewer repeats of Rows 1 through 4 to make a larger or smaller square, just keep it a perfect square so it folds correctly into the envelope shape
A quiet place to keep crocheting
If projects like this one are your kind of calm, you might love the V-Stitch Club.
It is my little corner of the internet for women who crochet for the joy and the quiet of it, with new patterns, gentle company, and the steady rhythm of always having something beautiful on the hook.
Be Part of The Tribe!
Come share your finished Ridgeline Beanie in my free Facebook group. Join Crochet & Stories with Sandra Stitches.
Copyright protected. You may not redistribute pattern after purchase or publish any part as your own including photos. If sharing online you must link back to this original post. You may sell finished products and if possible, reference back to this pattern and/or give credit to Sandra Stitches by Sandra as the original designer.
I hope you enjoyed this Easy Hanging Basket Crochet Pattern tutorial as much as I did!
Remember, the beauty of this project is that you can easily customize it to fit your needs and style.
So why not make a few and brighten up every corner of your home?
Don’t forget to share your creations with us – we can’t wait to see what you come up with! Happy hooking!
Check out these awesome deals for your crochet journey :
Colorful Bobby pins as stitch markers
Rechargeable LED Neck Reading Light
Storage Bins for all your Crochet items


Hi my crochet friend!
Crochet has followed me from Argentina to Israel and through every crossroads since. Now I design calm, achievable crochet, made to feel possible.
Come find free patterns, tutorials, and the V-Stitch Club right here on the blog.


4 thoughts on “Crochet Hanging Basket Pattern, Folds Into an Envelope Shape”