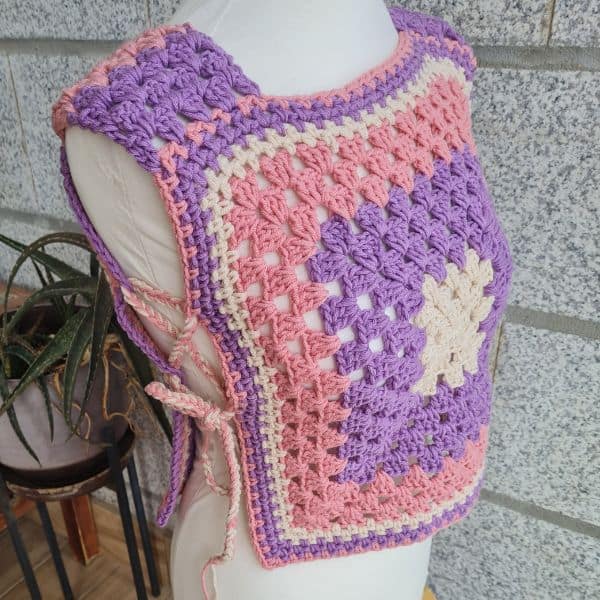
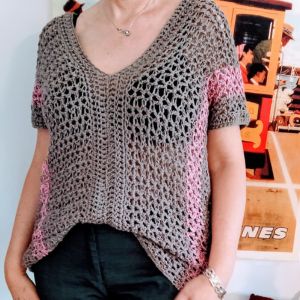
Granny square crochet summer tops are one of my favorite warm-weather projects, and this one is as easy as it gets.
If you’ve got a weekend and two granny squares, you can totally make this top. It’s light, breezy, open on the sides, and perfect for layering over a tank or swimsuit.
This is a beginner-friendly pattern that works up fast and doesn’t require any shaping. Just some classic granny squares, a bit of joining, and you’re good to go.
It’s a fun, relaxing make—and you’ll actually want to wear it when you’re done!
Find the free pattern below or purchase the ad-free PDF version of this pattern HERE. The PDF is designed for printing, and this way, you can support me! Thank you
Do you want to save this post for later? Go ahead and PIN IT!
Helpful Tips for This Granny Square Summer Top Pattern
Before you dive into the pattern, here are a few notes and resources that might help, especially if you’re a beginner or want to tweak your technique:
👉 No Chain 1 Between Granny Clusters
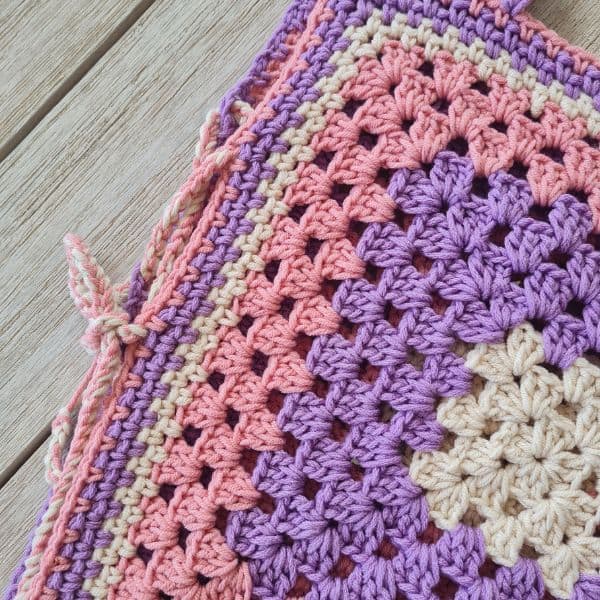
In this pattern, I don’t chain 1 between the granny square clusters. Skipping that little chain gives the square a sturdier, less hole-y look—perfect when you’re turning it into a crochet summer top for more coverage. If you’re used to chaining 1 between clusters, give this method a try and see the difference!
👉 How to Change Colors in Granny Square Rounds
Changing colors in your granny square crochet top is a fun way to add personality and make your project truly your own. Here’s a simple method I use that keeps things neat and minimizes weaving in ends:
🧵 Step-by-Step:
- Finish your round as usual, ending with a slip stitch into the top of the beginning chain (or first stitch, depending on your pattern).
- Cut the yarn, leaving a 5–6 inch tail. Pull the yarn through to fasten off.
- Insert your hook into any corner space (or starting space) of the next round with your new color.
- Yarn over with the new color and pull up a loop. Chain 3 (this counts as your first double crochet).
- Continue the round using the new color as written in your pattern.
💡 Tip: To make color changes look extra clean, always start a new color in a different corner from where you ended the last round. This keeps joins from stacking up in the same spot and helps your squares look more balanced.
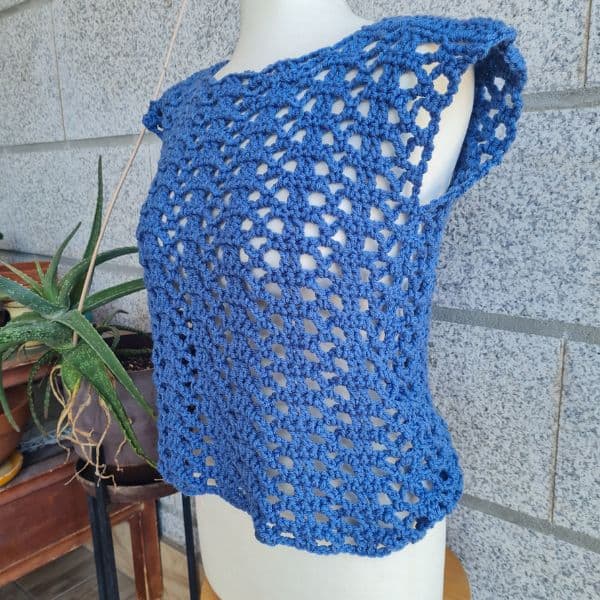
👉 Linen Stitch for Side Panels
For the open sides of the top, I used the linen stitch (also called the moss stitch) to create a more solid fabric. It’s a simple one-row repeat that gives a nice, dense texture—great if you want a bit more coverage without making it too heavy. If you’ve never tried it, this is a great intro to the stitch!
** Some of the links in this post may include affiliate links. Purchasing from one of these links pays me a small referral fee at no added cost to you. These small fees add up and help me keep the blog running. View our Disclosure and Privacy Policy for more information.
Before you get started, check out my newest favorite finds!
Yarn Winder – a perfect crochet accessory
Neck Stretcher – to keep you without neck and back pain
Gauge Ruler – so you always get the right size
Stitches Used in This Design
Granny Stitch
This crochet summer top uses two beginner-friendly stitches that work beautifully together: the granny stitch and the linen stitch.
The main fabric of the top is made with the granny stitch, which is a simple and classic technique where you work sets of three double crochets into chain spaces.
It’s the stitch used to create traditional granny squares, and it’s known for being easy to memorize, fast to work up, and wonderfully airy, perfect for a light summer project.
The granny stitch gives this top its open, breathable texture and that timeless crochet look we all love.
Linen Stitch
To add more structure and balance to the design, I used the linen stitch (also known as the moss stitch or granite stitch) to create the borders around each granny square and for the open side panels of the top.
The stitch is made by alternating single crochets and chain spaces, and then working into the chain spaces of the previous row.
It creates a dense, woven-like fabric that still has flexibility and drape.
The linen stitch helps frame each square nicely and gives a bit more coverage along the sides, making the overall piece feel more polished while still light and wearable.
Together, these two stitches create a beautiful contrast, one airy and vintage, the other neat and modern, that makes this top fun to crochet and easy to wear.

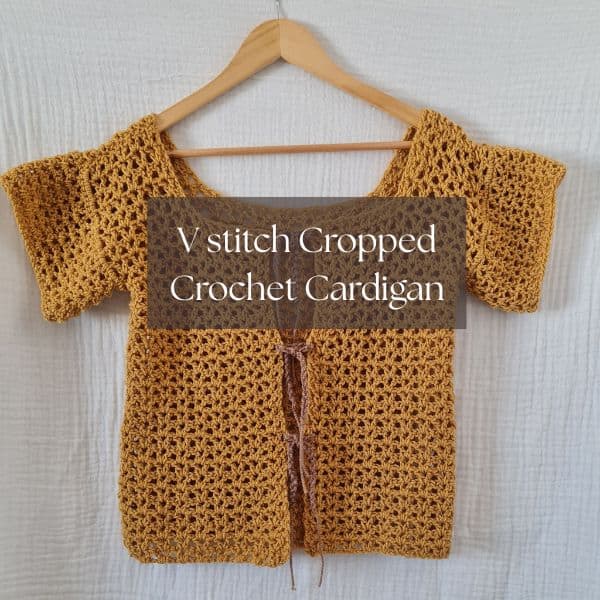
Here are some more Crochet Top Patterns
If you love the look of this easy Granny Beach Top pattern, here are a few more crochet top patterns you can view on our website:
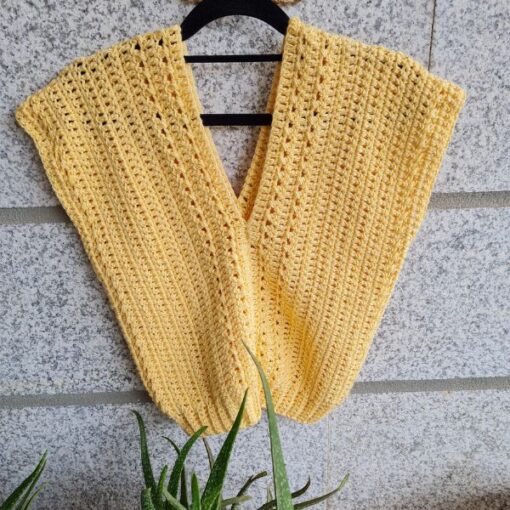
Crochet Patterns using the Linen stitch
Let’s get to the pattern, shall we? Making the Easy Granny Square Crochet Summer Top
Difficulty
Easy, Beginner
Materials
This is the yarn I had at hand. Do not forget I made a sample for you to learn, so be creative and choose the yarn you love.
Feel it before starting your project.
I know there are a million different yarn choices out there, but that also depends on where you live, so just be creative!
- 100% Acrylic or Cotton yarn, weight #4 in 3 colors, a total of 150 gr for Small size
- Hook: US Size H-8 (5 mm)
- Yarn Needle, Scissors, Measuring Tape
Gauge
- 15 st X 6 rounds (4” X 4”)
Sizes
This sample is: 15” long X 15” wide without the connecting chains – Women Small Size
You can make the square bigger or smaller to fit your size by adding or reducing rounds ( explained in instructions)
Stitch Key
You can see these stitches in action as you watch these video tutorials (just click on the underlined text):
- Ch = Chain
- St = Stitch
- Sc = Single Crochet
- Dc = Double Crochet
- Slst = Slip stitch
Specialty Stitches
Granny stitch = Dc 3 in indicated space, ch 1
Linen St = watch the video tutorial
Watch my review of the Hooks & Needles Subscription Box- Use coupon code: sandra20 for 20% off your 1st purchase
Notes
- The pattern is worked in rounds
- Ch3 does count as st at the beginning of each row
- Ch 1 does not count as a st at the beginning of the round
- You can work this pattern with one color or multiple, as you wish- I used 3 colors
- This pattern is worked with 2 identical granny squares joined together ( joining instructions below)
- If changing colors, make sure to have a changing technique and weave your ends in.
Love This Pattern? There’s More Where That Came From!
You will discover my complete collection of crochet patterns,
tutorials, and resources, both free and premium, all in one convenient place.
I know you’ll find something to inspire your next project🙃
All Things Crochet Start Here →
Granny Square Summer Top Instructions
A Granny Square- Make 2 – each square 10 rounds of Granny stitch and 5 rounds of Linen stitch
Round 1: Make a magic ring (or ch 4 and join with a sl st to form a ring). Ch 3 (counts as first dc here and throughout), 2 dc into the ring, *[ch 2, 3 dc into the ring]* repeat from * to * 2 more times. Ch 2 and sl st to the top of the beginning ch 3 to join. Pull the magic ring tight or weave in the yarn tail to secure the center.
Round 2: Sl st in the next 2 dc and into the ch-2 corner space. ch 3, dc 2 in the same ch-2 space, ch 2, dc 3 in same ch-2 space, *[ch 1, (dc3+ch2+dc3) in next ch-2 space]* repeat from * to * until you reach the beginning corner, ch1 , sl st to the top of the beginning ch 3 to join.
Round 3: Sl st in the next 2 dc and into the ch-2 corner space. ch 3, dc 2 in the same ch-2 space, ch 2, dc 3 in same ch-2 space, *[ch 1, dc 3 in next ch-1 space, ch1, (dc3+ch2+dc3) in next ch-2 space ]*repeat from * to * until you reach the beginning corner, ch1, sl st to the top of the beginning ch 3 to join.
Round 4-10: You can continue adding more rounds to make your square as large as you want by using these general rules: • Continue the pattern, increasing the ch-1 spaces between the 3-dc groups by 1 in each round. For example, in Round 4, you would have (dc 3+ ch 2 + dc 3) in the next ch-2 space, ch 1, 3 dc in the next ch-1 space, ch 1, 3 dc in the next ch-1 space repeat from until you reach the beginning corner. After each corner, continue to add ch-1 spaces to separate the 3-dc groups on each side of the square.
When you reach the desired square size, cut the yarn and weave in the ends
Let’s work the Linen stitch rounds– you can add rounds for your desired size
Round 11: Introduce yarn in a ch 2 space of corner, work (sc1+ch2+sc1) in corner, *ch 1, skip next st, sc 1 in next st, repeat until next corner, (sc1+ch2+sc1) in next corner, repeat from * around, Slst to 1st st.
Round 12: Slst to corner, (sc1+ch2+sc1) in corner, *ch 1, sc 1 in next ch 1 space, repeat until next corner, (sc1+ch2+sc1) in next corner, repeat from * around, Slst to 1st st.
Rounds 13- 15: repeat round 12 ( changing colors if you wish
Ensure you have a square covering the front and back enough to feel comfortable.
Construction
Start the shoulders. Work the same on both sides
One, you will start from the out in, and the second, you will start from the in out.
Start at a corner of the 1st square with the work right side facing you,
Row 1: introduce yarn in 1st st, ch3, dc 1 in same st, skip 2, dc 3 st in next, skip 2 st, dc 3 in next, skip 2 st, dc 3 in next, skip 2 st dc 2 in next, turn work
Row 2: Ch 3,* dc 3 in space between 2 clusters from prev row, repeat from * 3 more times, dc 1 in last st, turn work
Row 3: Ch 3, dc 1 in space between 1st dc and cluster, #dc 3 in next space between clusters, repeat from * 2 more times, dc 2 in last space before last dc from previous row
Rows 2 and 3 are the row repeats- work as many as you need for the length of your shoulders, so the top fits your desired look at the front and back.
Using the tapestry needle, sew the strap to the back square.
Sides
Use a double strand of colors and chain a long chain for both sides.
Weave it in between stitches in a braid shape to tie as you wish.
Finishing
Cut your yarn and weave in the ends.
You can add fringe on the bottom for a more summery look
Enjoy!
**This is an original Sandra Regev pattern: Owner /Designer of Sandra Stitches. This pattern may not be redistributed for free, sale, or trade, but finished products can be sold with credit to this shop – enjoy!
Do you want to save this post for later? Go ahead and PIN IT!
Did you try this Pattern? Share a picture
Tag me on Instagram
@sandrastitchesil
Questions?
Ask and share in our
FREE Facebook Group
DISCLOSURE
AMAZON ASSOCIATES: Sandra Stitches is a participant in the Amazon Services LLC Associates Program, an affiliate advertising program designed to provide a means for sites to earn advertising fees by advertising and linking to Amazon.com.
This post contains links to products that I use and recommend, If you purchase any using my links I get a very small fee at no ad to you! Thank you for supporting my small biz!

