I have a confession to make.
I used to hate yellow.
For years, I wouldn’t have chosen anything yellow for myself. And then, somehow, I changed my mind.
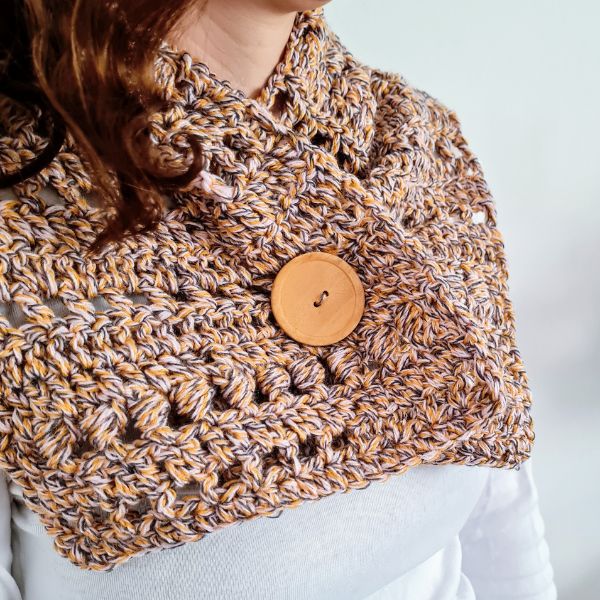
This warm golden, orangey shade became one of my favorite colors, and when I designed this crochet pocket scarf, I knew exactly what I wanted to call it: Papaya.
But the color isn’t the only reason I love this scarf.
It has texture.
It’s soft and cozy without feeling bulky.
And, most importantly, it has pockets.
Yes, pockets in a scarf.
I use mine for my glasses, keys, crochet hooks, little bits of yarn, and whatever else I don’t want to put down and then spend half an hour looking for.
This crochet pocket scarf pattern is made from simple crochet stitches, but the combination creates a lovely textured fabric that looks much more complicated than it really is. The scarf is worked as a simple rectangle, and the two pockets are crocheted separately and attached at the end.
You can make the scarf longer or shorter to suit you, choose your favorite #4 weight yarn, and make it in any color you love.
And if you are coming back to crochet after a long break, this is the kind of project I would choose: simple enough to relax with, but interesting enough that the finished scarf feels like something special.
The best part?
You get to make something beautiful that you will actually use.
Let’s make the Papaya Scarf.
There are 2  ways to get this pattern:

Option 1: You can purchase the individual pattern as an easy-to-read, ad-free, print-friendly PDF  from Ravelry

Option 2: Scroll down to get the written instructions for this pattern for free
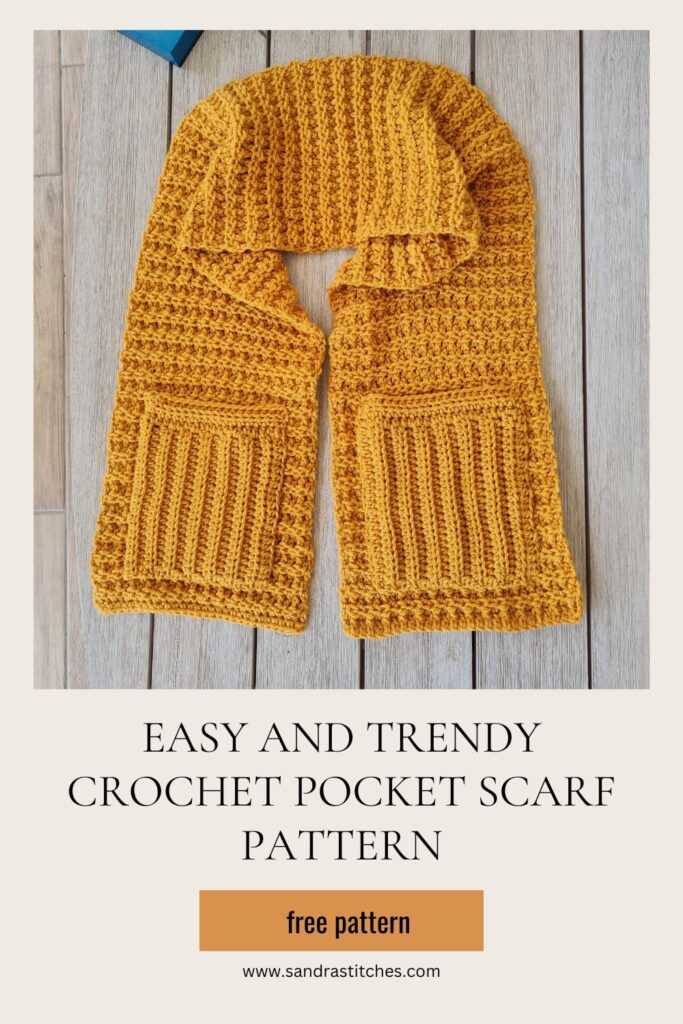
What size should I crochet a pocket scarf?
Here you can find the standard sizes for crochet scarves- measure yourself and determine which is best for you!
** Some of the links in this post may include affiliate links. Making a purchase through one of these links pays me a small referral fee at no added cost to you. These small fees add up and help me keep the blog running. View our Disclosure and Privacy Policy for more information.
Watch the Papaya Scarf in Action
Want to see why I love this scarf so much?
I made a video about it!
I show you the finished scarf, the texture, the pockets and how I actually wear it. I also talk about why I designed it and why this has become one of those crochet projects I keep coming back to.
And yes, there is a little story behind the Papaya color too.
So grab a cup of something nice, come crochet with me for a few minutes, and let me show you the scarf.
Watch the Papaya Crochet Pocket Scarf video below. Coming October 2026
Why You’ll Love This Crochet Pocket Scarf
I think the best crochet projects are the ones you actually use.
You know the kind. You finish the last stitch, take a picture because you’re very proud of yourself, and then… it disappears into a cupboard.
Not this one.
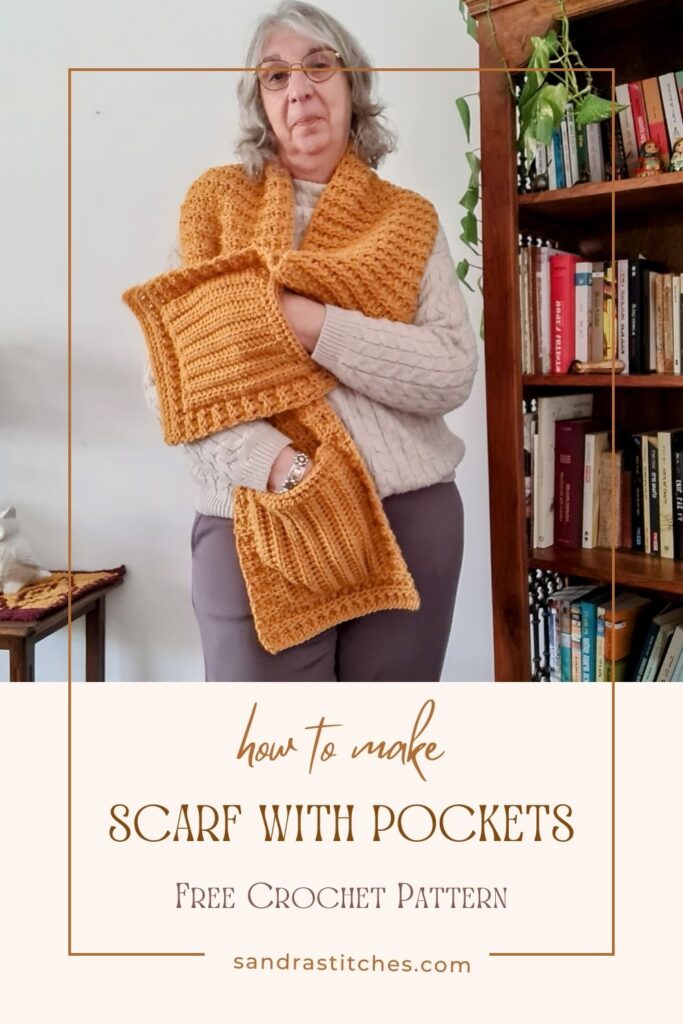
I designed the Papaya Scarf to be pretty, but also useful. And those pockets are the reason I keep reaching for it.
It has pockets!
I know, I know. A scarf with pockets sounds a little funny. But once you have them, you wonder why every scarf doesn’t have them.
I use mine for my glasses, keys, crochet hooks, little bits of yarn, and anything else I need to carry around without carrying an actual bag.
You can wear the scarf around your neck, or spread it over your shoulders like a little wrap and still have your pockets right where you need them.
The texture looks complicated, but it isn’t
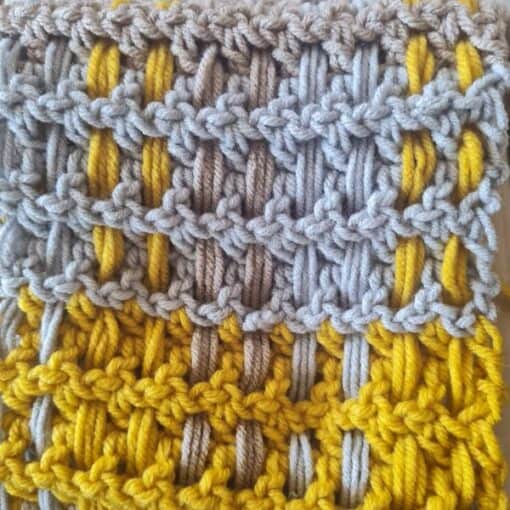
The texture is made with back post double crochet, which creates those lovely raised ridges across the scarf.
If you’ve never tried back post stitches before, this is a nice project to practice them because you repeat the same basic idea over and over.
Once your hands get into the rhythm, it becomes one of those projects you can crochet while watching your favorite show.
You can make it your own
The scarf is worked as a simple rectangle, so you don’t have to worry about complicated shaping.
Want it longer? Keep crocheting.
Want a different color? Absolutely.
Want to use the yarn you already have in your stash? Go for it.
And of course, the pockets are still there to make the whole thing much more useful.
It’s a good project for a gift
I also think this makes a lovely handmade gift.
Especially for someone who likes practical things.
You’re not giving them another decorative crochet item that they have to find somewhere to put. You’re giving them a scarf they can actually wear, with pockets they will probably end up loving as much as I do.
How the Papaya Scarf Is Made
The Papaya Scarf is a simple rectangular crochet scarf worked in rows.
The main texture comes from back post double crochet, which creates the raised ridges you see running across the fabric. The pockets are made separately using back loop only stitches and then attached to the scarf.
That’s really the beauty of this design.
There aren’t lots of complicated stitches or shaping to keep track of. Once you get into the rhythm of the rows, the texture starts to build almost by itself.
I used a soft 100% acrylic yarn for my scarf, but you don’t have to use the exact same yarn I did. A soft worsted weight yarn is a good place to start, and you can choose the color that makes you happy.
And yes, I strongly encourage you to choose a color that makes you happy.
▶️ Add this pattern to your Ravelry favorites here.
Can You Customize the Size?
Yes!
One of the things I like about making a scarf this way is that you’re not locked into one exact size.
My finished scarf is approximately 10.5 inches wide and 60 inches long, but you can adjust the length to suit you.
If you like a longer scarf, simply add more rows.
You can also make the scarf wider or narrower by adjusting your starting chain, as long as you keep the stitch repeat in mind.
And don’t forget the pockets when you’re deciding on your size. You want them to sit comfortably where you can actually reach them.
This is one of those patterns where I would rather you make it work for your body, your yarn and the way you like to wear your scarves than worry about making it exactly like mine.
Let’s get to the pattern, shall we? Making a Comfy Crochet Pocket Scarf pattern
Difficulty

Before you get started, check out my Favorite Crochet Tools (affiliate)
Yarn Winder – a perfect crochet accessories
Neck Stretcher – to keep you without neck and back pain
Gauge Ruler – so you always get the right size
Materials
- Ice Yarns Saver,#4, 100% Dralon Acrylic, 200 gr, (330 m) 2 skeins
- or any weight # 4 yarn of your choice
Hook: US Size (6 mm)
Gauge
- 11 st X 8 rows (scarf pattern 4″ X 4″ )
- 12 st X 8 rows (pocket pattern 4″ X 4″)
Sizes
- Scarf: 10.5 “ wide and 60” long
- Pocket: 7” wide X 9” tall
Stitch Key
- Ch = Chain
- Sc = Single Crochet
- St = Stitch
- Hdc = Half Double Crochet
- Yo = Yarn over
Specialty Stitches
Bpdc = Back post double crochet stitch – Yo, insert your hook from back to front around the post of the next stitch, yo, pull up a loop, yo, pull through 2 loops on your hook, yo, pull through remaining two loops on your hook.
BloHdc = Back loop only half double crochet – Yarn over, Insert crochet hook into the back loop only Pull up a loop, Yarn over, Pull through the 3 loops on the crochet hook.
Notes
- The pattern is worked in rows
- This pattern consists of a rectangle for the scarf + two small rectangles for the pockets
- Ch2 does count as st at the beginning of each row
- Ch1 at the beginning of the row does not count as a stitch
- This pattern uses pattern repeats.
- You can work this pattern with one color or multiple as you wish- I used one solid color
- If changing colors make sure to have a changing technique and weave your ends in.
- You can decide on the size of the scarf by adding chains and rows
- The scarf pattern is a one-row repeat pattern
- For the scarf pattern use multiples of odd#
Instructions
The Scarf – ch 31
Row 1: Dc 1 in 4th st from hook, dc 1 in next and across to end of row, turn (29)
Row 2: Ch 1, hdc 1 in 1st st from hook, *[Bpdc 1 in next st, hdc 1 in next]* repeat from *to* to end of the row, (do not forget the ch3 is the last st), turn (29)
Row 3: Ch 1, hdc 1 in 1st st from hook, *[Bpdc 1 in next st, hdc 1 in next]* repeat from *to* to end of the row, turn (29)
Row 4-129: Repeat row 3 (29)
Row 130: Ch 1, dc 1 in 1st st from hook, dc 1 in next and across to end of row, (29)
Secure yarn, cut, and weave in ends
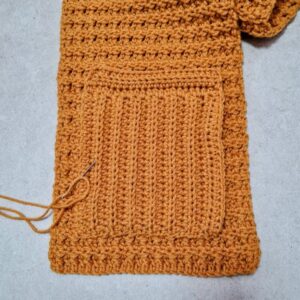
The Pockets – make two identical
Ch 22
Row 1: Hdc 1 in 2nd st from hook, hdc 1 in next st and across to end of row, turn (21)
Row 2: Ch 1, BloHdc in 1st st from hook, bloHdc in next and across to end of row, turn (21)
Row 3-21: repeat row 2 (21)
Turn your work to the narrow side of the rectangle
Work 1 row of hdc 1 on each st and work 2 rows of blohdc 1 on each st (21)

Construction
Block pockets before joining
Lay each pocket on the right side of the scarf bottom part, 1.5” above the final row and centered. Attach by sewing with the tapestry needle leaving the upper part open
Secure yarn, cut, and weave in ends
Finishing
You can add tassels or fringe to the pocket scarf!
Enjoy!
Frequently Asked Questions
Is the Papaya Scarf beginner friendly?
Yes. If you know the basic crochet stitches and are comfortable working in rows, you can make this scarf. The texture comes from back post double crochet, but once you understand where to place the stitch, the pattern is very repetitive.
If you are newer to crochet, I would recommend practicing a few back post double crochet stitches on a small swatch first. Once your hands understand the movement, the scarf itself is quite relaxing to make.
What yarn should I use for a crochet pocket scarf?
I used a soft 100% acrylic yarn for my Papaya Scarf, but you don’t have to use the same yarn.
A soft worsted weight yarn works well for this design. I would choose something comfortable against your skin because this is a scarf you will actually be wearing.
And please don’t feel that you have to use yellow or orange. The Papaya color is my choice, but this scarf would look beautiful in so many different colors.
Can I make the Papaya Scarf longer?
Absolutely.
The scarf is worked in rows, so you can simply continue crocheting until you reach the length you like.
This is especially useful if you are making the scarf for someone taller, or if you prefer a longer scarf that you can wrap around yourself.
How are the pockets made?
The pockets are crocheted separately and then attached to the scarf.
They are made using back loop only stitches, which gives the pocket fabric its own subtle texture.
The pockets are one of my favorite parts of this design because they aren’t just there to look cute. You can actually use them.
Can I wear the Papaya Scarf as a wrap?
Yes. The scarf is wide enough that you can also wear it over your shoulders as a small wrap.
This is actually one of the ways I like to wear mine at home.
And the pockets still come in handy, which is probably my favorite part.
Is there a printable PDF version of the pattern?
Yes. The Papaya Scarf pattern is available as a free pattern here on the blog.
If you prefer to crochet from an ad free, printable PDF, you can also find the paid PDF version on Ravelry.
Did you try this Pattern? Share a picture
Tag me on Instagram
@sandrastitchesil
Pattern Designed By: Sandra Stitches This pattern is copyright protected; it is unlawful to distribute this pattern in any form (free, sale or trade).
A quiet place to keep crocheting
If projects like this one are your kind of calm, you might love the V-Stitch Club.
It is my little corner of the internet for women who crochet for the joy and the quiet of it, with new patterns, gentle company, and the steady rhythm of always having something beautiful on the hook.
Be Part of The Tribe!
Come share your finished Ridgeline Beanie in my free Facebook group. Join Crochet & Stories with Sandra Stitches.
P.S. Do you love this pattern? Share in the comments below and let’s build a supportive community of crocheters who love to learn and grow together!
Want more crochet scarf patterns?
DISCLOSURE
AMAZON ASSOCIATES: Sandra Stitches is a participant in the Amazon Services LLC Associates Program, an affiliate advertising program designed to provide a means for sites to earn advertising fees by advertising and linking to Amazon.com.
This post contains links to products that I use and recommend, If you purchase any using my links I get a very small fee at no ad to you! Thank you for supporting my small biz!

Hi my crochet friend!
Crochet has followed me from Argentina to Israel and through every crossroads since. Now I design calm, achievable crochet, made to feel possible.
Come find free patterns, tutorials, and the V-Stitch Club right here on the blog.