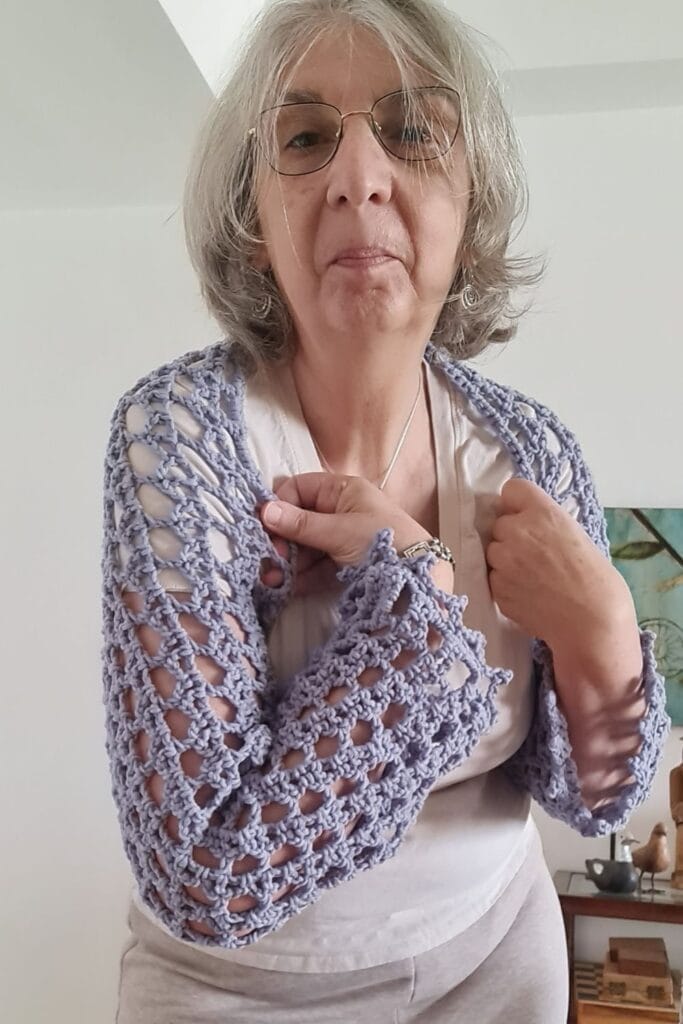
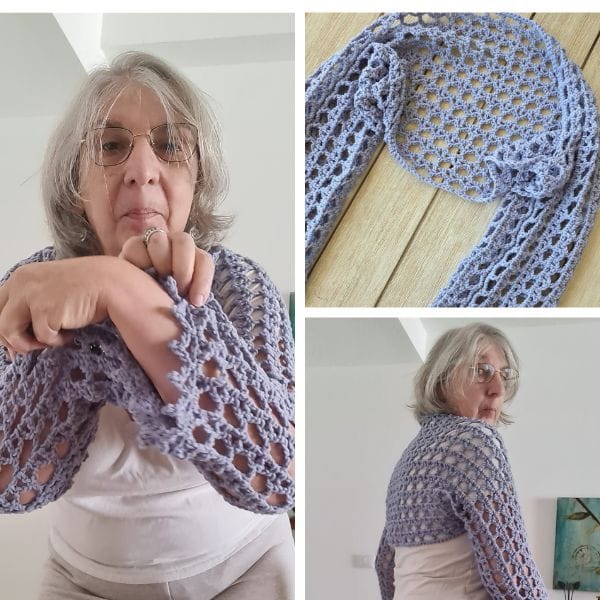
I have to be honest with you, when I finished this shrug I put it on and I didn’t want to take it off.
It’s that kind of piece. Light enough for summer, pretty enough to feel special, and open enough that the breeze actually comes through. That’s exactly why I called it the Breeze Shrug.
This free easy crochet shrug pattern is my contribution to the All Summer Crochet Blog Hop 2026, a blog hop I’m hosting this year, celebrating all things warm-weather crochet. More about that in a moment. But first, let’s talk about this shrug, because it really is something.
Scroll down for the free PDF download on June 1st – valid only for 24 hrs 👇

How to Get the Ad-free PDF of this Design
The pattern instructions are available below, but you can get the formatted, printable, ad-free PDF for just a few dollars in our shop and support my business, thank you!!!
No time to make it Today? Save to Pinterest!
Click your favorite image, below, and save to your Pinterest board or share with friends
What Makes This Shrug So Special
I designed this as a mesh crochet shrug, which means it has that gorgeous open, lacy look without being difficult at all. The mesh stitch is actually one of the most beginner-friendly stitches, it’s repetitive, rhythmic, and once you get going, your hands just know what to do next.
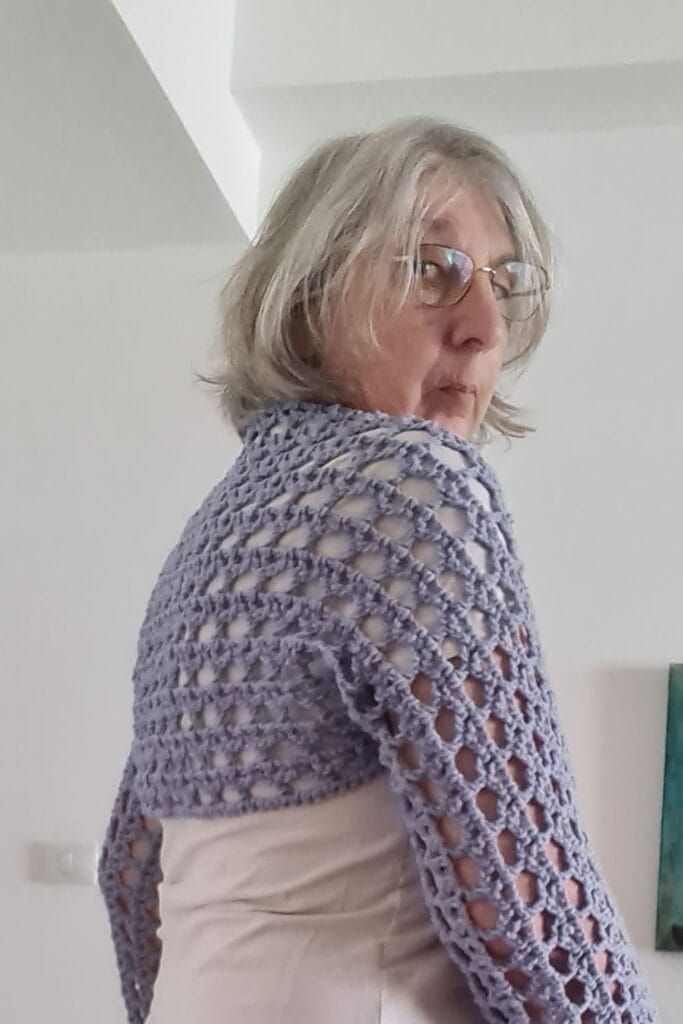
It drapes beautifully. It sits on your shoulders like it belongs there. And it goes over everything: a tank top, a summer dress, a linen blouse. You pick.
** Some of the links in this post may include affiliate links. Purchasing from one of these links pays me a small referral fee at no added cost to you. These small fees add up and help me keep the blog running. View our Disclosure and Privacy Policy for more information.
Before you get started, check out my newest favorite finds!
Yarn Winder – a perfect crochet accessory
Steamer for Clothes – Portable, ideal for crochet projects
Blocking Mat – 12.5″ for all your squares
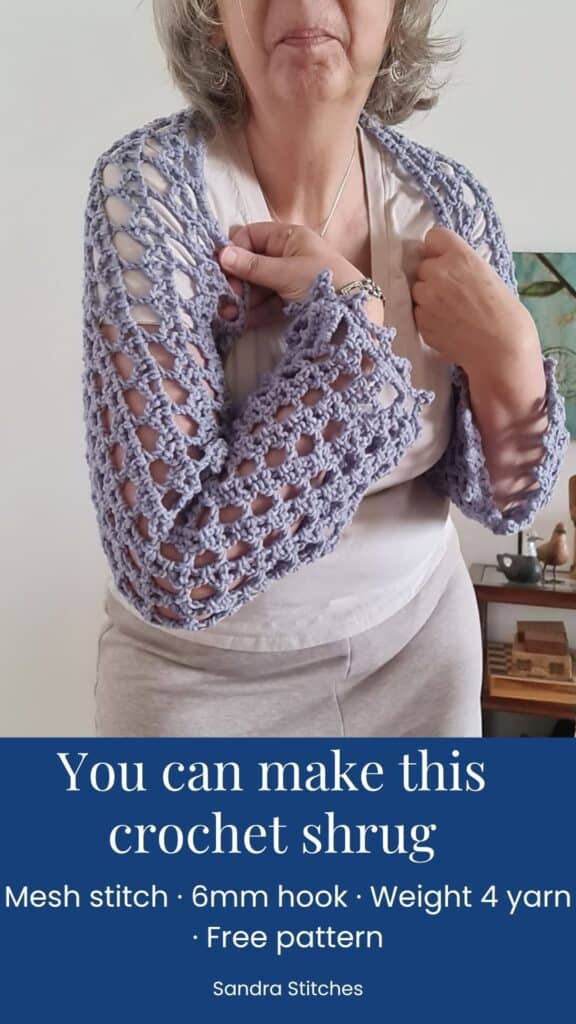
Pattern Details
Skill level: Easy Hook size: 6mm Yarn: Acrylic weight 4 (worsted) Stitch: Mesh This is a free crochet shrug pattern , the written pattern is right here on this blog, no sign-up needed.
If you’d like an ad-free PDF version you can print and keep in your project bag, you can grab that on my Payhip shop for a small fee. Totally optional, the free version isn’t going anywhere!
How to Get the Pattern
Scroll down on this page for the full written free crochet shrug pattern. Everything is here, the stitch counts, the construction, and the finishing details.
Why I Love Making Crochet Garments
Can I tell you something? I didn’t always feel confident making wearables.
For the longest time I stuck to scarves and accessories. Garments felt intimidating , all those sizing charts and shaping rows and “what if it doesn’t fit?” worries.
And then I discovered shrugs.
Because here’s the thing about a crochet shrug: it’s forgiving. It doesn’t need to be a perfect fit to look beautiful. It drapes, it stretches gently, it works on lots of different body shapes. And the construction is usually simple — often just a rectangle or a few panels that come together in a way that makes you feel like a genius when you’re done.
This easy crochet shrug pattern is exactly that kind of project. You’ll feel proud wearing it. And you should — you made it.
Tips Before You Start
A few things that will make your Breeze Shrug come out beautifully:
Check your gauge. I know, I know — but even a small difference in tension will change how your shrug fits. Take a few minutes to swatch first.
Stick with the weight 4 yarn. The mesh works best with a medium weight. Go heavier and you’ll lose the breezy drape. Go lighter and it may feel too delicate for everyday wear.
Block when you’re done. Wet blocking this shrug for even a short time will open up the mesh beautifully and give it that polished, “I made this on purpose” look.
The Breeze Shrug Pattern
Difficulty
Easy
Materials
- Weight 4 (medium) acrylic yarn
- Hook: Size 6 mm)
- Yarn Needle, Scissors, Measuring Tape
Sizes
- This sample is Approx. 60″ (length) x 16–17″ (width)
- Fully adjustable
Stitch Key
- Ch = Chain
- Sc = Single Crochet
- St = Stitch
- Dc = Double Crochet
- Yo = Yarn Over
Specialty Stitches
Lacy Picot st: [Ch 6,slst in 3rd ch from top down, ch3, sk 3 st, sc 1 in 4th st]
Notes
- This pattern uses US terminology
- The pattern is worked in rows
- Ch 1 at the beginning of the row does not count as st
- Ch 3 at the beginning of the row does count as st
- This pattern uses pattern repeats.
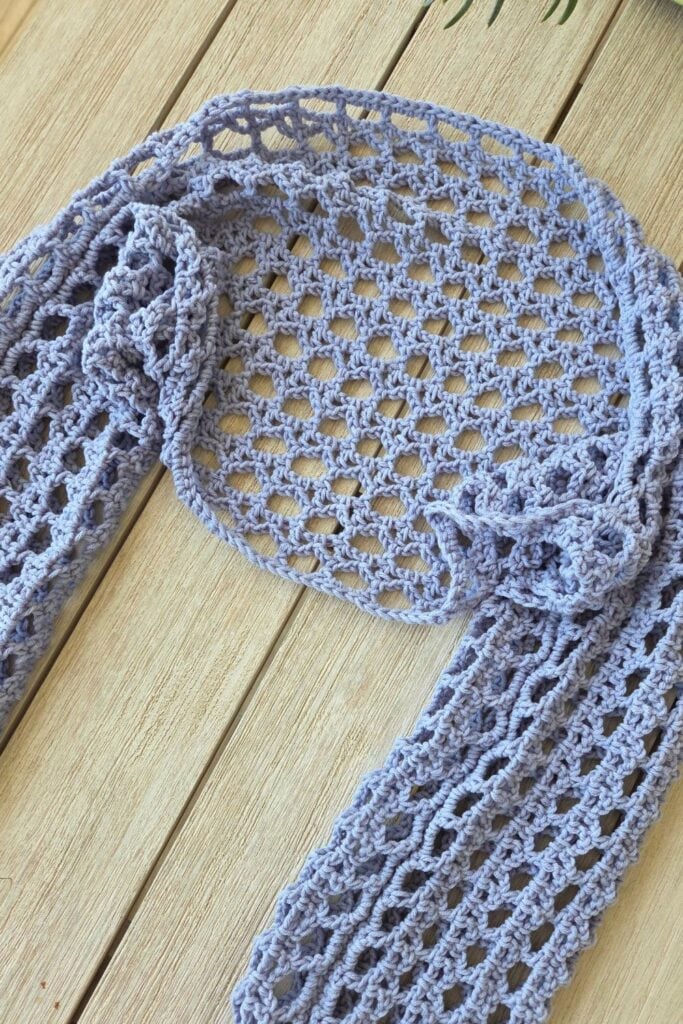
- Shrug is made as a rectangle, then folded and seamed
- Adjust length by changing starting chain (keep multiple)
- Adjust width by adding/removing rows
- Measure from hand to hand across your back for best fit
- You can work this pattern with one color or multiple as you wish- I used one solid colors
- If changing colors make sure to have a changing technique and weave your ends in.
- The multiple for this pattern is 4+2
Instructions
Chain 182
Row 1: Dc in 10th ch from hook, *Ch 2, skip next 3 ch, dc in next ch, Repeat from * across
Row 2: Ch 5 (counts as dc + ch 2),Sc in next ch-3 space, Ch 2, dc in next dc, ch 2, sc in next ch-3 space, Repeat from * across End with dc in top of turning chain
Row 3: Ch 6 (counts as dc + ch 3) ,Skip next two ch-2 spaces, Dc in next dc, Ch 3, skip next two ch-2 spaces, dc in next dc, Repeat from * across
End with dc in 3rd ch of turning chain
Repeat rows 2+3 continue until desired width, for this sample I made 12 rows
Construction
Fold
- Fold rectangle lengthwise, aligning short sides
Seaming
- From each outer edge, measure 17 inches (43 cm) toward the center
- Leave the middle open for neck/shoulders
- Using a tapestry needle, seam each side from the edge inward
- Use mattress stitch, working through the back loops
You will now have:
- Two sleeve openings
- One neck opening
Sleeve Edging
Round 1 (Foundation)
- Join yarn
- Work 1 round of single crochet evenly around
- Sl st to join
Round 2 (Picot Stitch)
- Sc in next stitch
- Ch 6
- Sl st in 3rd ch from hook
- Ch 3
- Skip 2–3 stitches
- Sc in next stitch
Repeat around.
Notes
- Adjust spacing (skip 2 or 3) as needed
- Focus on even distribution rather than exact count
Neckline & Body Opening
Round 1
- Join yarn at any point
- Work 2 single crochet in each stitch/space around
- Sl st to join
Notes
- You are working into the sides of rows, so 2 sc per space helps create a smooth edge
- Adjust if needed:
Too wavy → use fewer stitches in places
Too tight → add stitches
Finishing
Cut your yarn and weave in the ends. Block your scarf for the edge to stand out
Love This Pattern? There’s More Where That Came From!
You will discover my complete collection of crochet patterns,
tutorials, and resources, both free and premium, all in one convenient place.
I know you’ll find something to inspire your next project🙃
Love What You See?
If my patterns and tutorials brighten your day, you can now support me with a tiny virtual coffee on Ko-fi! ☕
Every little bit helps me keep creating and sharing more cozy crochet magic💛
About the All Summer Crochet Blog Hop 2026
This pattern is part of something bigger and I’m so excited to tell you about it.
I’m hosting the All Summer Crochet Blog Hop 2026 a collection of free crochet patterns designed by different crochet designers, all released this summer, all celebrating warm-weather making.
Each designer on the hop shares a free pattern on their blog. You hop from blog to blog, collect the patterns, and hopefully find some wonderful new designers along the way. It’s one of my favorite things about the crochet community , how generous everyone is.
Click here to see all the patterns in the All Summer Crochet Blog Hop 2026 👇
**This is an original Sandra Regev pattern: Owner /Designer of Sandra Stitches. This pattern may not be redistributed for free, sale, or trade, but finished products can be sold with credit to this shop – enjoy!
If crochet supports your well-being, you’re not alone
Join the V-Stitch Club and create cozy handmade socks while caring for yourself
Looking for more crochet accessories patterns👇
Check out all these, you will find one!
Did you try this Pattern? Share a picture
Tag me on Instagram
@sandrastitchesil
You’ve Got Your Pattern, Now What?
- PIN FOR LATER – Don’t lose this pattern. Save it to your Pinterest account so you can quickly come back to it later.
- SHARE YOUR WORK – Share your in-progress and finished projects on Facebook or Instagram and use the hashtag #sandrastitchesil
- SHOW OFF – Create a project on Ravelry to inspire and share your thoughts with others who might be interested in this project.
Questions?
Ask and share in our
FREE Facebook Group
DISCLOSURE
AMAZON ASSOCIATES: Sandra Stitches is a participant in the Amazon Services LLC Associates Program, an affiliate advertising program designed to provide a means for sites to earn advertising fees by advertising and linking to Amazon.com.
This post contains links to products that I use and recommend. If you purchase any using my links, I get a very small fee at no ad to you! Thank you for supporting my small biz!


