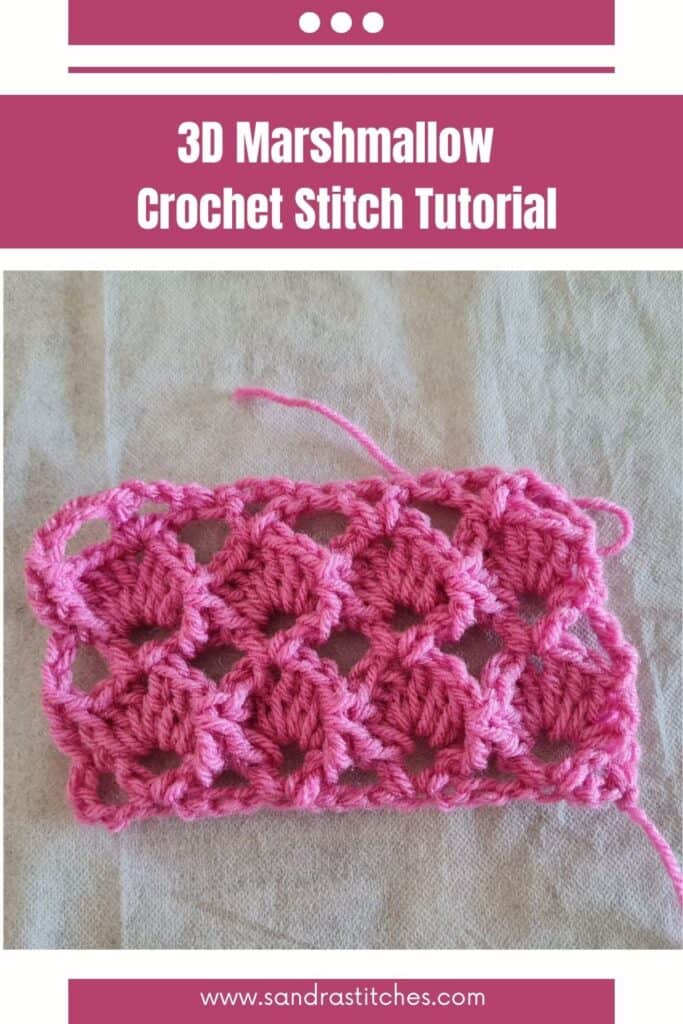
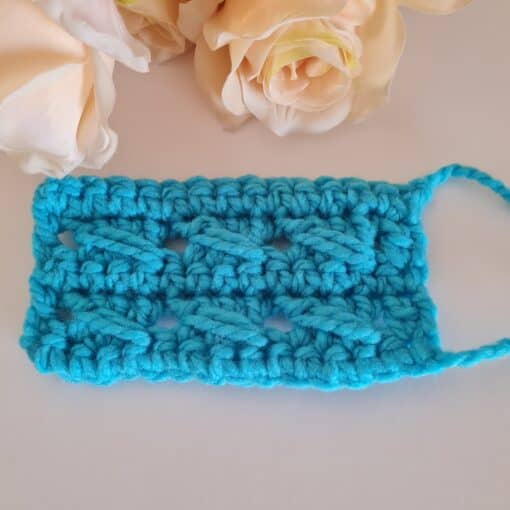
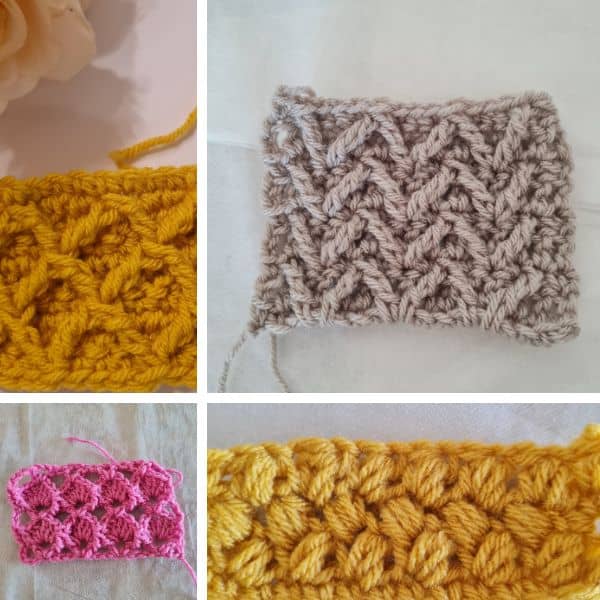
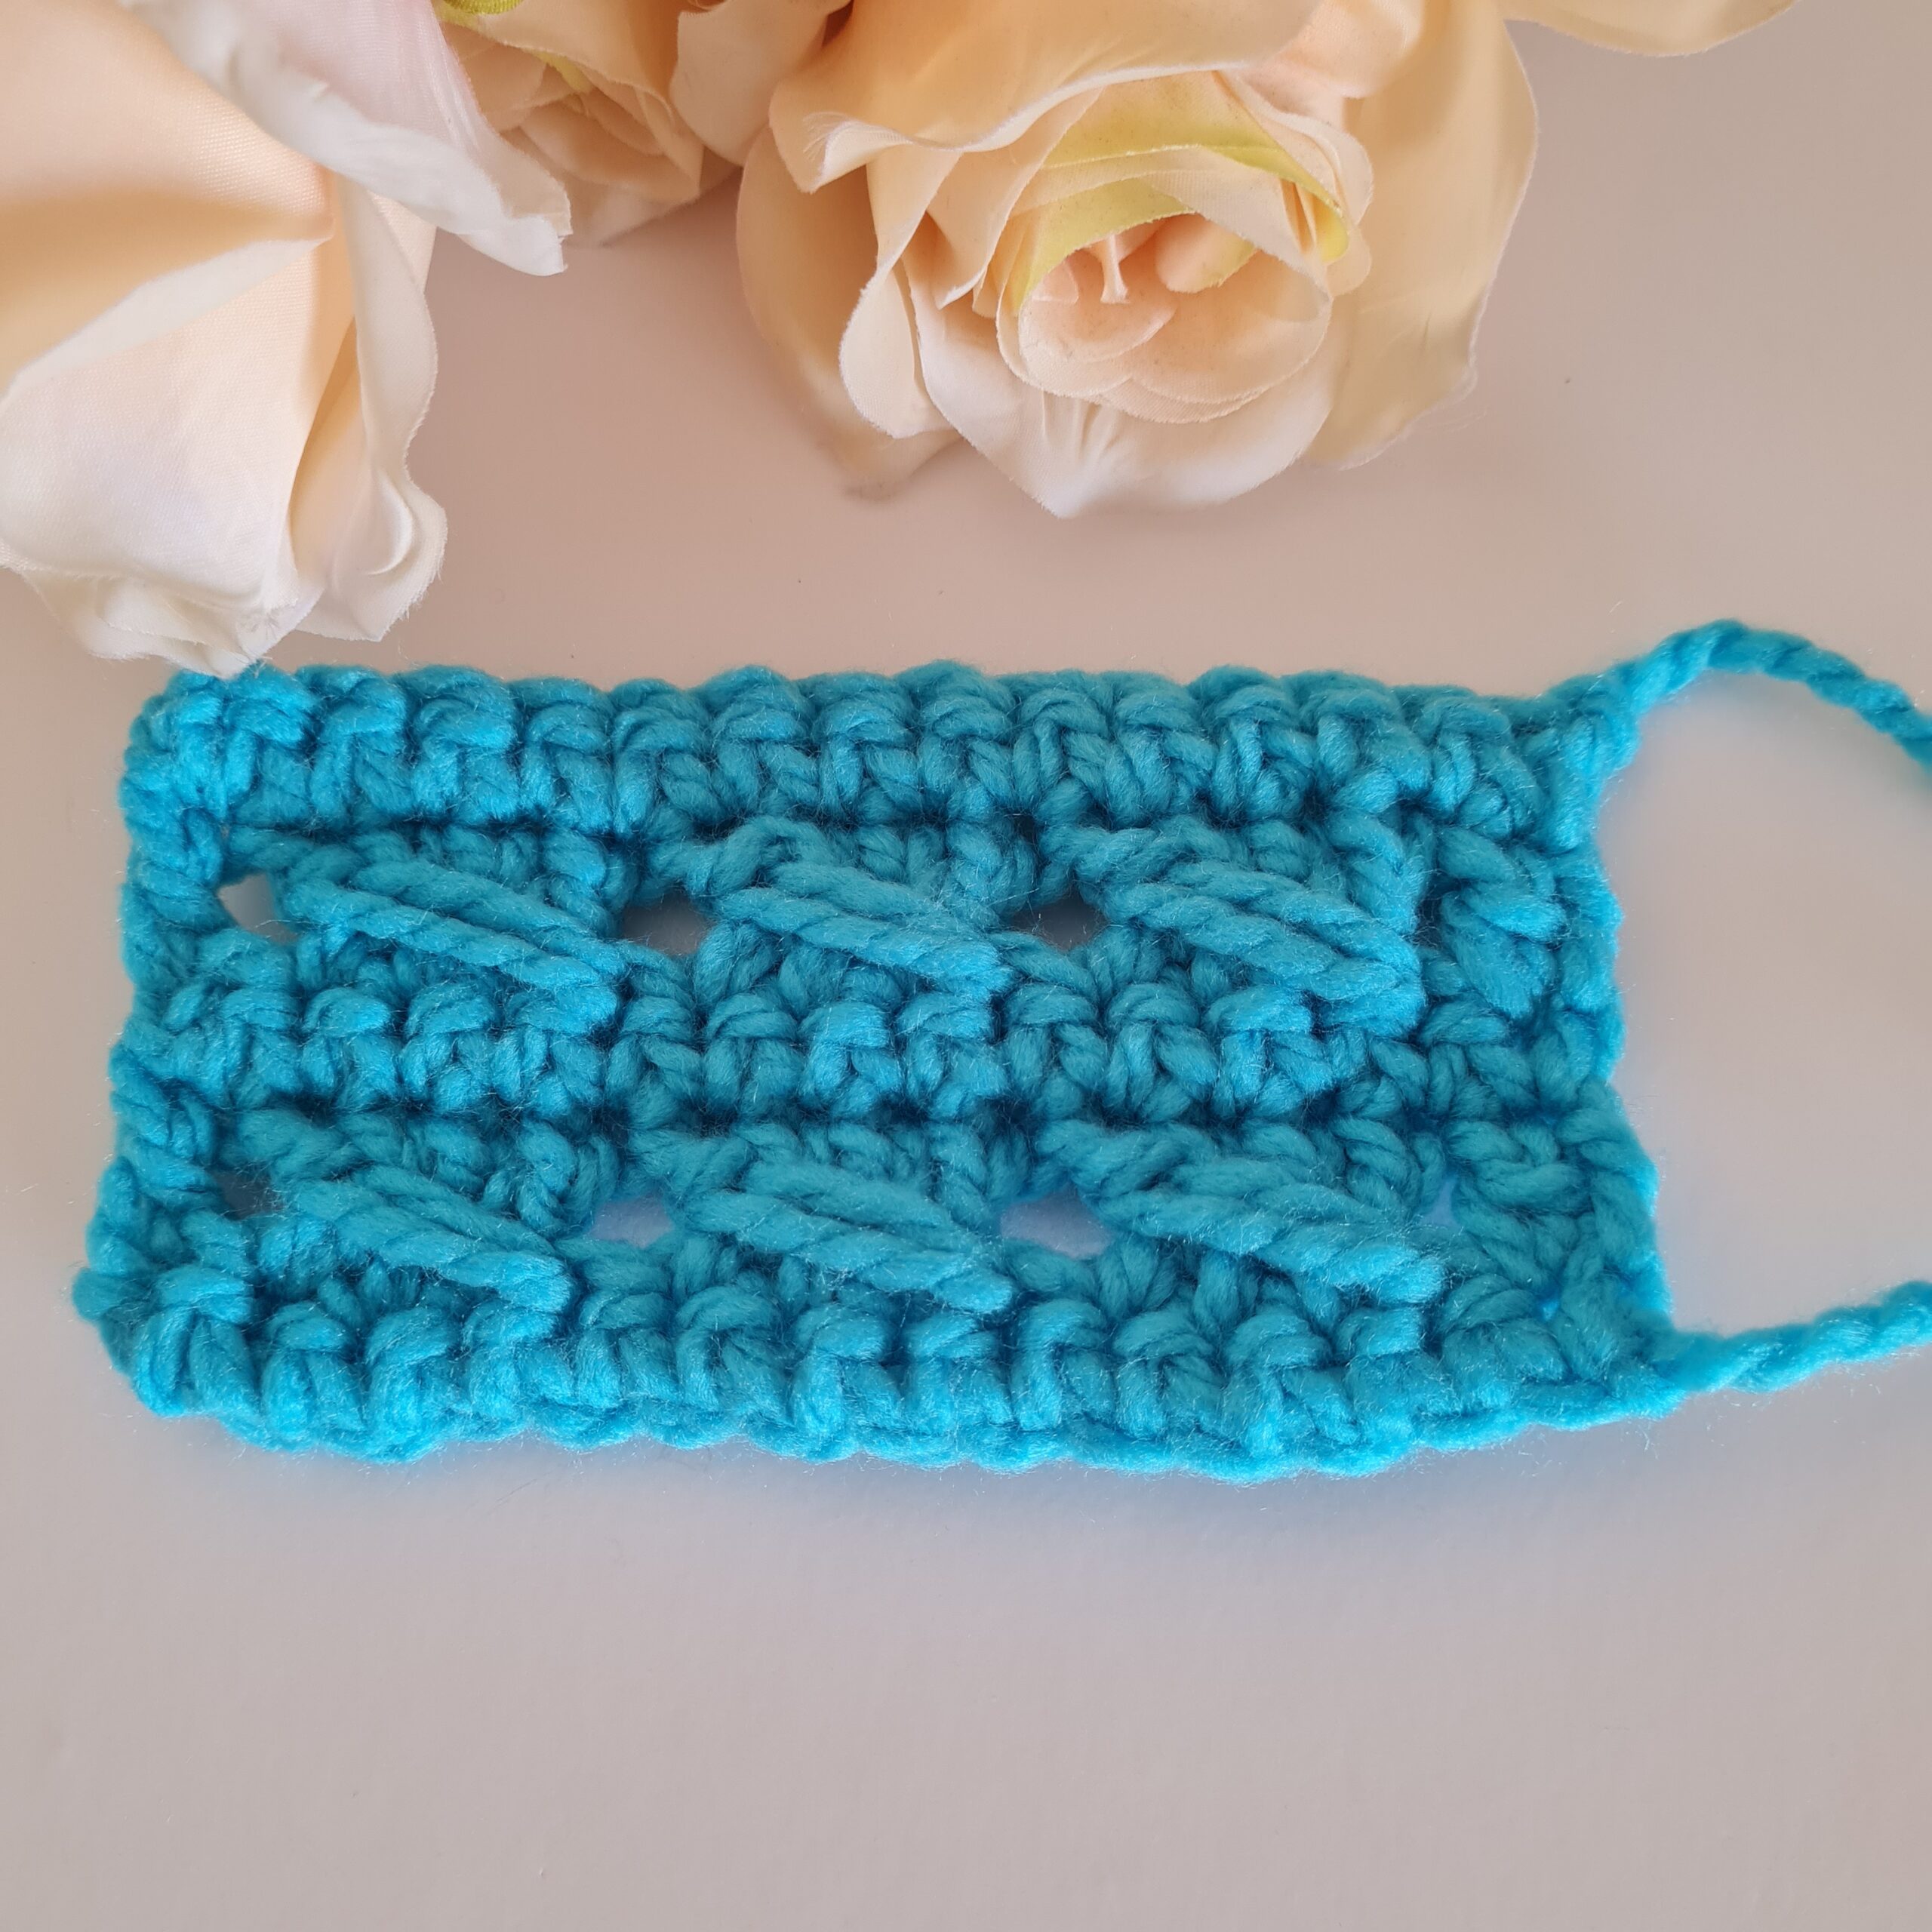
The Marshmallow Stitch, also known as the Marshmallow Shell Stitch, is more than just a stitch. It’s a ticket to making cozy, textured things. Imagine blankets with fluffy, 3D fans. Think about a scarf that’s soft to touch, or maybe even a stylish top.
This stitch mixes double crochets and front post tricks. It’s a fun challenge for all skill levels. This easy guide breaks down the Marshmallow Stitch. Soon, you’ll make awesome, textured projects.
If you want to learn new stitches or are eager for new skills, this guide is for you. It will help you master the Marshmallow Stitch. You can unlock lots of creative options.
Watch the video below for a step-by-step tutorial
Be creative!
Understanding the Marshmallow Stitch
This stitch has a special look. It can be airy or dense, based on the hook size. The stitch works well for many projects.
What is the Marshmallow Stitch?
It’s a stitch with a textured, fan-like look. The stitch brings a unique feel. It is visually appealing to any project.
The form you have selected does not exist.
Do you want to save this post for later? Pin it 👇

Hook and Yarn Considerations
A 6mm hook is good for this stitch. You can use any yarn you like. Be sure to use the right hook size for your yarn. Different hooks and yarns change how the stitch looks.
Project Ideas
The Marshmallow Stitch looks great in blankets. Try it with scarves, baby items, or tops. Get creative and see what you can make.
** Some of the links in this post may include affiliate links. Making a purchase through one of these links pays me a small referral fee at no added cost to you. These small fees add up and help me keep the blog running. View our Disclosure and Privacy Policy for more information.
Step-by-Step Guide to Row 1: Foundation Row
Start with chains in multiples of 4, then add one more. Make a V-stitch with the right spacing. Skip chains and end the row the right way.
Creating the Initial Chain
To find your chain count, use multiples of 4 + 1. Make a slip knot and start your chain. This is the base for the stitch.
The V-Stitch Foundation
Make a V-stitch with a double crochet, chain 2, and another double crochet in the same chain. It creates the first row’s pattern. Ensure each V-stitch sits correctly.
Completing Row 1
Repeat the pattern for Row 1. Skip chains as needed. End the row with a double crochet.
Mastering Row 2: The Fan Creation
Row 2 is trickier. It uses front post double crochets to make a fan. Learn the front post double crochet two together (fpdctog) stitch.
Front Post Double Crochet Start
Start with a chain 3. Then, do a front post double crochet. Work it on the first double crochet from the row before.
Creating the Fan
Make a fan with three double crochets. Add a chain 1, then three more double crochets in the chain 2 space. These form the fan shape.
Front Post Double Crochet Two Together (fpdctog)
The fpdctog joins two double crochets. Do the front post stitch. Then, join two stitches into one.
Repeating Rows 2 and 3: Building the Pattern
The pattern repeats every two rows. Learn how to switch between Row 2 and Row 3. Row 3 is easy, with V-stitches in the chain spaces.
Row 3: The V-Stitch Row
Make V-stitches in the chain 1 spaces. These spaces are from the fans you made earlier.
Row 2 Repeat: Solidifying the Pattern
Do Row 2 again, make fans. Remember the front post double crochet steps.
Before you get started…
Check out my Favorite items and tools
Rechargeable LED night reading light on Amazon
Bamboo Hooks on Amazon
Colorful Bobby pins as crochet markers on Amazon
Crochet Marshmallow Stitch Video Tutorial
Love This Pattern? There’s More Where That Came From!
You will discover my complete collection of crochet patterns, tutorials, and resources, both free and premium all in one convenient place.
I know you’ll find something to inspire your next project🙃
All Things Crochet Start Here →
Tips for Maintaining Consistency
Keep your stitches even. Avoid common mistakes. Watch your tension.
Troubleshooting and Customization
Fix problems you might find. Try different colors and yarns.
Common Mistakes and How to Fix Them
If your stitch count is wrong, count again. Keep your tension even. Adjust your hook if needed.
Colorwork Ideas
Change colors every row. Try variegated yarn. See what looks best to you. Will mixed color work well or be too busy?
Yarn and Hook Size Variations
Adjust the pattern for different yarns and hooks. Thicker yarn needs a bigger hook. Thinner yarn needs a smaller one.
Want more stitch tutorials?
The Marshmallow Stitch makes texture. It is easier than it looks. Now you can make blankets, scarves, and more.
Keep practicing and trying new things. Change the yarn and hook. Play with colors. Make the pattern your own. Start your Marshmallow Stitch journey.
Click here to share your finished project with our community!
The form you have selected does not exist.
A new stitch steps
- When learning a new stitch, try several yarn weights and hook sizes to understand how the stitch works and looks.
- Use light yarn colors to get the stitch to form the right shape.
- Make several swatches before starting a new project
Stay Calm and Crochet!😎
Sandra
Interested in a professional Paperback Crochet Planner?
DISCLOSURE
AMAZON ASSOCIATES: Sandra Stitches is a participant in the Amazon Services LLC Associates Program, an affiliate advertising program designed to provide a means for sites to earn advertising fees by advertising and linking to Amazon.com.
This post contains links to products that I use and recommend, If you purchase any using my links I get a very small fee at no ad to you! Thank you for supporting my small biz!
Pin for later 👇
Want to know more about me? This is my story
DISCLOSURE
AMAZON ASSOCIATES: Sandra Stitches is a participant in the Amazon Services LLC Associates Program, an affiliate advertising program designed to provide a means for sites to earn advertising fees by advertising and linking to Amazon.com.
This post contains links to products that I use and recommend, If you purchase any using my links I get a very small fee at no ad to you! Thank you for supporting my small biz!
