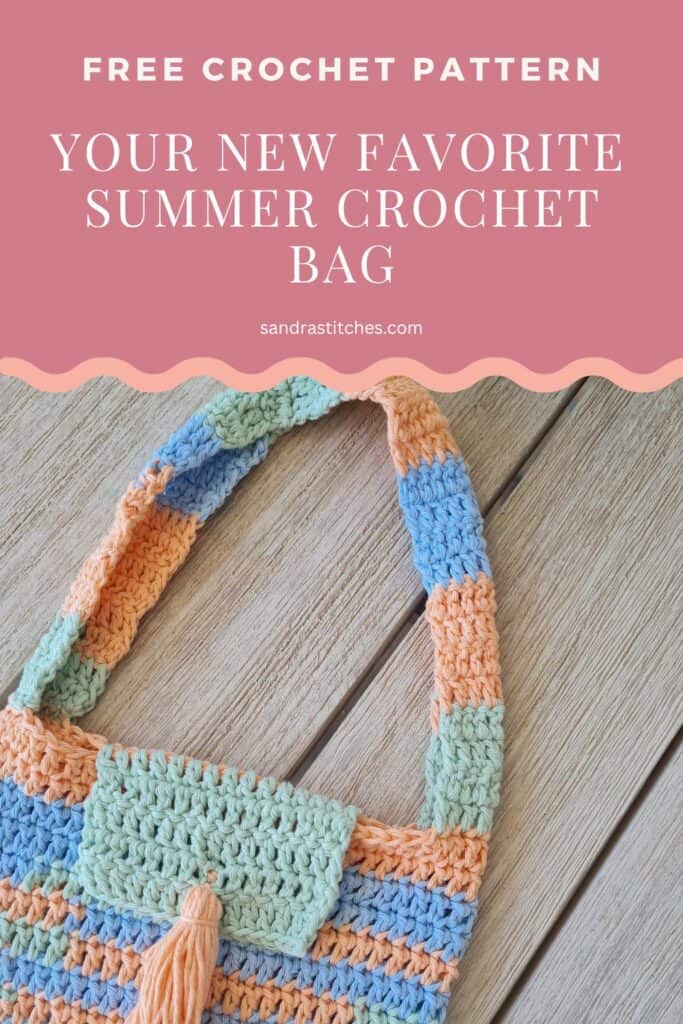
Quick answer: This is the Festival Stripes Tote, a scrap yarn tote bag made by joining random lengths of yarn with the magic knot before you start crocheting. The stripes appear on their own as you work, and there are no ends to weave in.
Jump straight to the Festival Stripes Tote pattern ↓
Say hello to your new favorite little bag! The Festival Stripes Crochet Tote is colorful, fun, and just the right size for tossing in your keys, phone, and a snack (or yarn, you know how we do).
I wanted something playful and easy, the kind of project you can pick up on a summer afternoon and finish before the weekend’s over.
The stripes are totally random, the yarns are stash-friendly, and best of all, there are no ends to weave in. Yep. Magic.
Find the free pattern below or purchase the ad-free PDF version of this pattern HERE. The PDF is designed for printing, and by doing so, you can support me. Thank you
Do you want to save this post for later? Go ahead and PIN IT!
About the Stripe Technique
Let’s talk about those fun, happy stripes.
You know I love a bit of controlled chaos when it comes to color.
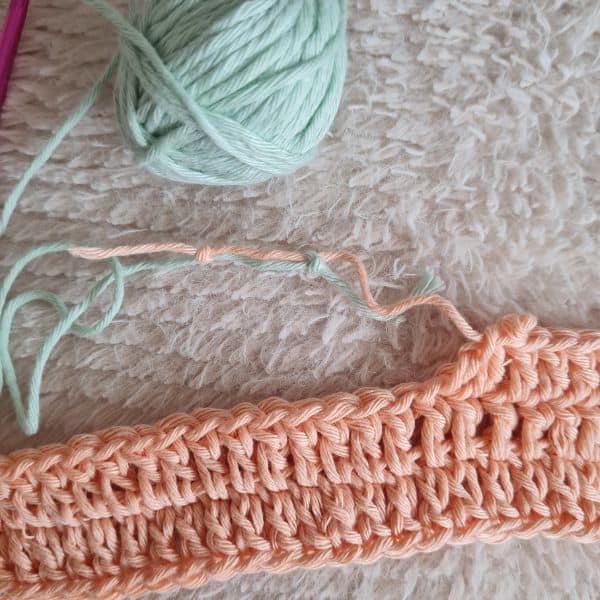
For this bag, I cut random lengths of my chosen yarns and joined them all together before crocheting, using the Fisherman’s Knot (also called the Magic Knot). Watch the tutorial if you’ve never tried it.
That way, I had one big colorful ball of yarn ready to go, and I didn’t have to stop and change colors or deal with tails later.
It’s the easiest way to get that joyful, mismatched stripe look without weaving in a million ends. Highly recommend. If you love this kind of playful color mixing, the Moroccan Tiles Cordoba Bag plays with color in a very different way.
** Some of the links in this post may include affiliate links. Purchasing from one of these links pays me a small referral fee at no added cost to you. These small fees add up and help me keep the blog running. View our Disclosure and Privacy Policy for more information.
Before you get started, check out my newest favorite finds!
Yarn Winder – a perfect crochet accessory
Steamer for Clothes – Portable ideal for crochet projects
Blocking Mat – 12.5″ for all your squares
How to Line a Crochet Tote Bag (And Why You Might Want To)
Lining a crochet tote bag might sound like an extra step, but it can really take your project to the next level!
If you’ve ever made a crochet tote bag pattern and noticed it stretches a little under weight, a simple fabric lining can help keep its shape and protect your yarn work from wear and tear.
It’s especially useful if you plan to carry smaller items or use your crochet bag regularly.
I usually go for a cotton fabric and hand-stitch or machine-sew it in after the bag is finished.
Totally optional, but it adds durability, a pop of personality, and that satisfying “finished” feel! If you’d rather use a sturdier yarn instead of lining, the Sunset Stripe Tote is worked entirely in cotton for that reason.
Making a Handmade Crochet Summer Tote
Difficulty
Intermediate
Colorful Crochet Bag Pattern: Materials and Tools You’ll Need
This is the yarn I had at hand . Do not forget I make a sample for you to learn, so be creative and choose the yarn you love. Feel it before starting your project.
I know there are a million different yarn choices out there, but that also depends on where you live, so just be creative!
Drops Paris 100% cotton yarn, 85 g in total, using 3 colors ( peach, green, and blue)
Subs: https://yarnsub.com/yarns/garnstudio/drops_paris
Hook: US G-6 (4mm)
Yarn Needle, Scissors, Measuring Tape
Gauge
- 14 st X 8 Rounds ( 4” X 4”)
Sizes
Can be modified as you wish
This sample is: 9” wide X 6” height without straps
Stitch Key
- Ch = Chain
- Sc = Single Crochet
- St = Stitch
- Dc = Double Crochet
- Slst = Slip stitch
- Yo = Yarn Over
Notes
- The pattern is worked in rounds and rows
- This pattern is worked in one piece for the body
- Ch2 at the beginning of the row does count as 1st stitch
- Ch1 at the beginning of the row does not count as a stitch
- You can work this pattern with one color or multiple, as you wish- I used three colors
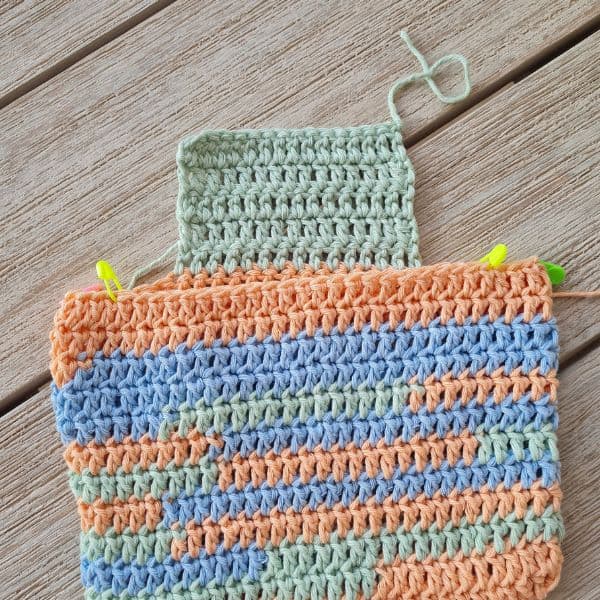
- To obtain the color changes of the stripes, I cut different lengths of yarn in all 3 colors and joined them using the fishermen knot ( this way I did not have lots of ends to weave in and could continue stitching.
- Watch the video tutorial for the knot
- I worked a small size tote- you can decide on any size
Sandra’s tip: Cut your yarn lengths in genuinely random sizes, not a repeating pattern, that’s what gives the finished stripes their scrappy, unplanned look. If you cut them all the same length, the stripes will end up looking more deliberate than random.
Instructions
Chain 30
Row 1: Dc 1 in 3rd st from hook, dc 1 in next and across to last st, (29)
Now we start a round: dc 3 in the same last st (total of 2 in same st), turn work around and dc 1 in back of next st, dc 1 in next and across to last st , Slst to 1st st to close the round (58)
Round 2: Ch 2 ( counts as 1st dc), dc 1 in next st, dc 1 in next and around, Slst to ch 2 (58)
Round 3-12: Repeat round 2 ( As you crochet through the yarn ball created from various lengths of different colored yarns, the color changes will appear automatically)
The Strap
Row 1: Ch 2, dc 1 in next st and next 8 stitches to a total of 9 stitches, turn
Row 2- 34: Ch 2, dc 1 in next st and across to end, join with Slst to opposite side of the bag
Cut yarn
Introduce yarn skipping 2 stitches from the strap to the center of the bag, dc 1 in the next 15 st, turn and repeat for a total of 5 rows to make the closing part
Finishing
Cut yarn and weave in ends.
Add a tassel using one yarn color and enjoy!
Enjoy!
**This is an original Sandra Regev pattern: Owner /Designer of Sandra Stitches. This pattern may not be redistributed for free, sale, or trade, but finished products can be sold with credit to this shop – enjoy!
FAQ
Yes, tied correctly it sits flat and stays secure through washing and regular use, since it’s actually two overlapping knots rather than one. It’s the reason this bag has zero ends to weave in despite using three different colors. (Some crocheters also call this the Magic Knot, same technique.)
Cut your yarn lengths in genuinely uneven sizes before joining them with the Fisherman’s Knot. If every piece is the same length, the stripes will look more even and planned than the scrappy look this pattern is going for.
No, lining is optional. It helps the bag hold its shape under weight and keeps smaller items from slipping through the stitches, but plenty of people use a bag like this unlined without issues
It’s rated intermediate, mainly because of the strap and closing construction rather than the stitches themselves, which are just chain, single crochet, and double crochet
A quiet place to keep crocheting
If projects like this one are your kind of calm, you might love the V-Stitch Club.
It is my little corner of the internet for women who crochet for the joy and the quiet of it, with new patterns, gentle company, and the steady rhythm of always having something beautiful on the hook.
Be Part of The Tribe!
Come share your finished Ridgeline Beanie in my free Facebook group. Join Crochet & Stories with Sandra Stitches.
Questions?
Ask and share in our
FREE Facebook Group
DISCLOSURE
AMAZON ASSOCIATES: Sandra Stitches is a participant in the Amazon Services LLC Associates Program, an affiliate advertising program designed to provide a means for sites to earn advertising fees by advertising and linking to Amazon.com.
This post contains links to products that I use and recommend, If you purchase any using my links I get a very small fee at no ad to you! Thank you for supporting my small biz!

Hi my crochet friend!
Crochet has followed me from Argentina to Israel and through every crossroads since. Now I design calm, achievable crochet, made to feel possible.
Come find free patterns, tutorials, and the V-Stitch Club right here on the blog.