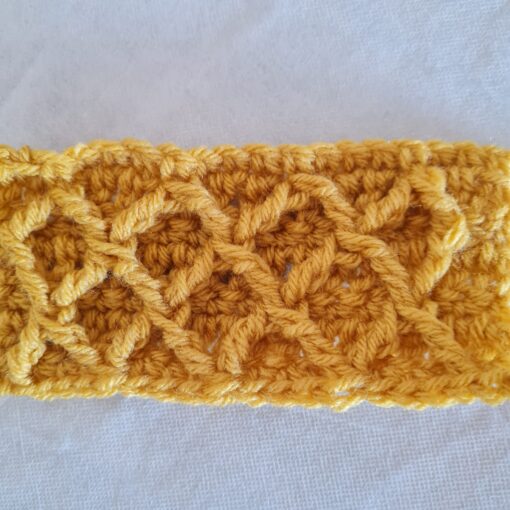
Master the Crossed Ripple Crochet Stitch: A Step-by-Step Tutorial.
Ever seen a crochet stitch that just pops? The Crossed Ripple Stitch does exactly that! It’s got this awesome texture from the front posts mixed with a cool cross-stitch design.
I am here to show you how to make it! It’s way easier than it looks, and the result? Amazing.
Think blankets with a twist, stylish tops, or anything your crochet heart desires. Ready to add this eye-catching stitch to your skills? Let’s get started!
Watch the video below for a step-by-step tutorial
Be creative!
Why You’ll Love This Stitch
Visual Appeal: It just looks impressive, doesn’t it?
Texture: The front post stitches add a depth that’s hard to ignore.
Versatility: Great for blankets, scarves, sweaters, and more.
The form you have selected does not exist.
Do you want to save this post for later? Pin it 👇

What You’ll Need
Before diving in, gather these goodies:
- 6 mm Crochet Hook: This size works well for the yarn used in the tutorial.
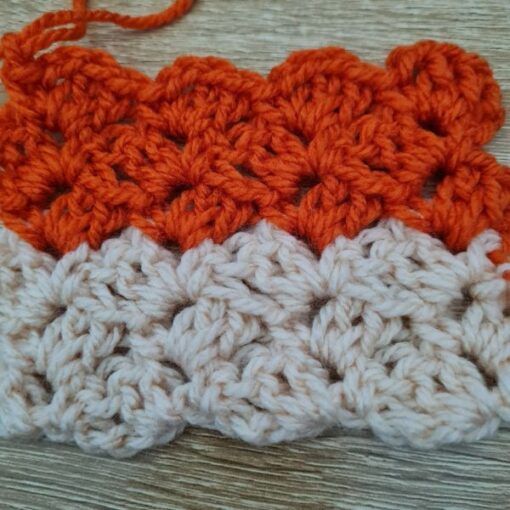
- Scrap Yarn: Any yarn will work, but the tutorial uses a chunky yarn for demonstration.
- Scissors: For cutting the yarn, of course!
- Yarn Needle: To weave in those pesky ends.
Choosing the right hook size for your yarn is really important! Too small, and your fabric will be stiff. Too big, and it’ll be too loose.
If you’re ready, grab your materials, and let’s get crocheting!
** Some of the links in this post may include affiliate links. Making a purchase through one of these links pays me a small referral fee at no added cost to you. These small fees add up and help me keep the blog running. View our Disclosure and Privacy Policy for more information.
Understanding the Stitch: Multiples of Three
Here’s the deal: This stitch pattern requires a chain in multiples of three.
Why? Because of how the stitches cross and create the ripple effect. If you don’t follow this rule, the pattern won’t line up correctly.
Let’s say you want your project to be 15 stitches wide. Just chain 15! Easy peasy.
Before you get started…
Check out my Favorite items and tools
Rechargeable LED night reading light on Amazon
Bamboo Hooks on Amazon
Colorful Bobby pins as crochet markers on Amazon
Getting Started: Foundation Rows
These rows are like the secret sauce. They give your stitch the height and stability it needs to really shine.
Row 1: Single Crochet Foundation
This row is all about setting the stage.
- Skip the first chain from the hook.
- Single crochet in each chain across the foundation chain.
- Make sure you get one single crochet in each chain.
This first row can be called a foundation chain or starting chain. If you chain 15, you’ll end up with 14 single crochets. Remember, we skipped that first chain!
Row 2: Setting Up the Cross
Time to get those crosses going!
- Chain 3 (this counts as your first double crochet).
- Skip two stitches.
- Double crochet in the third stitch.
- Chain 1.
- Go back to the first skipped stitch and double crochet. You’re crossing the stitches here!
Repeat those steps across the row. End with one double crochet in the last stitch.
The Crossed Ripple Stitch Pattern: Repeating Rows
This is where the magic happens! Once you get these two rows down, you’re golden.
Row 3 (First Repeat Row): Single Crochet Row
Simple, but crucial!
- Single crochet in each stitch and chain space across the row.
Yep, you read that right. Don’t forget those chain spaces! They’re sneaky little things.
Double check that you have the same number of stitches as when you started. It’s a good habit to get into. If you started with 14 stitches, you should still have 14 at the end of this row!
Row 4 (Second Repeat Row): The Cross Ripple
Get ready to ripple!
- Chain 3 (counts as the first double crochet).
- Skip two stitches.
- Double crochet in the third stitch.
- Chain 1.
- Front Post Double Crochet into the first double crochet from two rows below.
Whoa, front post what-now? It sounds complicated, but it isn’t. Yarn over, go down and look for the first double crochet from two rows below, yarn over and finish your double crochet.
Instead of working in the skipped stitch, you’re working a front post around the double crochet from two rows below. Repeat across the row, and finish with one double crochet in the last stitch.
Crochet Crunch Stitch Video Tutorial
Love This Pattern? There’s More Where That Came From!
You will discover my complete collection of crochet patterns, tutorials, and resources, both free and premium all in one convenient place.
I know you’ll find something to inspire your next project🙃
All Things Crochet Start Here →
Continuing the Pattern
You’ve got the basics down! Now, just repeat rows 3 and 4. Keep going until your project is the size you want.
Don’t skip the single crochet rows! They’re super important for keeping your fabric stable.
Tips and Tricks
- You might notice some curling as you work. Don’t panic! The single crochet rows will straighten things out.
- Keep your tension consistent. This will give you a smooth, even fabric.
Share Your Projects!
I can’t wait to see what you create! Share your finished Crossed Ripple Stitch projects using #CrossedRippleStitch or #SandraStitches.
So, what do you think? Will you give the Crossed Ripple Stitch a try? Grab your hook and yarn, and let’s get crocheting!
Want more stitch tutorials:
Click here to share your finished project with our community!
A new stitch step
- When learning a new stitch, try several yarn weights and hook sizes to understand how the stitch works and looks.
- Use light yarn colors to get the stitch to form the right shape.
- Make several swatches before starting a new project
Stay Calm and Crochet!😎
Sandra
Interested in a professional Paperback Crochet Planner?
DISCLOSURE
AMAZON ASSOCIATES: Sandra Stitches is a participant in the Amazon Services LLC Associates Program, an affiliate advertising program designed to provide a means for sites to earn advertising fees by advertising and linking to Amazon.com.
This post contains links to products that I use and recommend, If you purchase any using my links I get a very small fee at no ad to you! Thank you for supporting my small biz!

