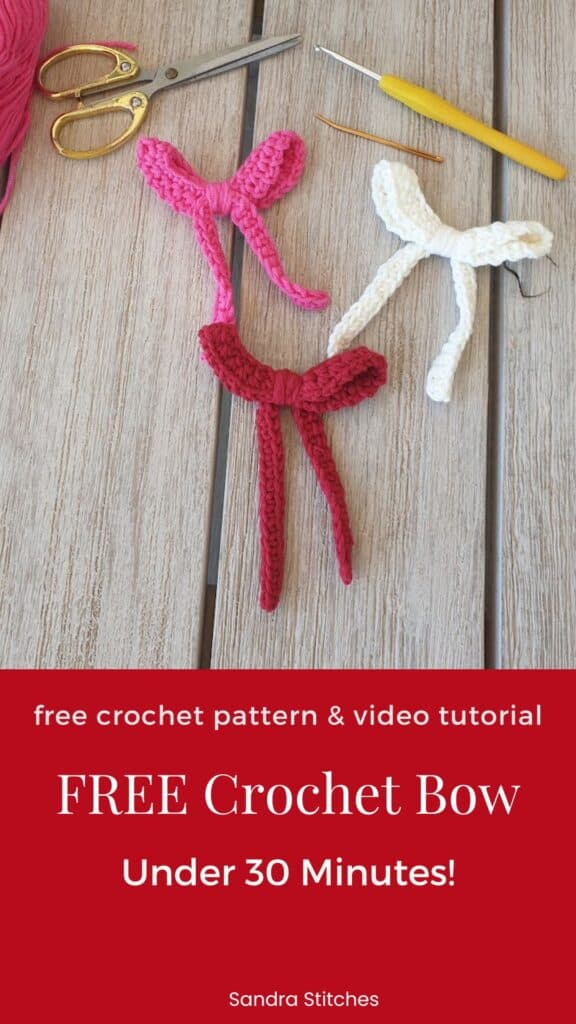
This free crochet bow pattern, the Happy Bow, is one of the quickest and most satisfying projects you’ll ever make.
With just a 3.5mm hook and a small amount of fingering yarn, you can crochet this beautiful bow in under 30 minutes.
Attach it to a bag, make it into a keychain, use it as a gift topper, clip it to your hair, or hang it in your car.
Once you make one, you’ll want to make it in every color.
Are you with me?
Watch the Tutorial
How to Get the Ad-free PDF of this Design
The pattern instructions are available below, but you can get the formatted, printable, ad-free PDF for just a few dollars in our shop and support my business, thank you!!!
No time to make it Today? Save to Pinterest!
Click your favorite image, below, and save to your Pinterest board or share with friends
What You’ll Need
- Fingering weight or light yarn — cotton or cotton blend works beautifully
- 3.5mm crochet hook
- Tapestry needle
- Scissors
Yarn suggestions: This pattern works with both acrylic and cotton yarn. Cotton gives a crisp, defined finish. Acrylic is softer and great for gift toppers.
** Some of the links in this post may include affiliate links. Purchasing from one of these links pays me a small referral fee at no added cost to you. These small fees add up and help me keep the blog running. View our Disclosure and Privacy Policy for more information.
Before you get started, check out my newest favorite finds!
Yarn Winder – a perfect crochet accessory
Steamer for Clothes – Portable, ideal for crochet projects
Blocking Mat – 12.5″ for all your squares
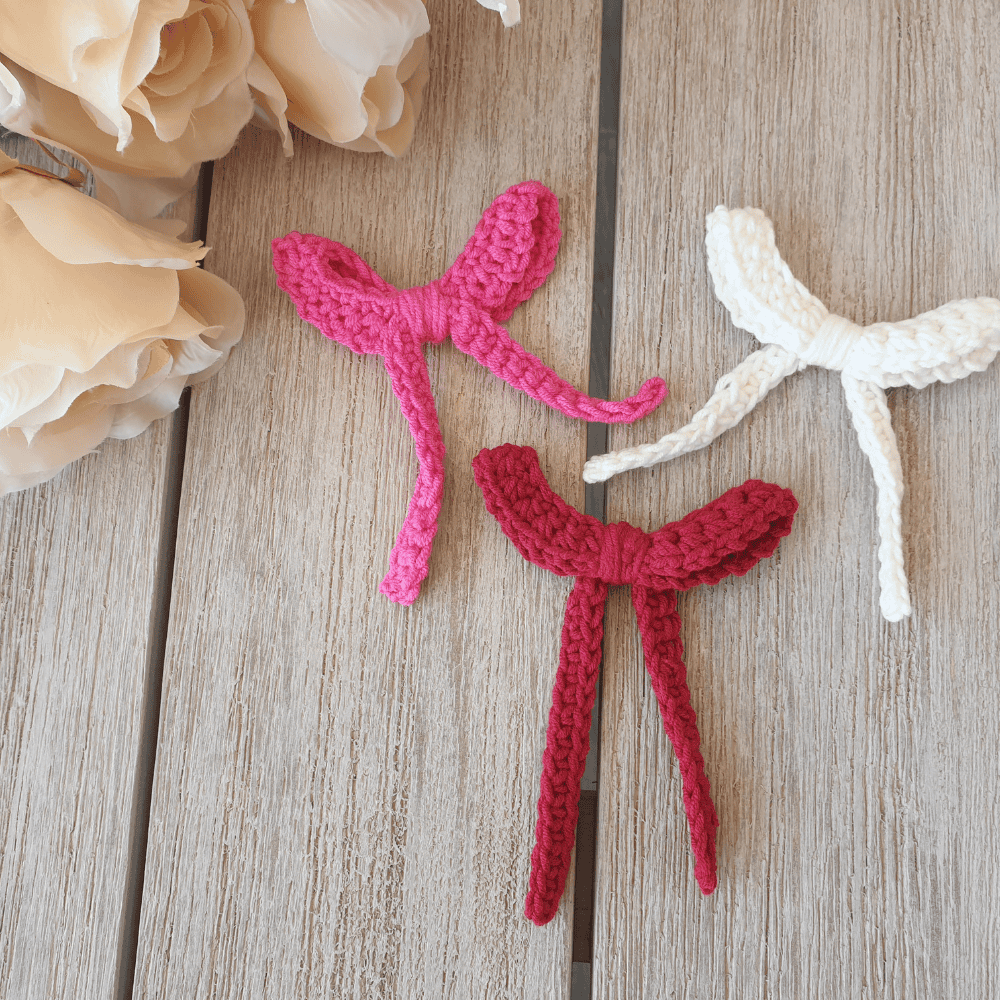
What Can You Do With This Bow?
The Happy Bow is endlessly versatile. Here are five ways to use it:
Bag charm — Attach to a zipper pull or bag handle for an instant style upgrade.
Keychain — Thread through a keyring for a sweet handmade accessory.
Gift topper — Replace a store-bought ribbon with a handmade crochet bow. Perfect for grandchildren’s gifts!
Hair clip — Glue or sew onto a clip base for a beautiful hair accessory.
Car charm — Hang from your rearview mirror for a personal touch.
Free Crochet Bow Pattern — The Happy Bow
Notes Before You Begin
Work the foundation row in the back bump of the chain for a clean, professional edge.
Sample is made with Ch 28.
You may use any number of chains to adjust the width of your bow.
Yarn Needle, Scissors, Measuring Tape
Pattern Details
| What | How |
|---|---|
| Skill level | Easy |
| Time to make | Under 30 minutes |
| Finished size | Approx. 4″ wide (adjustable) |
| Hook | 3.5mm |
| Yarn weight | Fingering / Light (#1 or #2) |
| Yarn type | Cotton or acrylic |
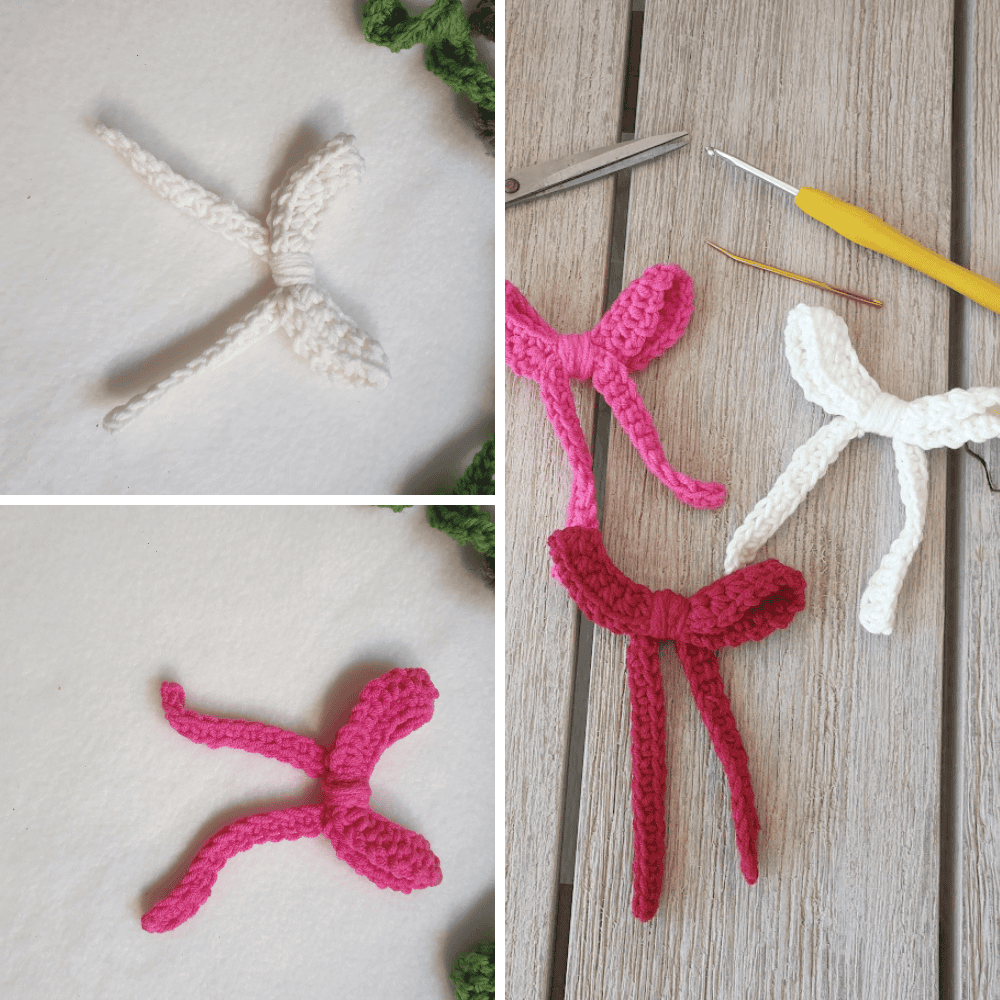
Upper Bow Piece (Textured Edge)
Chain 28.
Row 1: Sc in 2nd ch from hook and in each ch across. (27 sts)
Row 2: Ch 1, turn. Sc in first st, ch 1, sc in next st; repeat from * to * across. Do not ch after last st. Fasten off, leaving a tail.
Form a loop:
- Bring short ends together.
- Tie tails securely to close into a circle.
- Weave in ends.
Bottom Bow Piece (Flat Band)
Chain 28.
Row 1: Sc in 2nd ch from hook and in each ch across. (27 sts)
Fasten off, leaving a tail. Tie starting and ending tails together securely. Weave in ends.
Assembly
- Flatten the upper loop with the join centered at the back.
- Fold the bottom band in half.
- Place the bottom band behind the upper piece.
- Cut a strand of yarn.
- Wrap tightly around the center several times to cinch into a bow shape.
- Tie securely at the back.
- Weave in ends.
Your Happy Bow is ready to attach to keychains, bags, garments, or accessories!
Love This Pattern? There’s More Where That Came From!
You will discover my complete collection of crochet patterns,
tutorials, and resources, both free and premium, all in one convenient place.
I know you’ll find something to inspire your next project🙃
Tips for the Best Results
Adjusting size: Use more chains for a larger bow, fewer for a smaller one. The pattern is fully flexible.
Yarn color ideas: Make a set of three in coordinating colors — perfect as a gift bundle or to match different bags.
Stiffening your bow: If you want a crisper bow, lightly spray with starch and shape while damp.
Attaching to a keychain: Use a jump ring or lobster clasp for easy attachment.
Love What You See?
If my patterns and tutorials brighten your day, you can now support me with a tiny virtual coffee on Ko-fi! ☕
Every little bit helps me keep creating and sharing more cozy crochet magic💛
Frequently Asked Questions
Q: Is this pattern suitable for beginners? Yes! The Happy Bow uses only single crochet and basic assembly. If you can make a chain and single crochet, you can make this bow.
Q: What yarn is best for this bow? Cotton yarn gives the crispest result and holds its shape well. Acrylic works beautifully too and is softer — great for hair clips or gift toppers.
Q: Can I sell items made from this pattern? Yes! You are welcome to sell finished bows made from this free pattern. Please credit Sandra Stitches as the designer.
Q: How do I adjust the size? Simply change the starting chain number. More chains = wider bow. Fewer chains = smaller bow.
And if you found this helpful, don’t forget to subscribe to my YouTube channel for more tutorials, tools, and creative crochet inspiration.
If you want two exclusive crochet patterns every month that are never sold and never made free anywhere else, come and join the V-Stitch Club. It is five dollars a month and you can cancel any time. The link is below.
**This is an original Sandra Regev pattern: Owner /Designer of Sandra Stitches. This pattern may not be redistributed for free, sale, or trade, but finished products can be sold with credit to this shop – enjoy!
If crochet supports your well-being, you’re not alone
Join the V-Stitch Club and create cozy handmade socks while caring for yourself
Looking for more crochet accessories patterns👇
Check out all these, you will find one!
Did you try this Pattern? Share a picture
Tag me on Instagram
@sandrastitchesil
You’ve Got Your Pattern, Now What?
- PIN FOR LATER – Don’t lose this pattern. Save it to your Pinterest account so you can quickly come back to it later.
- SHARE YOUR WORK – Share your in-progress and finished projects on Facebook or Instagram and use the hashtag #sandrastitchesil
- SHOW OFF – Create a project on Ravelry to inspire and share your thoughts with others who might be interested in this project.
Questions?
Ask and share in our
FREE Facebook Group
DISCLOSURE
AMAZON ASSOCIATES: Sandra Stitches is a participant in the Amazon Services LLC Associates Program, an affiliate advertising program designed to provide a means for sites to earn advertising fees by advertising and linking to Amazon.com.
This post contains links to products that I use and recommend. If you purchase any using my links, I get a very small fee at no ad to you! Thank you for supporting my small biz!


