Hey, my crochet friend! Today I want to talk about a confusing topic: How to Resize and Customize Flat Projects for Perfect Fit
Crocheting is such a fun craft that allows for endless creativity. However, sometimes you may find a pattern you love but wish it were a different size.
When you want to make a blanket larger, a scarf narrower, or adjust a garment to fit perfectly, understanding how to customize flat crochet patterns is an essential skill.
In this guide, we’ll walk you through the process of adjusting your flat crochet projects to achieve the perfect dimensions.
Let’s start!

Step 1: Find the Stitch Repeat
The first and most crucial step in customizing a crochet pattern is identifying the stitch repeat. The stitch repeat is the smallest unit of stitches that, when repeated, creates the pattern. Understanding this allows you to add or subtract stitches while maintaining the integrity of the design.
To find the stitch repeat:
- Look at the pattern instructions for a row or round.
- Identify a section of stitches that repeats throughout the row.
- Count the number of stitches in this repeating section.
For example, in a simple ripple pattern, you might have:
*dc 5, dc2tog, dc 5, dc3tog* repeat from * to *
In this case, the stitch repeat is 15 stitches (5 + 2 + 5 + 3).
A simple stripe pattern might be:
Row 1: sc 3, dc 2 repeat from * to *
In this case, the stitch repeat is 5 stitches (3 single crochets + 2 double crochets).
To adjust the width of this pattern:
- Ensure any changes you make are in multiples of 5 stitches.
- For instance, to make it wider, you might add 10 stitches (2 full repeats).
- To make it narrower, you could remove 5 stitches (1 full repeat).
A Basic Lace Pattern can look like this:
Here’s a simple lace pattern:
Row 1: *ch 2, skip 2 sts, dc in next st* repeat from * to *For this pattern, the stitch repeat is 3 stitches (2 skipped + 1 dc).
To customize this pattern:
- Any changes to the width should be in multiples of 3 stitches.
- To widen the project, you might add 6 stitches (2 full repeats).
- To narrow it, you could remove 3 stitches (1 full repeat).
Remember, identifying the stitch repeat is crucial for maintaining the pattern’s integrity while adjusting its size. These simple examples should help you practice recognizing stitch repeats in various patterns.
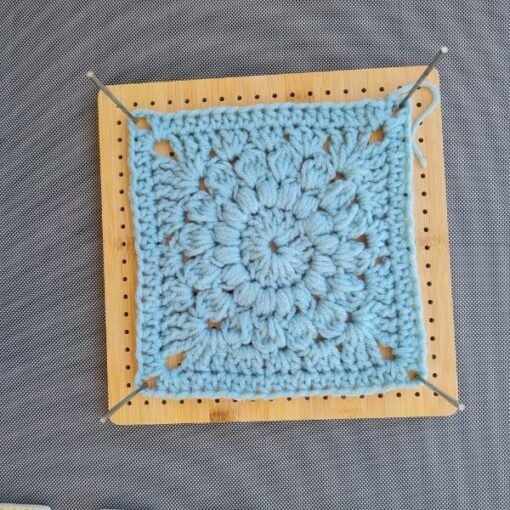
Step 2: Swatch and Check Gauge
Before making any adjustments, it’s crucial to create a gauge swatch:
- Crochet a small sample (usually 4″ x 4″ or 10cm x 10cm) using the pattern stitch.
- Count the number of stitches and rows in your swatch.
- Compare your gauge to the pattern’s recommended gauge.
This step is vital because your tension may differ from the designer’s, affecting the final size of your project.
Step 3: Adjust Length and Width
Now that you have your gauge and know the stitch repeat, you can adjust the pattern’s dimensions:
Adjusting Width
To make your project wider or narrower:
- Determine how many additional (or fewer) inches you need.
- Use your gauge to calculate how many stitches this equates to.
- Add or subtract stitch repeats to achieve the desired width.
For example, if your stitch repeat is 13 stitches and you get 4 stitches per inch:
- To add 3 inches, you’d need to add 12 stitches (3 inches x 4 stitches/inch).
- This means adding one full stitch repeat (13 stitches) to get as close as possible to your desired width.
Adjusting Length
To adjust the length:
- Determine how many additional (or fewer) rows you need based on your row gauge.
- Add or subtract rows accordingly.
Remember to consider pattern repeats in the vertical direction as well, especially for complex stitch patterns.
Example: Adjusting a Simple Blanket Pattern
Let’s say you have a blanket pattern that measures 40″ x 60″, but you want to make it 48″ x 72″. The pattern uses a shell stitch with a 12-stitch repeat, and your gauge is 3 stitches and 2 rows per inch.
- Width Adjustment:
- Additional width needed: 8 inches (48″ – 40″)
- Stitches to add: 8 inches x 3 stitches/inch = 24 stitches
- Stitch repeats to add: 24 ÷ 12 = 2 repeats
- Length Adjustment:
- Additional length needed: 12 inches (72″ – 60″)
- Rows to add: 12 inches x 2 rows/inch = 24 rows
To customize your blanket:
- Increase your starting chain by 24 stitches (2 full pattern repeats).
- Work an additional 24 rows to achieve the desired length.
Additional Tips for Customizing Patterns
- Mind Your Edges: When adding width, ensure that your pattern still works at the edges. You may need to adjust the first and last few stitches of each row.
- Consider Yarn Weight: If you’re substituting yarn, remember that different weights can significantly affect your gauge and the final size of your project.
- Adjust for Stitch Height: Different stitches have different heights. If you’re mixing stitch types, take this into account when calculating length adjustments.
- Document Your Changes: Keep notes on the adjustments you make. This will be helpful if you want to recreate the project or share your modifications with others.
- Test As You Go: For larger projects, measure periodically to ensure your adjustments are giving you the desired results.
Final words:
By mastering these techniques, you’ll be able to customize any flat crochet pattern to suit your needs.
Remember, practice makes perfect, and don’t be afraid to frog (unravel) and start over if your adjustments aren’t working out as planned.
Stay Calm and Crochet!
DISCLOSURE
AMAZON ASSOCIATES: Sandra Stitches participates in the Amazon Services LLC Associates Program, an affiliate advertising program designed to provide a means for sites to earn advertising fees by advertising and linking to Amazon.com.
This post contains links to products that I use and recommend, If you purchase any using my links I get a very small fee at no ad to you! Thank you for supporting my small biz!


2 thoughts on “How to Resize and Customize Flat Projects for Perfect Fit”
I wanted to let you know that your addition for the 1st example of finding the stitch multiple for the ripple blanket should say 15, not 13 as you stated (5+2+5+3=15) 😀
Thank you foe leting me know!