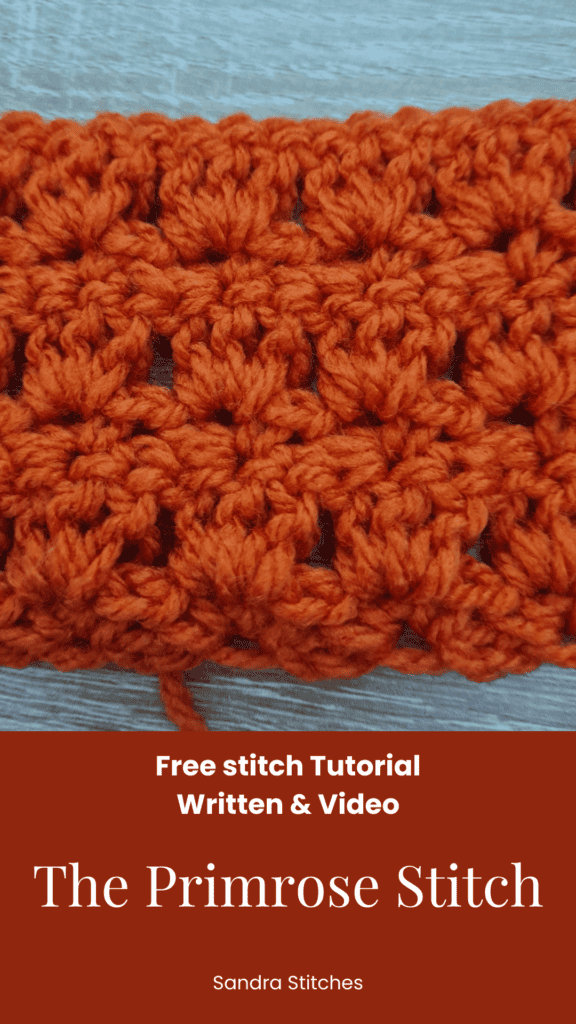
The Primrose Stitch is one of those crochet stitches that looks far more complicated than it actually is.
That delicate, rose-like texture comes from a simple two-row repeat of single crochet and chain stitches, and once you get the rhythm, it almost works itself.
I use a light to medium-weight yarn and a 5mm hook. It works beautifully for summer tops, shawls, and, as I recently discovered, as a section in a stitch sampler blanket.
If you are making my Stitch Sampler Blanket (watch the full series HERE) along with me, this is Section 2. Get the free blanket tracker HERE
Watch the video below for a step-by-step tutorial
Be creative!
🧶 Making the Stitch Sampler Blanket with me? Download the free printable tracker and follow along week by week
Understanding the Primrose Stitch
Let’s dive into the Primrose Stitch! We’ll discover its secrets and how you can use it to make amazing things.
What is the Primrose Stitch?
The Primrose Stitch is a crochet pattern that looks like little roses blooming across your fabric. It uses single crochet and chain stitches to make those pretty rose shapes. It’s not just nice to look at; it also adds great texture.
Why Choose the Primrose Stitch?
Why pick the Primrose Stitch? For starters, it’s easy to learn. Even if you are new to crochet, you can master it quickly. Also, the texture is amazing. It’s great for adding something special to your projects. It’s also super useful. You can use it for many different things.
Do you want to save this post for later? Pin it 👇
Materials and Preparation
Before you start crocheting, you’ll need a few things. Getting ready ensures your Primrose Stitch turns out great!
Yarn and Hook Selection
Picking the right yarn and hook matters a lot. For the Primrose Stitch, a light to medium yarn works well. The video uses Alize burkum classic, a 3-4 weight yarn, and a 5mm hook. Your hook size depends on the yarn you choose. You want a fabric that is not too tight or too loose.
Gauge and Swatching
Making a gauge swatch is crucial. It helps you see how your stitches will look and feel. To make the Primrose Stitch, you’ll need a multiple of 3 + 2 chains. Crochet a small sample to check your tension. If it’s too tight or loose, change your hook size. This way, your final project will be just right.
** Some of the links in this post may include affiliate links. Making a purchase through one of these links pays me a small referral fee at no added cost to you. These small fees add up and help me keep the blog running. View our Disclosure and Privacy Policy for more information.
Step-by-Step Tutorial: Crocheting the Primrose Stitch
Now, let’s get into the step-by-step guide. Follow along and create your own Primrose Stitch fabric!
Foundation Row: Setting the Stage
First, make a slip knot and chain a multiple of 3, then add 2 more chains. For example, chain 17 (3+3+3+3+3+2). Next, single crochet in the third chain from your hook. Then, chain 2, and single crochet again in the same chain. Skip two chains, and in the next chain, make a single crochet, chain 2, and single crochet in the same spot. Repeat this across the row. Finish with a half double crochet in the last chain.
Row 1: Creating the Rose Buds
Chain 3 (this counts as your first double crochet). Skip the first stitch and the next single crochet. In the chain-2 space, work 3 double crochets. Skip to the next chain-2 space and repeat: 3 double crochets. Keep going across the row. At the end, make 1 double crochet in the chain-2 space from the start of the previous row.
Row 2: Establishing the Primrose Pattern
Chain 1 and turn your work. Make a half double crochet in the first stitch. Skip the first double crochet. In the middle double crochet of the cluster, work a single crochet, chain 2, and single crochet. Skip to the middle double crochet of the next cluster, repeat: single crochet, chain 2, and single crochet. Repeat this across the row. To finish, work a half double crochet in the top of the chain-3 from the beginning of the previous row.ows.
Repeating the Pattern
Keep repeating rows 1 and 2. These two rows make up the Primrose Stitch pattern. Try to keep your tension even. Place your stitches carefully to get the best look. Before long, you’ll see the beautiful texture of the Primrose Stitch.
Before you get started…
Check out my Favorite items and tools
Rechargeable LED night reading light on Amazon
Bamboo Hooks on Amazon
Colorful Bobby pins as crochet markers on Amazon
Love This Pattern? There’s More Where That Came From!
You will discover my complete collection of crochet patterns, tutorials, and resources, both free and premium all in one convenient place.
I know you’ll find something to inspire your next project🙃
All Things Crochet Start Here →
Tips and Tricks for Perfecting the Primrose Stitch
Here are some tips to make your Primrose Stitch even better. These tricks can help you avoid common problems and create a polished finish.
Maintaining Even Edges
Uneven edges can be annoying. The video instructor notes that using a chain-3 at the beginning can make edges a little wonky. Try chaining only one and then making a double crochet. Or, add a border after you finish your project for a cleaner look.
Avoiding Common Mistakes
Watch out for common mistakes. It is easy to miscount stitches, so count often. Keep your tension the same throughout. If your tension changes, the fabric won’t look even. If you make a mistake, don’t be afraid to frog (rip out) your work and fix it.
If you love the feeling of learning a new stitch and you would enjoy gentle, steady company while you crochet, come and join us in the V-Stitch Club.
For $5 a month you get two brand new patterns every month, a monthly wellbeing workbook that ties our crochet to a calmer mind, seasonal workshops, and a warm worldwide community of women who simply love to make. Stay calm and crochet, and do it together
This stitch is part of the Stitch Sampler Blanket Series I am crocheting a 12-section sampler blanket and sharing each section week by week on YouTube. Each section uses a different stitch, all beginner-friendly, all beautiful together.
If you want to make this blanket with me, start HERE and download the free tracker to follow along
Want more stitch tutorials?
Project Ideas Using the Primrose Stitch
What can you make with the Primrose Stitch? So many things! Here are a few ideas to get you started.
Apparel: Summer Tops and Shawls
The Primrose Stitch is great for summer clothes. Think light tops, cardigans, or shawls. The airy design keeps you cool. The stitch looks beautiful and feels comfortable.
Accessories: Scarves and Bags
Consider using the Primrose Stitch for accessories. Scarves with this stitch have great texture. Market bags made with it are both pretty and strong. You could also make small pouches or decorative items.
Click here to share your finished project with our community!
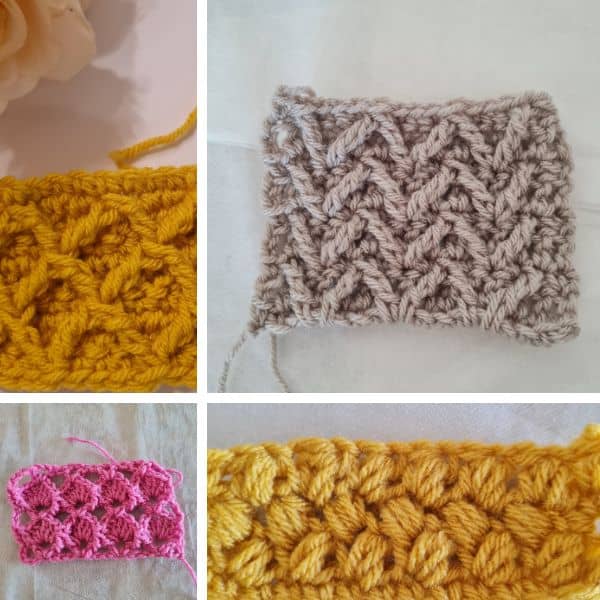
A new stitch step
- When learning a new stitch, try several yarn weights and hook sizes to understand how the stitch works and looks.
- Use light yarn colors to get the stitch to form the right shape.
- Make several swatches before starting a new project
Stay Calm and Crochet!😎
Sandra
Interested in a professional Paperback Crochet Planner?
DISCLOSURE
AMAZON ASSOCIATES: Sandra Stitches is a participant in the Amazon Services LLC Associates Program, an affiliate advertising program designed to provide a means for sites to earn advertising fees by advertising and linking to Amazon.com.
This post contains links to products that I use and recommend, If you purchase any using my links I get a very small fee at no ad to you! Thank you for supporting my small biz!


