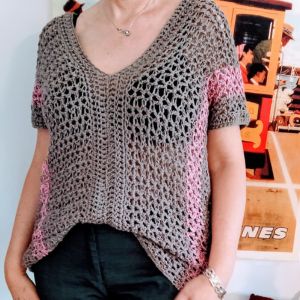
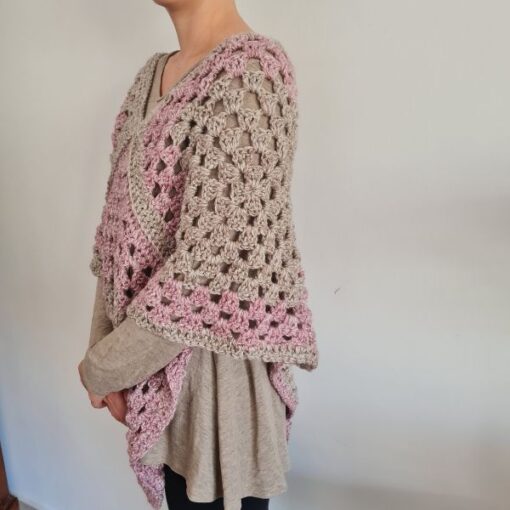
Does your wardrobe need something warm and lightweight? This granny crochet shrug is the answer.
It’s free, simple to follow, and creates a cozy piece you’ll wear again and again.
Don’t stress about the steps—this pattern is easy to tackle, no matter your crochet skills.
Are you with me?
There are 2  ways to get this pattern:

Option 1: You can purchase the individual pattern as an easy-to-read, print-friendly PDF  from HERE

Option 2: Scroll down to get the written instructions for this pattern for free
Want to save this post for later? Go ahead and PIN IT!

You will find instructions in the free pattern below ⬇️
** Some of the links in this post may include affiliate links. Purchasing one of these links pays me a small referral fee at no added cost to you. These small fees add up and help me keep the blog running. View our Disclosure and Privacy Policy for more information.
Before you get started, check out my Favorite Crochet Tools (affiliate)
Yarn Winder – a perfect crochet accessories
Neck Stretcher – to keep you without neck and back pain
Gauge Ruler – so you always get the right size
Pattern Designed By: Sandra Stitches This pattern is copyright protected; it is unlawful to distribute this pattern in any form (free, sale or trade).
Let’s get to the pattern, shall we? Making the Shoulder Snuggle Shrug

Materials I used
Stylecraft Special Chunky Yarn, 100% premium Acrylic, 100gr, 144 m, 157 yards in 3 colors, total 210 g appr 310 yards
Or any weight #5 you decide
Hook: US Size (6 mm)
Yarn Needle, Scissors, Measuring Tape
Gauge
- 14 st X 3 rounds (granny square) (4” x 4”)
Sizes
- Shrug Body: 25” X 25”
- Sleeves: 11” long
Stitch Key
- Ch = Chain
- Sc = Single Crochet
- St = Stitch
- Dc = Double Crochet
- Hdc = Half Double Crochet
Specialty Stitches
Grst = Granny Stitch ( Dc 3 in next ch space, Ch1)
Notes
- This pattern is written in US terminology
- The pattern is worked with one big granny square and two sleeves
- Ch3 does count as st at the beginning of each row
- Ch1 at the beginning of the row does not count as a stitch
- This pattern uses pattern repeats.
- You can work this pattern with one color or multiple as you wish- I used three colors
- If changing colors make sure to have a changing technique and weave your ends in.
- You can decide on the shrug size by adding rounds to the granny square and rounds to the sleeves
Instructions
Granny square
Chain 4 slst to 1st to form a circle or start with a magic circle.
Round 1: Ch 3, 2 dc in circle, *ch 2, dc3 in circle, repeat from* 2 more times, ch 2, sl st in 3rd ch of initial ch 3 to join round.
Round 2: Sl st to next ch 2 space, *[dc3 + ch2+dc3 in ch2 space]* repeat 3 more times, sl st in 3rd ch of initial ch 3 to join round.
Round 3: Sl st to next ch 2 space, (dc3 + ch2+dc3) in ch2 space, ch 1, *[dc 3 in next ch1 space, ch1, (dc3+ch2+dc3) in the corner]* repeat 3 more times, sl st in 3rd ch of initial ch 3 to join round.
Round 4- 15: Continue the pattern, increasing the ch-1 spaces between the 3-dc groups by 1 in each round.and working (dc 3+ch2+dc 3) in each corner
Fold the square in half and seam using Slst method 3 Dc clusters + Ch1 to form the armhole on two sides.
Now we move to the sleeves
Sleeves X 2
Round 1: Start on the joining point, Ch3 +dc 2 in ch1 space, ch 1, *[dc 3 in next ch 1 space, ch 1]*around for for a total of 9 dc 3 clusters, slst to ch 3 to close the round.
Round 2: Ch3+dc 2 in prev ch 1 space, ch 1, dc 3 in next ch1 space and around, slst to ch 3 to close the round, total of 9 dc 3 clusters
Repeat round 2 to your desired length for the sleeve.
I made a ¾ sleeve working 14 rounds.
Round 15: Ch 3, dc 1 in next st, dc 1 in next and around to end of round, Slst to ch3.
Round 16: Ch 1, sc in 1st st from hook, sc 1 in next st and around to end of round, Slst to 1st st.
Love This Pattern? There’s More Where That Came From!
You will discover my complete collection of crochet patterns, tutorials, and resources, both free and premium all in one convenient place.
I know you’ll find something to inspire your next project🙃
All Things Crochet Start Here →
Finishing
Secure yarn, weave in ends and cut.
Work 1 round of DC 1 in every stitch and a last round of SC 1 around the shrug body for a more polished finish
Do you want to save this post for later? Pin it!

Want more Wrap patterns?
DISCLOSURE
AMAZON ASSOCIATES: Sandra Stitches is a participant in the Amazon Services LLC Associates Program, an affiliate advertising program designed to provide a means for sites to earn advertising fees by advertising and linking to Amazon.com.
This post contains links to products that I use and recommend, If you purchase any using my links I get a very small fee at no ad to you! Thank you for supporting my small biz!


