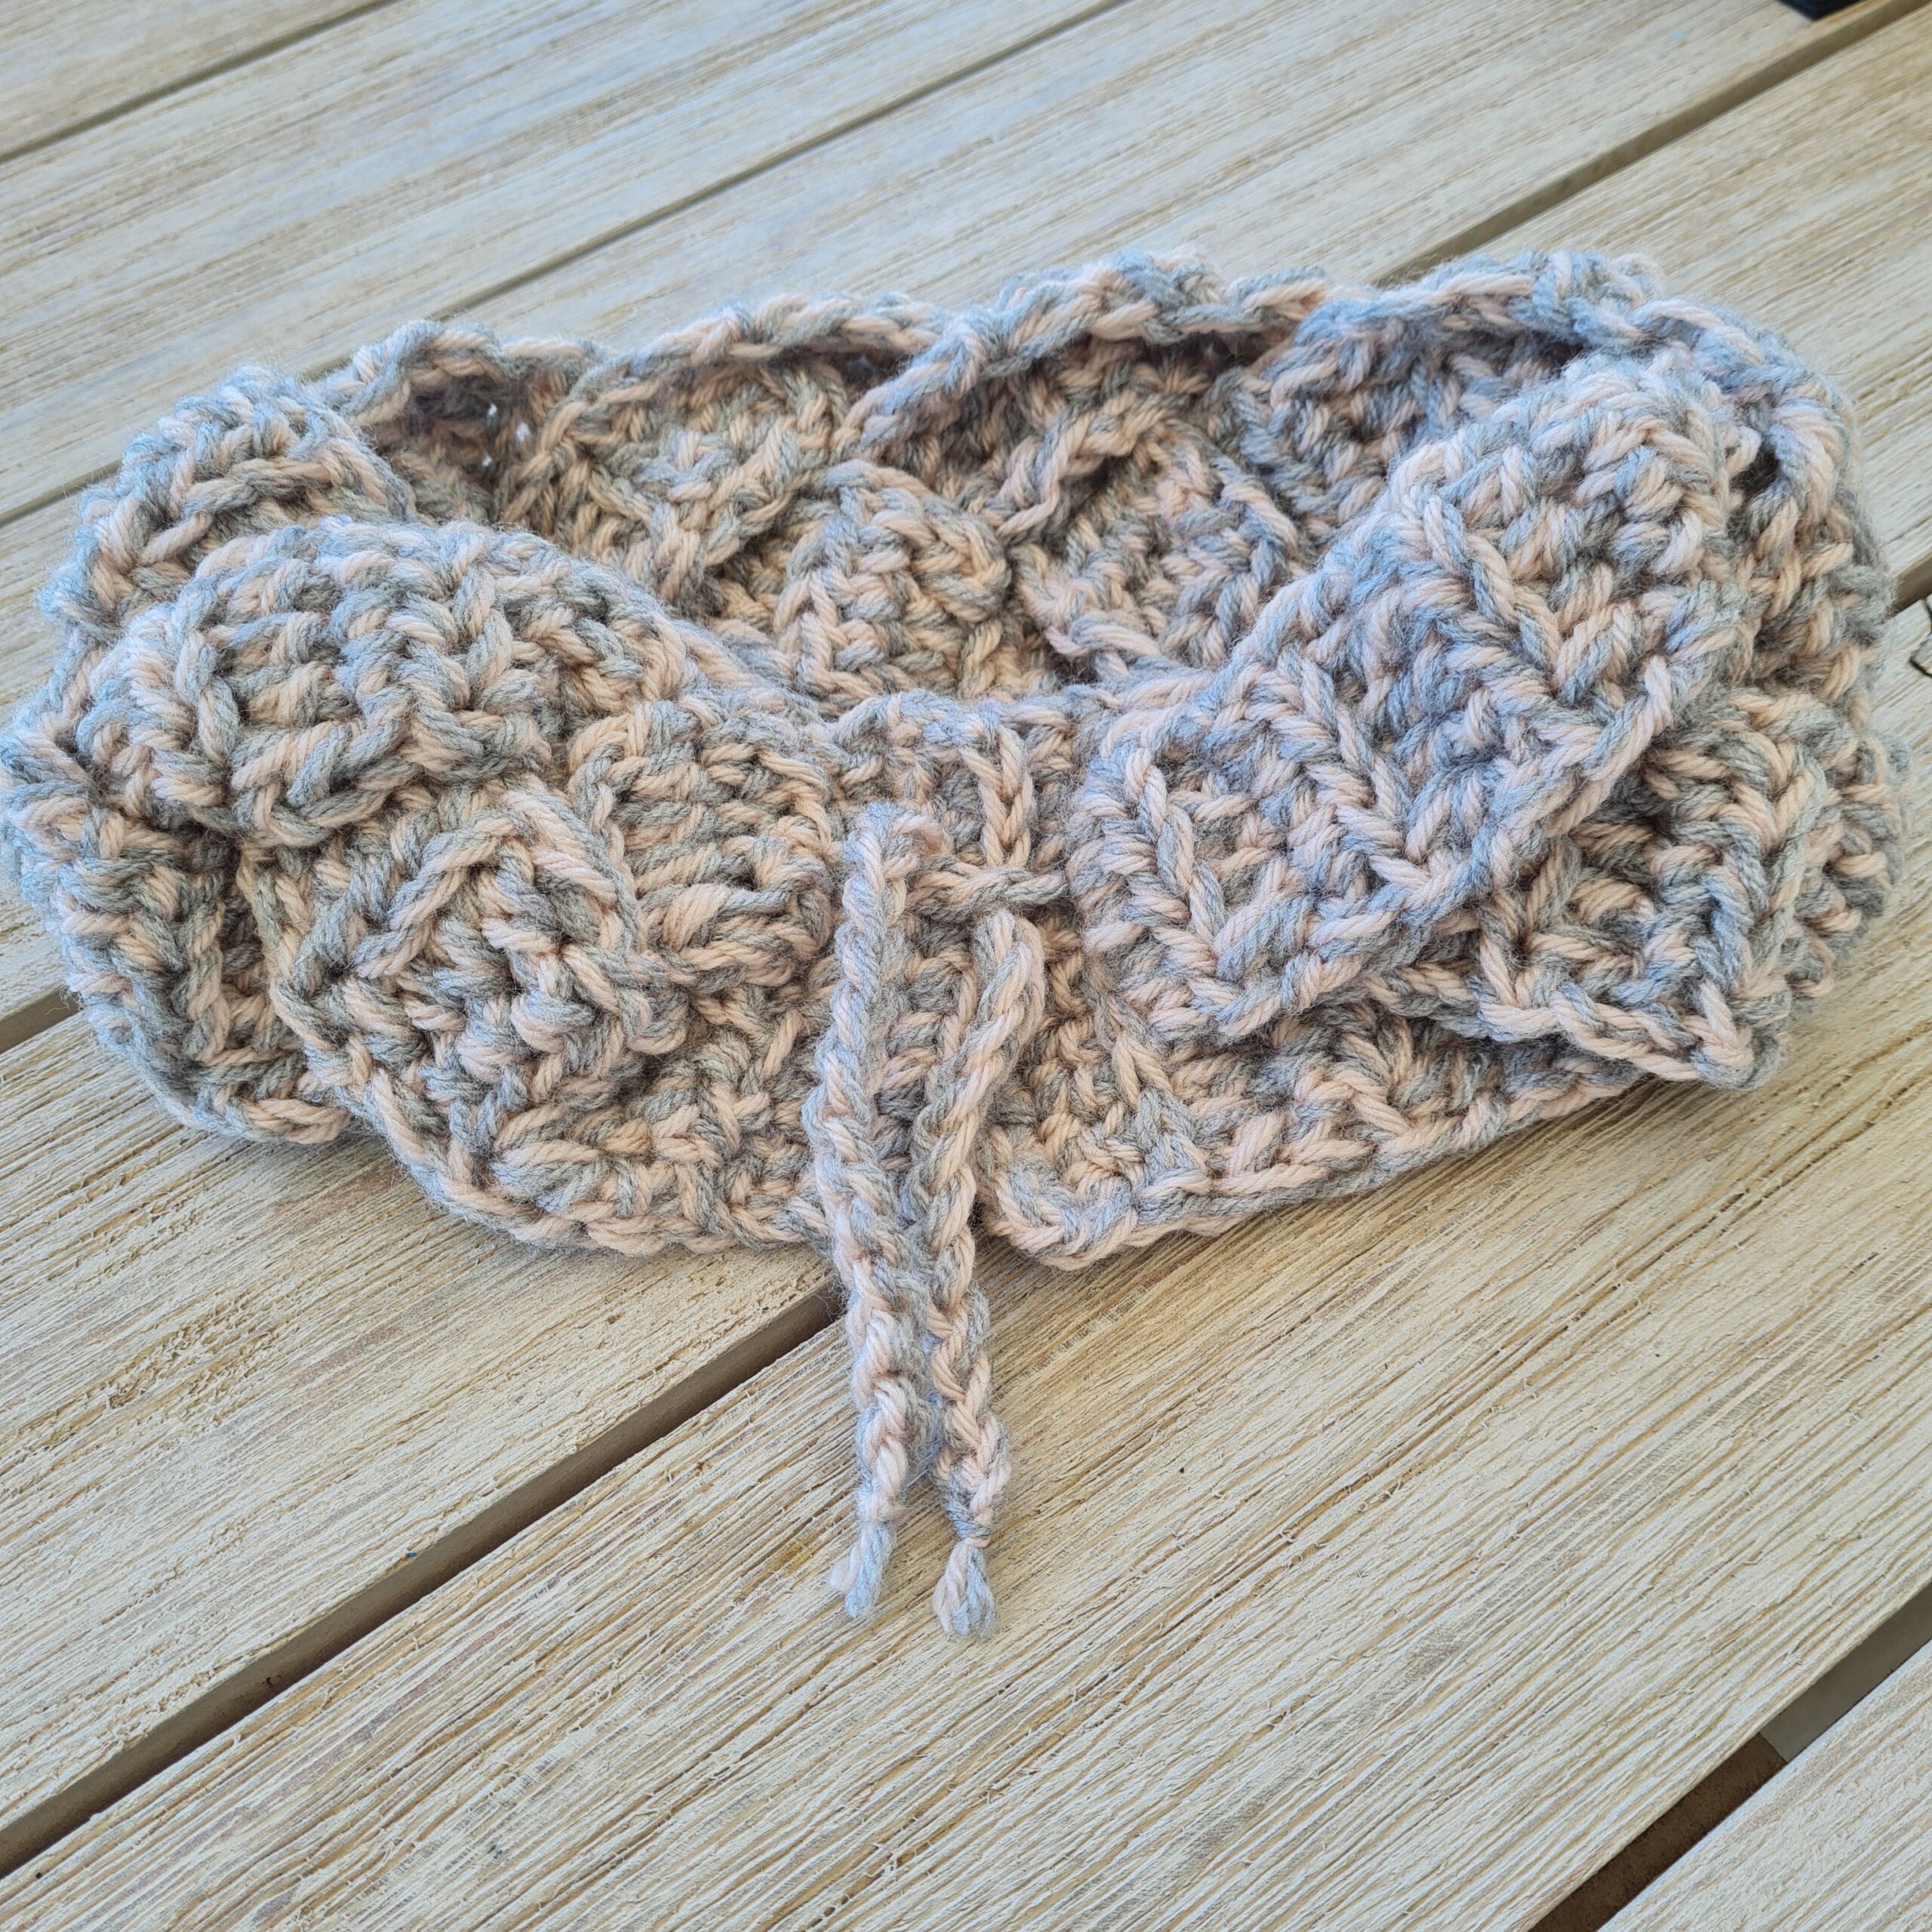
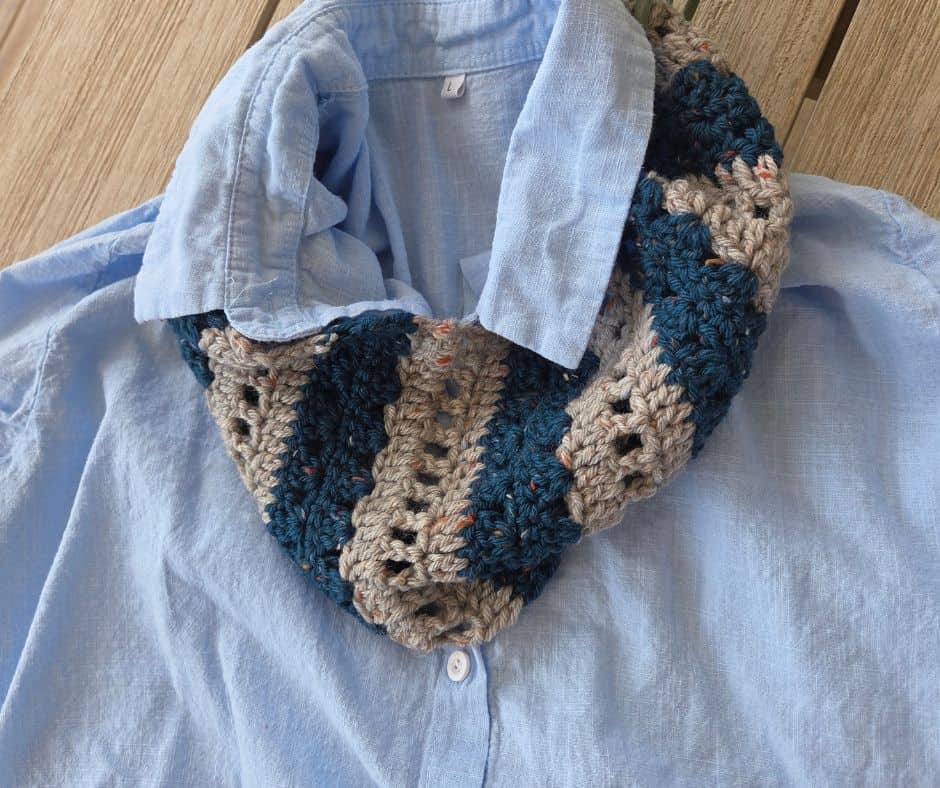
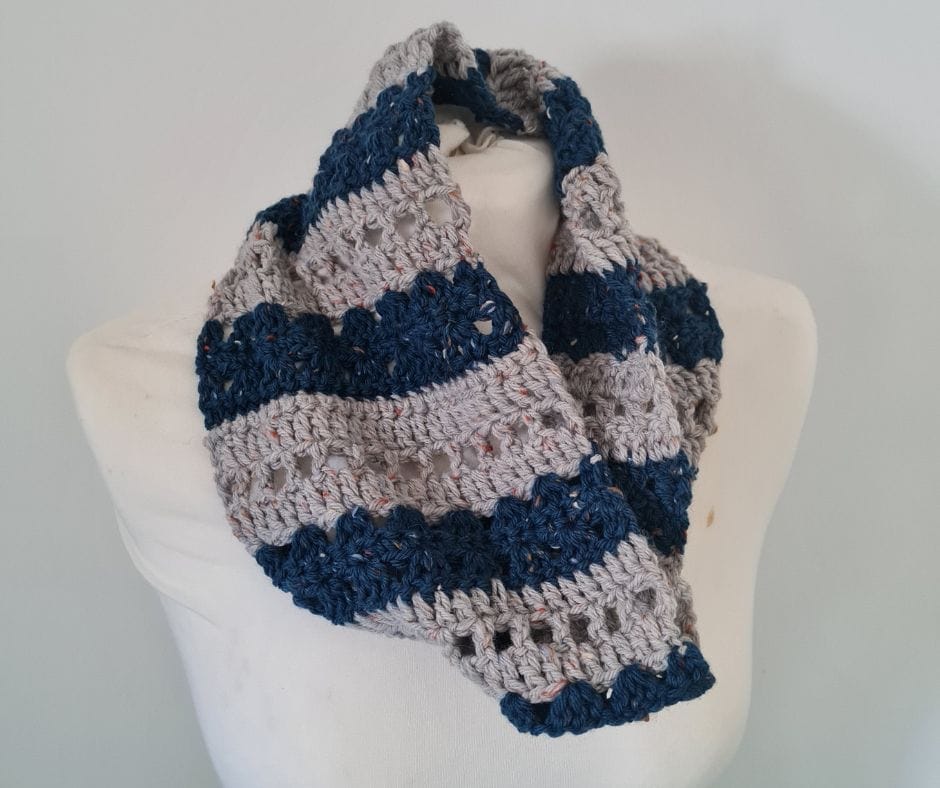
The Harbor Cowl is a striped crochet cowl you can make in a single evening, worked flat in two cozy colors and then seamed into a soft loop.
It uses three simple stitches you very likely already know, the double crochet, the single crochet, and an easy mesh, and it stands about 7 inches tall and 25 inches around.
It suits everyone from a confident beginner to a seasoned crocheter, and you can find the free written pattern further down this page or pick up the ad free printable version for your project bag.
If you have wanted a quick, satisfying make that looks far more intricate than it actually is, this is the one. The stripes do all the heavy lifting. You simply change color, keep your rhythm, and watch the bands of texture build up under your hook.
I named it Harbor because the deep teal and the soft flecked grey remind me of a calm morning by the water. It is the kind of project that gives you a finished, wearable thing by the time the evening is over, and there is real comfort in that.
So pour something warm, settle into your favorite chair, and let us make a cowl together.
How to Get the Ad-free PDF of this Design
Love to crochet without the scrolling? The complete Harbor Cowl pattern is available as a clean, printable PDF you can take anywhere. No ads, no popups, just the pattern, the photos, and plenty of room for your notes. Harbor Cowl Pattern as a PDF
The full written pattern is also right here on this page, free, a little further down. Both are the same tested pattern. The PDF simply travels better
Save this striped crochet cowl for later
Not ready to start tonight? Pin it so it is waiting for you when you are.
What makes the Harbor Cowl a striped crochet cowl
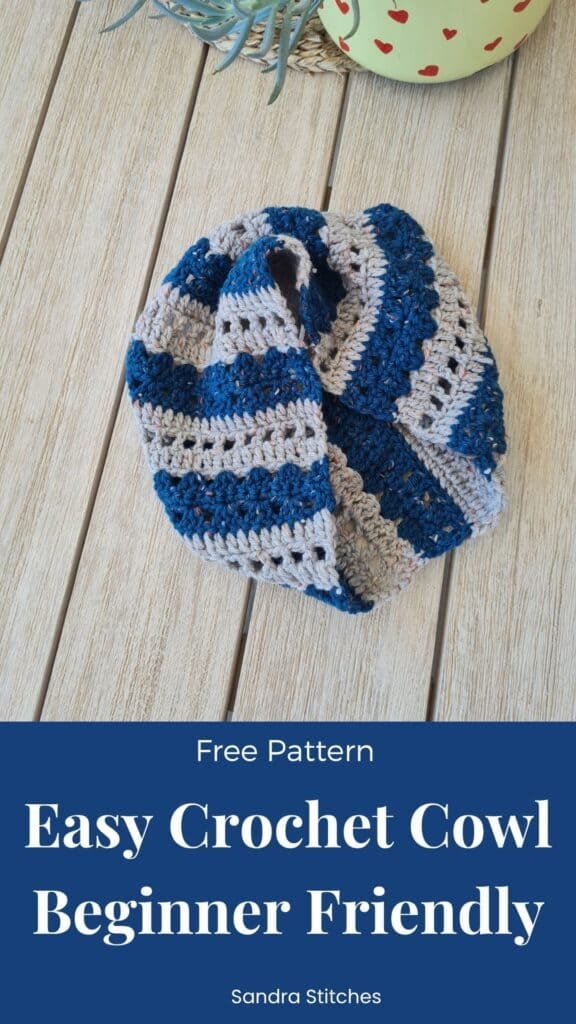
The stripes here are not just color, they are texture too.
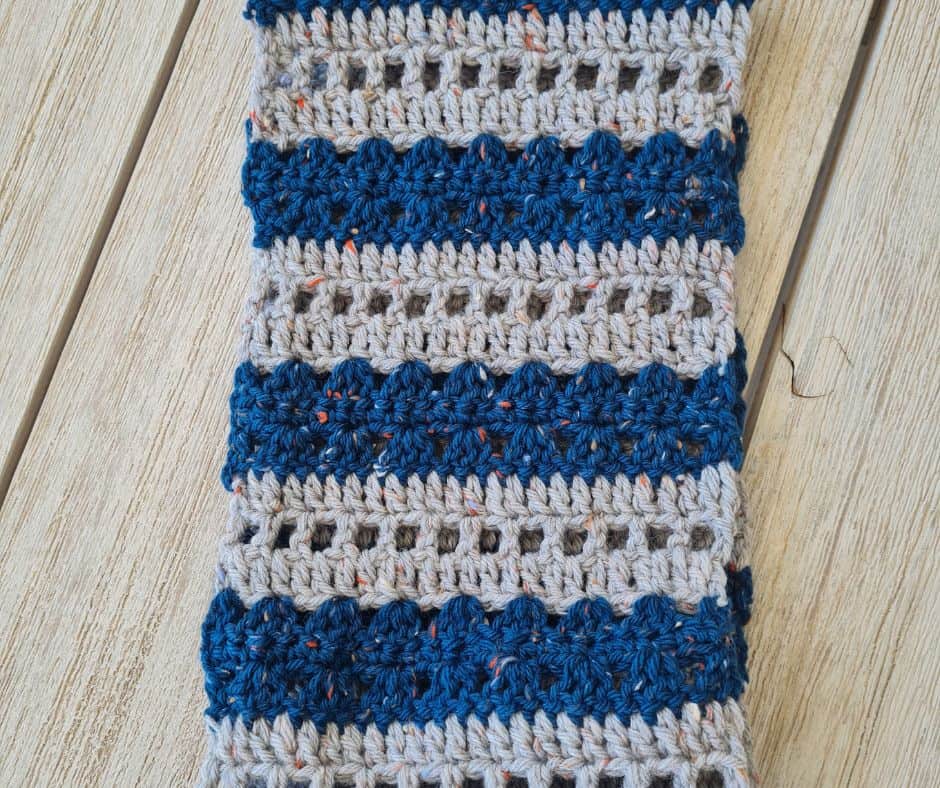
As you work the six row repeat, the grey rows give you an open mesh and a smooth double crochet, while the teal rows give you rows of little shells and a band of single crochet. So every color change also brings a change in surface.
That is what makes the finished cowl look rich and considered, even though each individual row is simple.
You work the whole thing flat, as a long rectangle, then fold it and seam the two short ends together into a comfortable loop.
Working flat like this is friendly for two reasons.
You never have to keep track of a round, and you can try the cowl against your neck as you go to get the fit exactly how you like it.
Why crochet a cowl worked flat instead of in the round
A cowl worked flat and seamed is one of the most forgiving projects you can choose.
There is no join to line up at the start of every round, no risk of a twisted foundation that you only notice ten rows later, and no shaping to manage. You crochet a simple panel, you fold it, and you sew one seam.
For anyone returning to crochet, or building confidence after a break, that gentle structure is exactly what makes a project feel doable rather than fussy.
If you enjoy this kind of easy flat and seam project, my Happy Neck Warmer is another quick one worth trying, same relaxed construction, a different look for your collection
What you will need
- You will need:
- Weight 4 acrylic yarn in two colors, about 70 grams total for the size shown. I used a deep teal and a soft flecked grey, but any two colors you love will work beautifully.
- A 5 mm (H/8) crochet hook.
- A tapestry needle for seaming and weaving in ends.
- Scissors.
A few notes before you begin
The turning chain counts as the first double crochet throughout. Work a chain 2 where the pattern says so, or a chain 3 if that sits more comfortably for you. Either is fine as long as you stay consistent all the way up.
To change color, work to the last stitch of the old color and stop when you have two loops on your hook. Yarn over with the new color and pull through to finish that stitch. Then start the next row in the new color. Weave in your ends at the very end.
Sandra’s tip: Count your stitches at the end of Row 2 and Row 4 the first time through. Those two rows set the rhythm for the whole cowl. Once they are right, the rest simply flows, and you can crochet the rest on gentle autopilot.
** Some of the links in this post may include affiliate links. Purchasing from one of these links pays me a small referral fee at no added cost to you. These small fees add up and help me keep the blog running. View our Disclosure and Privacy Policy for more information.
A few handy tools I reach for on a make like this:
5mm (H/8) Crochet Hook, the exact size this cowl calls for
Tapestry Needle Set for the seam
Locking Stitch Markers for tracking the 6 row stripe repeat
How to crochet the Harbor Cowl: free written pattern
Skill level: Easy, suitable for a confident beginner.
Finished size: About 7 inches tall and 25 inches around, worn as a soft loop.
Gauge: 15 stitches and 7 rows measure 4 inches (10 cm). Gauge is forgiving here since you work to your own length, but it helps the 7 inch height come out right.
Stitches used (US terms): chain (ch), double crochet (dc), single crochet (sc), skip (sk), back loop only (BLO), front loop only (FLO).
Color guide: Grey is used for Rows 2, 3, and 7. Teal is used for Rows 4, 5, and 6. Worked this way the stripes read as three grey, then three teal, up the piece.
The pattern
Ch 26 in grey.
Row 1 (set up, worked once, grey): Dc in the 3rd ch from hook (the first 2 ch count as your first dc), then dc in each ch across. (25 dc)
You will now work Rows 2 to 7 as your repeat block.
Row 2 (grey): Turn. Ch 4 (counts as dc plus ch 1 space). Sk 1 st, dc in next st. Then work ch 1, sk 1 st, dc in next st across the row, ending with a dc in the last st. (13 dc and 12 ch 1 spaces)
Row 3 (grey): Turn. Ch 3 (counts as first dc). Dc in each st and in each ch 1 space across. (25 dc)
Row 4 (teal): Turn. Ch 2 (counts as first dc), dc in the same st. Then work sk 2 sts, 3 dc in next st across the row. You will make 7 shells of 3 dc. To finish, sk 2 sts and work 2 dc in the last st. (25 dc, with a small 2 dc shell at each end and 7 full shells between)
Row 5 (teal): Ch 1, turn. Sc in the first st and in each st across. (25 sc)
Row 6 (teal): Repeat Row 4. (25 dc)
Row 7 (grey): Turn. Ch 2 (counts as first dc), dc in each st across. (25 dc)
Repeat Rows 2 to 7 a total of 7 times. After 7 repeats the piece will measure about 25 inches long. Fasten off, leaving a long tail for seaming.
Seaming your cowl
Fold the panel in half so the two short ends line up, stitch for stitch. You will have the same number of stitches on each edge. Thread your long tail onto the tapestry needle.
Working across the join, insert the needle into the back loop only of the near edge and the front loop only of the far edge, then pull through. Continue up and down across the row in this way. This little trick keeps the seam flat and tidy, with no bulky ridge on the inside. Knot to secure, cut the yarn, and weave in all your ends.
You made it
And there it is, your finished Harbor Cowl. Slip it over your head, let it settle, and enjoy the soft bands of color you built one simple row at a time. It is light enough for a cool morning and cozy enough to become the thing you reach for without thinking.
If you would like to make it taller, add more foundation chains at the start. For a longer loop, simply work more repeats. The pattern is yours to adjust.
Looking for your next one? Come browse my favorite free crochet cowl patterns for more cozy ideas
© Sandra Regev, Sandra Stitches. This is an original Sandra Regev pattern. Please do not redistribute it for free, sale, or trade. You are welcome to sell finished items made from it with credit to this shop.
A quiet place to keep crocheting
If projects like this one are your kind of calm, you might love the V-Stitch Club.
It is my little corner of the internet for women who crochet for the joy and the quiet of it, with new patterns, gentle company, and the steady rhythm of always having something beautiful on the hook.
And if you are not on my email list yet, that is the best place to keep up with new free patterns. When you join, I will send you my free printable Row Tracker, the very thing that keeps me from losing my place mid round.
Join the newsletter and get your free Row Tracker →
We also have a warm, friendly Facebook group with monthly challenges, lives, and lots of finished project sharing. Come and show us your slippers. Seeing your makes is one of my favorite parts of all this.
Frequently asked questions
How long does it take to crochet the Harbor Cowl?
Most crocheters finish the Harbor Cowl in a single evening. The sample shown here took one relaxed sitting. If you prefer to crochet in shorter spells, you can comfortably finish it over two cozy evenings.
What yarn is best for a striped crochet cowl?
A weight 4 yarn, sometimes called worsted or medium weight, is ideal. You need about 70 grams in total for the size shown. Acrylic is soft, affordable, and easy to wash, which makes it lovely for something worn close to the neck. Choose two colors with a clear difference between them so the stripes really show.
Is the Harbor Cowl good for beginners?
Yes. It uses only chain, double crochet, single crochet, and a simple mesh, and it is worked flat with no shaping. If you can work a double crochet and change colors, you can make this cowl. The written pattern gives a stitch count at the end of every row so you always know you are on track.
Can I make the cowl in just one color?
Absolutely. The stripes are lovely, but the cowl looks just as beautiful in a single color, where the changing textures still create soft bands of light and shadow. Use the same yarn throughout and skip the color changes entirely.
How do I make the cowl bigger or smaller?
To make it taller, add more foundation chains at the beginning. To make the loop longer or roomier, work more of the six row repeats before you seam. Because you work flat, you can hold the panel against your neck as you go and stop exactly where it feels right.
What stitches do I need to know?
You need the chain, the double crochet, the single crochet, and how to skip a stitch to make the mesh and the little shells. That is the whole list. Everything in the Harbor Cowl is built from those few simple stitches.
Did you try this Pattern? Share a picture
Tag me on Instagram
@sandrastitchesil
You’ve Got Your Pattern, Now What?
- PIN FOR LATER – Don’t lose this pattern. Save it to your Pinterest account so you can quickly come back to it later.
- SHARE YOUR WORK – Share your in-progress and finished projects on Facebook or Instagram and use the hashtag #sandrastitchesil
- SHOW OFF – Create a project on Ravelry to inspire and share your thoughts with others who might be interested in this project.
Questions?
Ask and share in our
FREE Facebook Group
DISCLOSURE
AMAZON ASSOCIATES: Sandra Stitches is a participant in the Amazon Services LLC Associates Program, an affiliate advertising program designed to provide a means for sites to earn advertising fees by advertising and linking to Amazon.com.
This post contains links to products that I use and recommend. If you purchase any using my links, I get a very small fee at no ad to you! Thank you for supporting my small biz!

Hi my crochet friend!
Crochet has followed me from Argentina to Israel and through every crossroads since. Now I design calm, achievable crochet, made to feel possible.
Come find free patterns, tutorials, and the V-Stitch Club right here on the blog.